Easter is a time of celebration, creativity, and tradition. One of the most enjoyable activities for families and craft enthusiasts alike is decorating Easter eggs. Painting eggs is not only a fun way to express creativity, but it also allows you to personalize your holiday decorations and even create keepsakes that can last for years. Whether you are decorating eggs with your children, hosting a crafting party, or simply looking to try something new, there are countless techniques and designs you can explore. From simple, minimalist patterns to intricate designs that look professionally done, the possibilities are endless.
Creating beautiful Easter eggs starts with understanding your materials and preparation methods. Using the right type of egg—real, blown-out, or artificial—can make a significant difference in your results. Similarly, choosing the correct paints, brushes, and protective materials ensures that your designs will turn out beautifully without frustration. In this blog post, we will explore 10 DIY Easter egg painting ideas, each accompanied by detailed instructions, materials lists, and preparation tips. These ideas are perfect for beginners and experienced crafters alike, and they will help make your Easter celebration truly special.
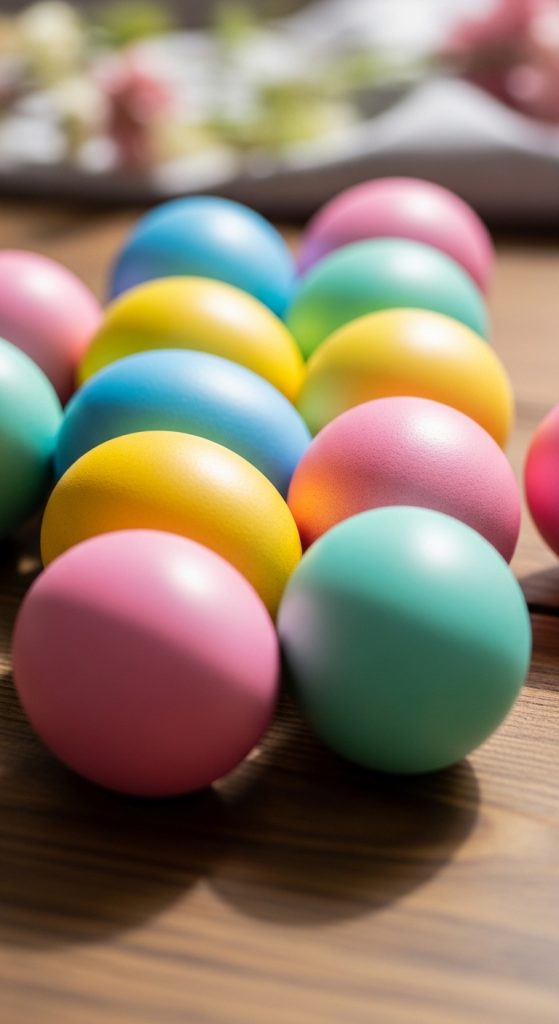
1. Classic Solid Color Eggs
Painting eggs in solid, vibrant colors is a timeless Easter tradition. This simple technique allows you to create a clean, uniform look and serves as a great base for more complex designs later.
Materials Needed:
- White or brown eggs
- Food coloring or acrylic paints
- Paintbrushes or sponges
- Cups or small bowls
- Vinegar (for food coloring)
Preparation:
If using real eggs, boil them for 10 minutes and let them cool completely. For better color absorption, mix 1 tablespoon of vinegar into ½ cup of warm water and then add your chosen food coloring.
Instructions:
- Dip the egg in the colored solution or paint it directly with a brush.
- Let the first coat dry completely before applying a second coat for more vibrant colors.
- Place the finished eggs on a drying rack or paper towels to avoid smudging.
Tips:
For a glossy finish, brush the egg lightly with a bit of vegetable oil after the paint dries. You can also experiment with pastel shades or bold, bright tones depending on your preference.
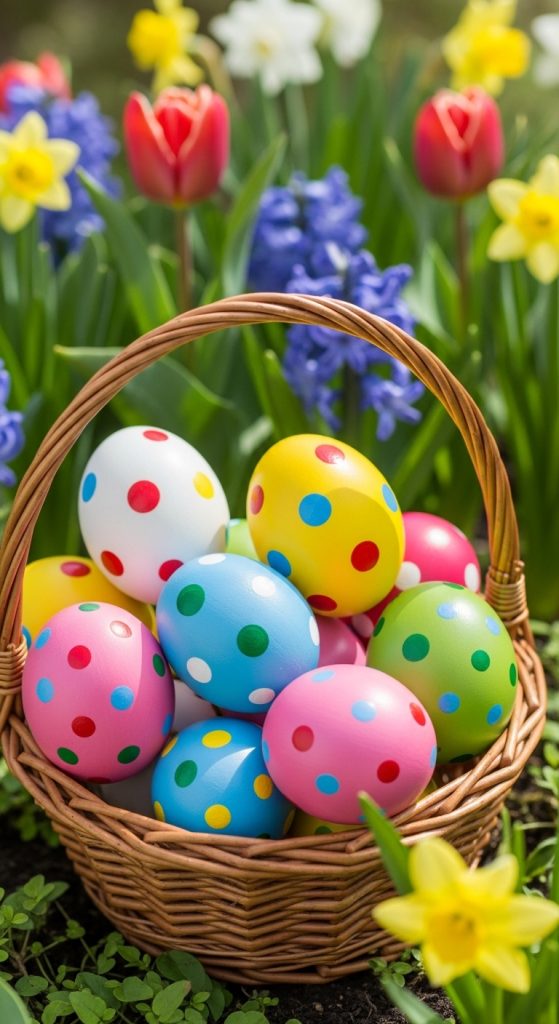
2. Polka Dot Eggs
Polka dots add a playful and cheerful touch to Easter eggs. This design is easy enough for children to try while producing a visually appealing result.
Materials Needed:
- Hard-boiled or blown-out eggs
- Acrylic paints or food coloring
- Cotton swabs or small round sponge applicators
- Toothpicks (optional for smaller dots)
Preparation:
Make sure your eggs are clean and dry before painting. If using food coloring, prepare separate bowls for each color you intend to use.
Instructions:
- Dip a cotton swab or the end of a toothpick into the paint.
- Gently press onto the surface of the egg to create evenly spaced dots.
- Repeat the process with different colors if desired.
Tips:
For an organized pattern, mark faint pencil dots as a guide before painting. You can create various sizes of dots to give the eggs a dynamic look. This design works best on a solid color background.
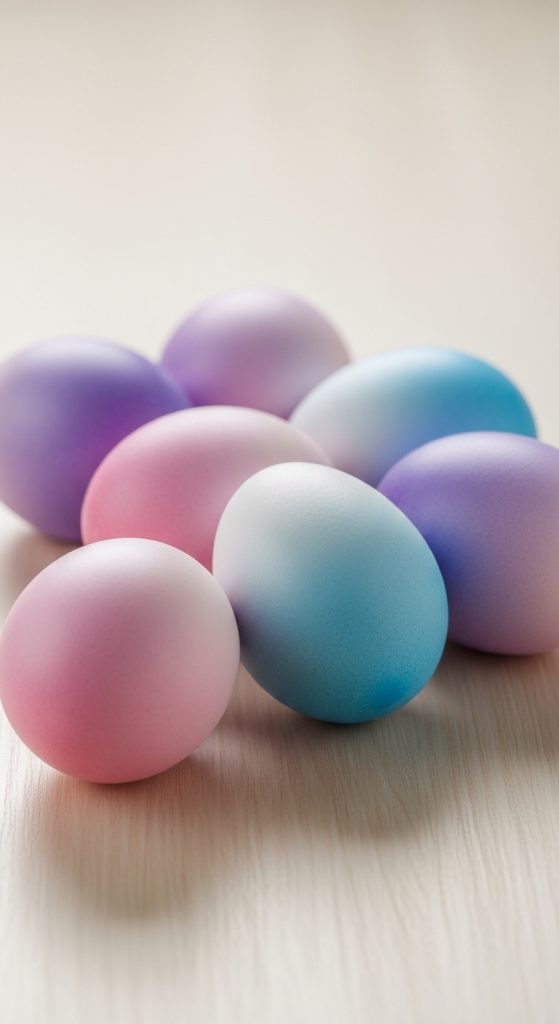
3. Ombre Gradient Eggs
Ombre or gradient eggs feature a smooth transition from one color to another, offering a sophisticated, modern aesthetic.
Materials Needed:
- Hard-boiled eggs
- Acrylic paints or water-based dyes
- Small paintbrushes or sponge brushes
- Cups or bowls for mixing
Preparation:
Select two or three colors that blend well together. Dilute the paint slightly with water to create a softer effect.
Instructions:
- Start with the lightest color at the top of the egg.
- Gradually blend the next color into the first, working quickly before the paint dries.
- Use a sponge or brush to soften any harsh lines between colors.
Tips:
Rotate the egg as you blend to ensure a smooth gradient. This technique works particularly well with pastel shades for a soft, springtime look.
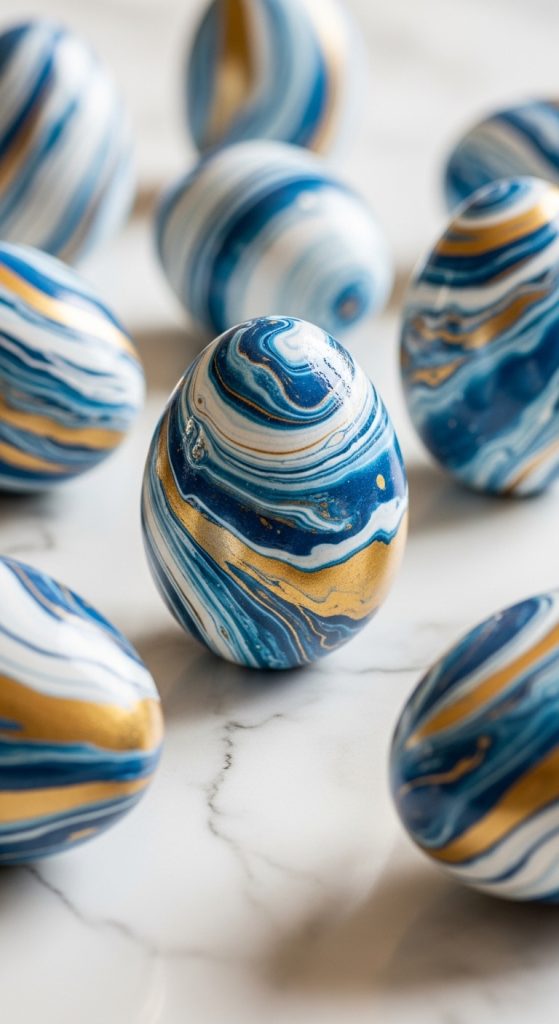
4. Marble Effect Eggs
Marble eggs mimic the elegant swirls of natural stone and create a luxurious appearance. This technique looks complex but is surprisingly easy to achieve.
Materials Needed:
- Hard-boiled or blown-out eggs
- Nail polish in multiple colors
- A bowl of room-temperature water
- Toothpicks or skewers
Preparation:
Fill a bowl with room-temperature water deep enough to submerge an egg. Choose nail polish colors that complement each other.
Instructions:
- Drip nail polish onto the surface of the water.
- Use a toothpick to create swirls by gently dragging the colors together.
- Dip the egg into the water, allowing the paint to adhere.
- Dry completely on a paper towel or egg carton.
Tips:
Work quickly, as nail polish dries fast. Marble eggs can also be sealed with a clear coat to increase shine and longevity.
5. Glitter Eggs
Adding glitter gives your Easter eggs a festive sparkle that catches the light beautifully. This design is perfect for parties or decorative displays.
Materials Needed:
- Hard-boiled eggs or plastic eggs
- White glue or Mod Podge
- Fine glitter in various colors
- Paintbrushes or sponge brushes
Preparation:
Decide whether you want to cover the entire egg in glitter or create patterns. Cover your workspace to catch excess glitter.
Instructions:
- Apply a thin layer of glue over the area you want to cover.
- Sprinkle glitter evenly over the glue.
- Shake off excess glitter and allow to dry completely.
Tips:
Use multiple colors to create patterns or gradients. For a smoother finish, seal the glitter with another layer of glue or Mod Podge.

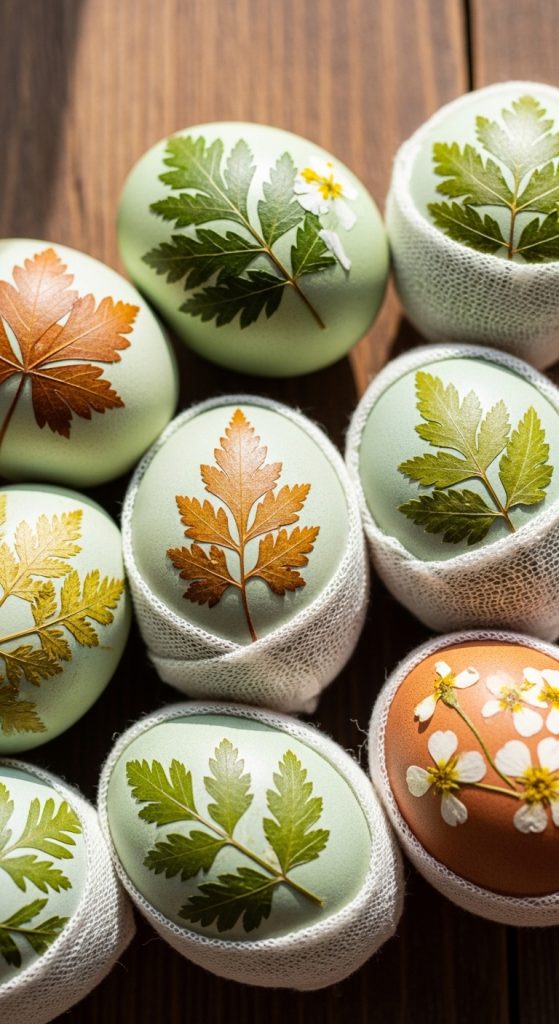
6. Nature-Inspired Eggs
Nature-inspired designs use leaves, flowers, or other natural patterns to create organic and unique eggs.
Materials Needed:
- Hard-boiled eggs
- Small leaves or flowers
- Stockings or cheesecloth
- Fabric scraps and rubber bands
- Food coloring
Preparation:
Select leaves with distinct shapes and place them on the egg surface. Secure them with stockings or cheesecloth.
Instructions:
- Wrap the egg tightly with the fabric, securing with rubber bands.
- Dip the wrapped egg into food coloring and allow it to soak.
- Remove the fabric and leaves carefully after drying to reveal the natural imprints.
Tips:
Experiment with different leaf sizes and patterns. This technique gives each egg a one-of-a-kind look.
7. Metallic Eggs
Metallic paints give Easter eggs a modern, chic appearance, perfect for sophisticated table settings or gifts.
Materials Needed:
- Blown-out or hard-boiled eggs
- Metallic acrylic paints (gold, silver, bronze)
- Small paintbrushes or sponge brushes
- Sealant spray (optional)
Preparation:
Ensure eggs are dry and free from oil or dirt. Metallic paints often require multiple thin coats for full coverage.
Instructions:
- Apply a base coat if desired, then layer metallic paint evenly over the egg.
- Let each layer dry before applying the next.
- Optionally, seal with a clear spray to enhance shine.
Tips:
Metallic eggs pair beautifully with simple solid-colored eggs in displays. Use masking tape to create striped metallic patterns for added interest.

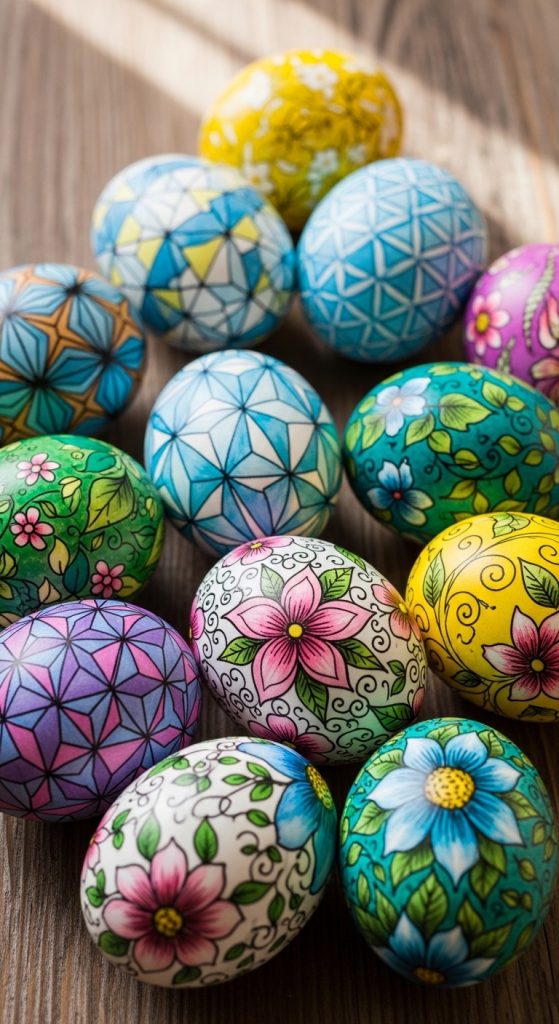
8. Hand-Drawn Pattern Eggs
Drawing patterns on eggs allows for maximum creativity and a personalized touch. You can create geometric shapes, flowers, or abstract designs.
Materials Needed:
- Hard-boiled or blown-out eggs
- Fine-tip permanent markers or acrylic pens
- Pencil for sketching (optional)
- Ruler for geometric designs (optional)
Preparation:
Lightly sketch your design with a pencil before using permanent markers for more precision.
Instructions:
- Carefully draw your patterns directly onto the egg.
- Use a steady hand and rotate the egg as you work.
- Allow marker or pen designs to dry before handling.
Tips:
For children, start with simple shapes like stripes, dots, or zigzags. Complex designs are best for adults or more experienced crafters.
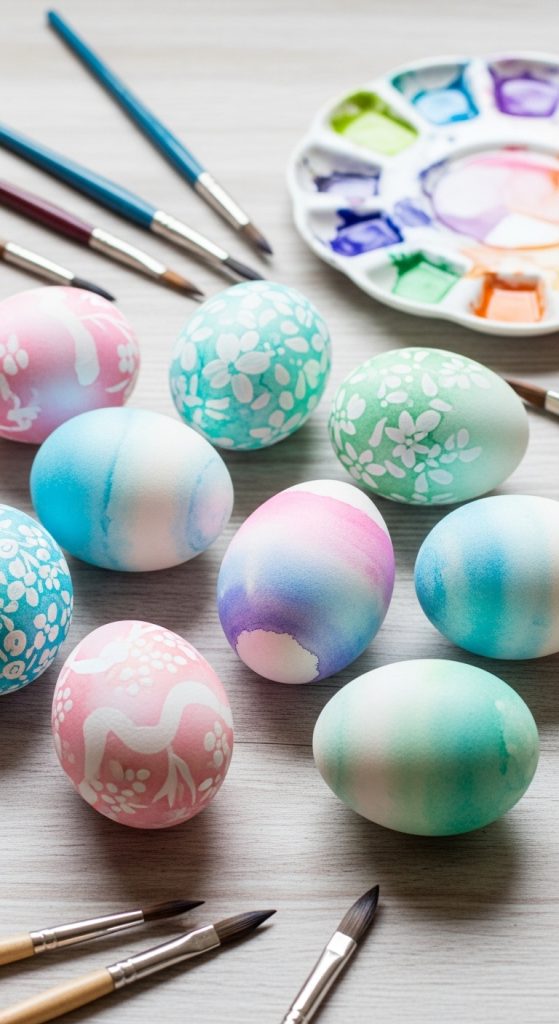
9. Watercolor Eggs
Watercolor eggs produce a soft, dreamy effect that resembles delicate paintings. This technique is ideal for pastel spring decorations.
Materials Needed:
- Hard-boiled or blown-out eggs
- Watercolor paints
- Small paintbrushes
- Water and paper towels
Preparation:
Dampen your egg lightly with a sponge before painting. This helps the watercolor blend smoothly.
Instructions:
- Dip your brush into watered-down paint and apply gentle strokes.
- Blend colors carefully for a soft gradient or abstract effect.
- Allow the egg to dry completely before handling.
Tips:
Use multiple layers to build color intensity. Avoid oversaturating the egg, as watercolors can drip or streak if too wet.
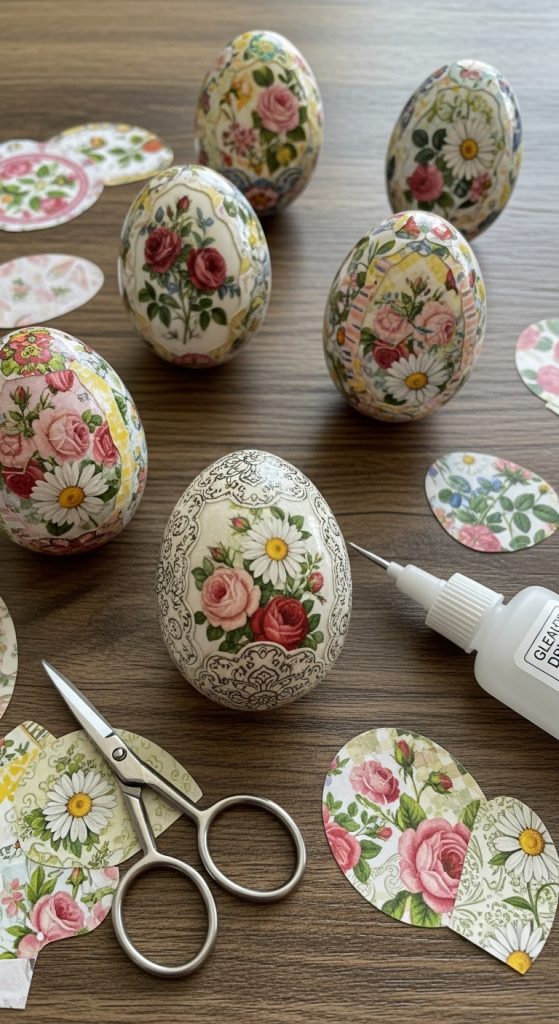
10. Decoupage Eggs
Decoupage is a decorative art technique where paper designs are glued onto a surface, resulting in detailed and intricate patterns.
Materials Needed:
- Hard-boiled or blown-out eggs
- Tissue paper, napkins, or printed designs
- Mod Podge or white glue
- Small paintbrushes
- Scissors
Preparation:
Cut paper into small shapes or strips that will fit the curves of your egg.
Instructions:
- Brush a thin layer of glue onto the egg.
- Carefully place the paper pieces onto the glue.
- Apply another layer of glue over the top to seal and smooth.
- Allow to dry completely.
Tips:
Layering different colors or textures can create depth and complexity. Decoupage eggs are perfect for gifts or keepsakes as they have a professional look.


Leave a Reply