
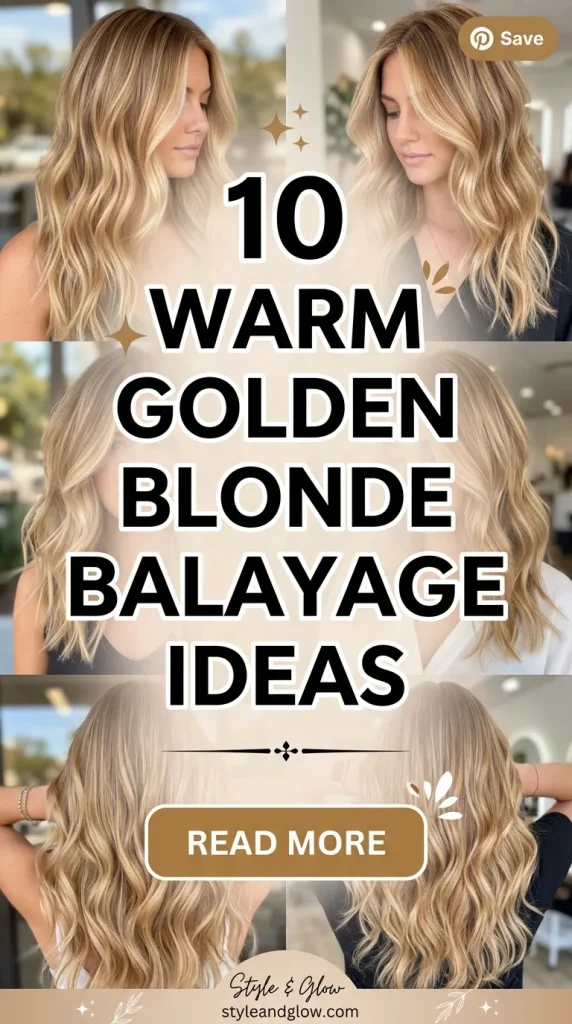
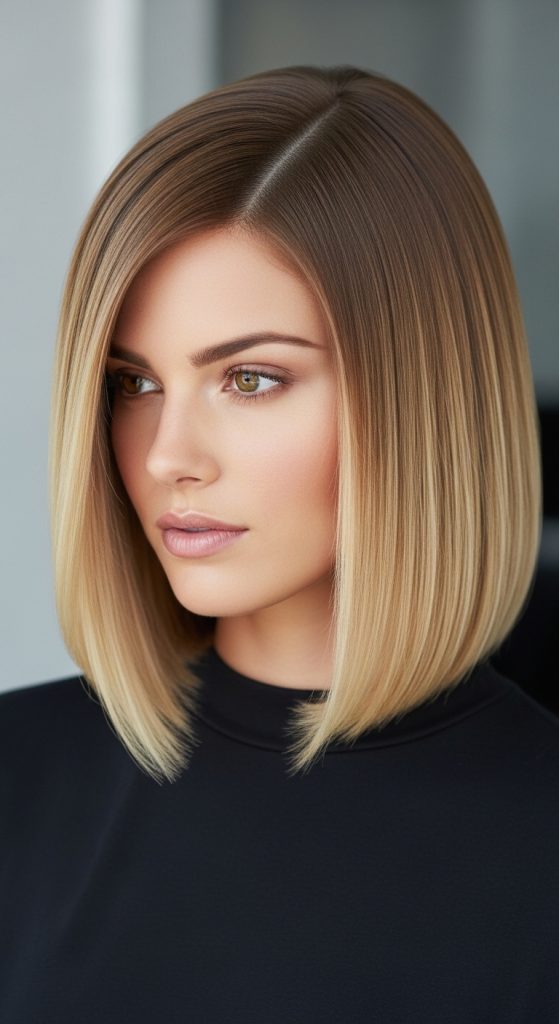
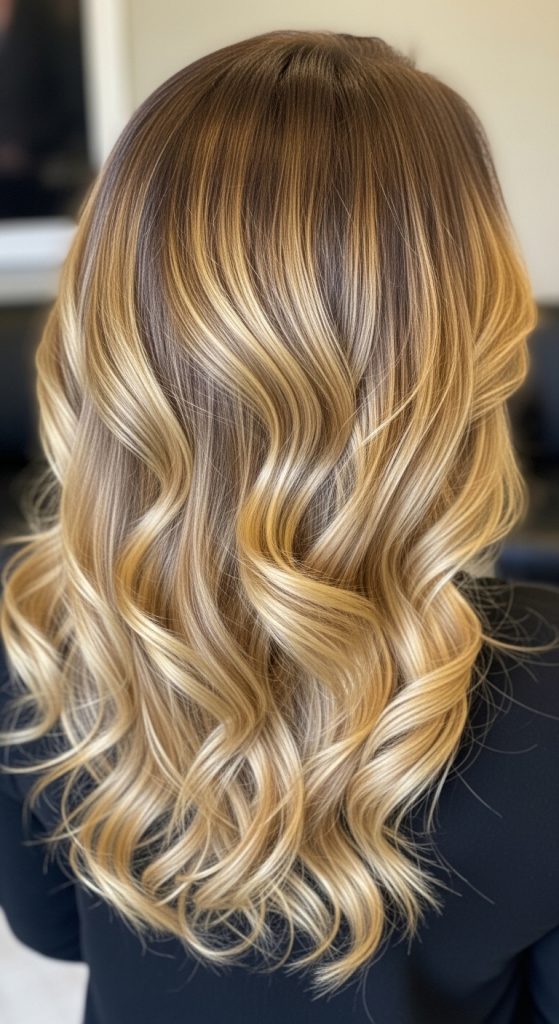
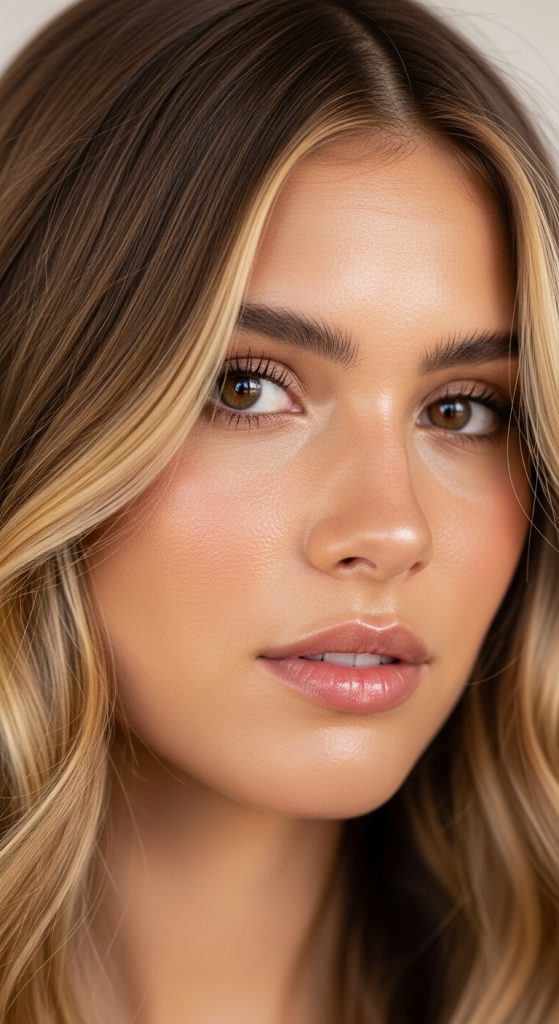
Warm golden blonde balayage has become a widely shared topic across Pinterest ideas due to its natural glow, low-maintenance appeal, and adaptability to different hair types. This coloring technique blends lighter golden tones into a darker base, creating a soft, sunlit effect that looks effortless yet refined. Unlike traditional highlighting methods, balayage focuses on hand-painted placement, allowing for a customized and gradual transition between shades. Readers exploring this topic will learn how to approach different variations of warm golden blonde balayage, understand how each style works, and gain practical insight into how these looks can be achieved step by step. This guide also explains preparation, materials, and planning considerations for both beginners and those refining their technique. The topic is useful because it balances aesthetic appeal with practicality, making it suitable for modern design preferences while remaining achievable as a DIY or salon-inspired creative project.
Why This Idea Is Trending or Useful
Warm golden blonde balayage continues to trend because it aligns with current preferences for natural-looking beauty and low-maintenance styling. Pinterest inspiration frequently highlights styles that appear effortless, and this technique delivers a soft gradient without harsh lines. The practical value lies in its longevity, as it grows out seamlessly and requires fewer touch-ups than traditional coloring. It also supports creative ideas by allowing flexibility in tone placement, making it adaptable for different face shapes and personal styles. From a design perspective, warm golden tones add depth and brightness, enhancing overall appearance without overwhelming the natural base color. Beginners are drawn to this style because it offers room for gradual improvement, especially when approached through step-by-step tutorials. Additionally, the DIY appeal makes it accessible, as the materials and techniques can be simplified for at-home experimentation while still achieving an aesthetic result.
Materials and Preparation
Preparing for a warm golden blonde balayage project requires careful planning and the right materials. Essential items include a balayage brush, mixing bowl, gloves, sectioning clips, lightening product, toner, and a conditioning treatment. A wide-tooth comb and foil sheets or plastic wrap may also be used depending on the technique. Before starting, hair should be clean and free from heavy product buildup, but not freshly washed, as natural oils help protect the scalp. Planning involves deciding the placement of highlights, intensity of color, and desired finish, whether subtle or more defined. It is helpful to section the hair into manageable parts to ensure even application. Conducting a strand test is a practical step to evaluate how the hair reacts to the lightening process. Proper preparation reduces the risk of uneven tones and helps maintain the health of the hair throughout the process, making the overall creative project more controlled and predictable.
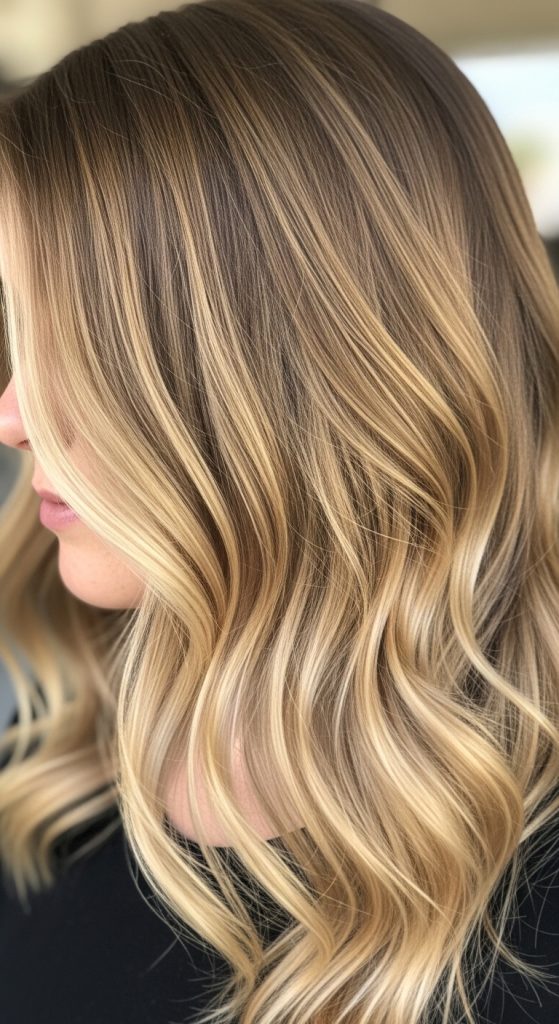
Idea 1: Soft Honey Glow Balayage
How to Create
This style focuses on blending warm honey tones into a natural base to create a soft, radiant effect. The key concept is gradual lightness that mimics natural sun exposure. The color transitions smoothly from darker roots into golden ends, producing a balanced and natural aesthetic. This approach works well for those seeking a beginner friendly introduction to balayage, as it does not require sharp contrast or complex sectioning. The warmth of honey tones complements a wide range of skin tones, making it a versatile option for everyday styling. The result is subtle yet noticeable, adding dimension and movement without overwhelming the natural hair color. This idea fits well within minimalist style preferences and is commonly featured in modern home decor-inspired beauty trends due to its simplicity and elegance.
To create this look, start by sectioning the hair into layers and focusing on mid-lengths to ends. Apply the lightening product using a sweeping motion, concentrating more product toward the tips for a natural gradient. Avoid saturating the roots to maintain a soft blend. After processing, rinse and apply a warm golden toner to achieve the honey effect. Conditioning treatments should follow to restore moisture and enhance shine. This step-by-step method ensures an even result while keeping the process manageable for beginners. Proper planning and controlled application help achieve a seamless finish that reflects current trending ideas in hair aesthetics.
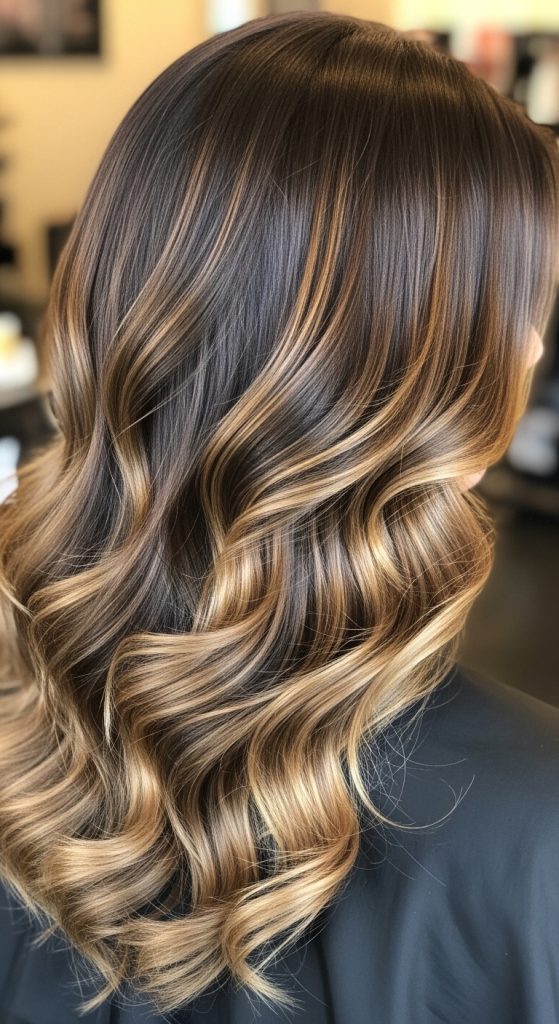
Idea 2: Golden Caramel Blend
Step-by-Step Guide
Golden caramel balayage combines deeper caramel shades with lighter golden highlights to create depth and richness. This style emphasizes contrast while maintaining a cohesive blend. The darker tones provide a strong base, while the golden strands add brightness and movement. This balance creates a multidimensional effect that appears both polished and natural. It is particularly suitable for those who want a slightly more defined look without losing the softness associated with balayage. The combination of tones aligns with creative ideas seen in Pinterest inspiration boards, especially those focused on warm palettes and layered textures.
To achieve this style, divide the hair into horizontal sections and begin applying lightener in a V-shaped pattern to create natural variation. Focus on alternating sections to avoid uniformity. After lifting the color, apply a caramel-toned gloss followed by a golden toner to enhance warmth. Blending is essential, so use a brush to soften any harsh lines. Finish with a deep conditioning treatment to maintain hair health. This process allows for controlled color placement while achieving a rich, dimensional result that fits within modern design aesthetics.
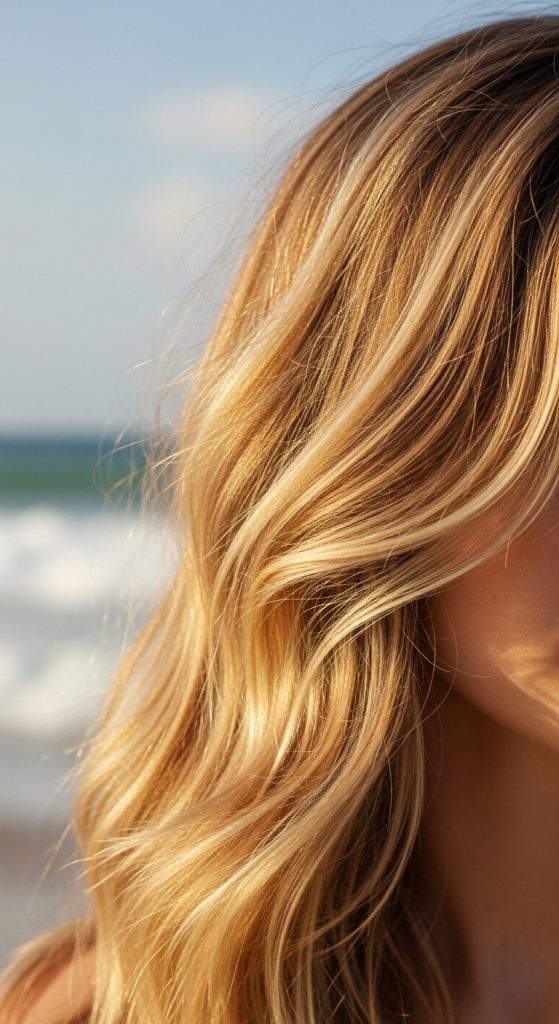
Idea 3: Sun-Kissed Beach Balayage
How to Make
This idea replicates the natural lightening effect caused by sun exposure, resulting in a relaxed and effortless appearance. The focus is on creating uneven, organic highlights that mimic how hair naturally lightens at the beach. The tones remain warm and golden, with subtle variation throughout the hair. This style is ideal for those who prefer a casual, low-maintenance look that still feels intentional. It aligns with aesthetic trends that emphasize natural beauty and simplicity, making it a popular choice among beginner friendly DIY enthusiasts.
To create this effect, lightly tease sections of hair before applying the lightener to ensure a diffused blend. Focus on the front pieces and ends, as these areas naturally lighten more in sunlight. Use minimal product to avoid harsh contrasts. After processing, tone the hair with a warm golden shade and apply a hydrating treatment. This method emphasizes a soft finish and requires less precision, making it an easy project for those exploring balayage techniques for the first time.
Idea 4: Warm Vanilla Blonde Transition
Execution Process
Warm vanilla blonde balayage offers a lighter, creamy tone while maintaining a golden undertone. The concept revolves around creating a smooth transition from darker roots into a soft, pale blonde. This style provides a refined and polished look, often associated with modern design trends that favor clean and balanced color palettes. It is suitable for those seeking a brighter appearance without losing warmth, making it a versatile option for various hair types and lengths.
To achieve this look, section the hair carefully and apply the lightener in thin layers to ensure even lift. Focus on achieving a consistent level of lightness before applying a vanilla-toned gloss. The toner should have a slight golden base to prevent the color from appearing too cool. Conditioning treatments are essential to maintain softness and shine. This structured approach ensures a smooth gradient and a professional finish, even when approached as a DIY tutorial.
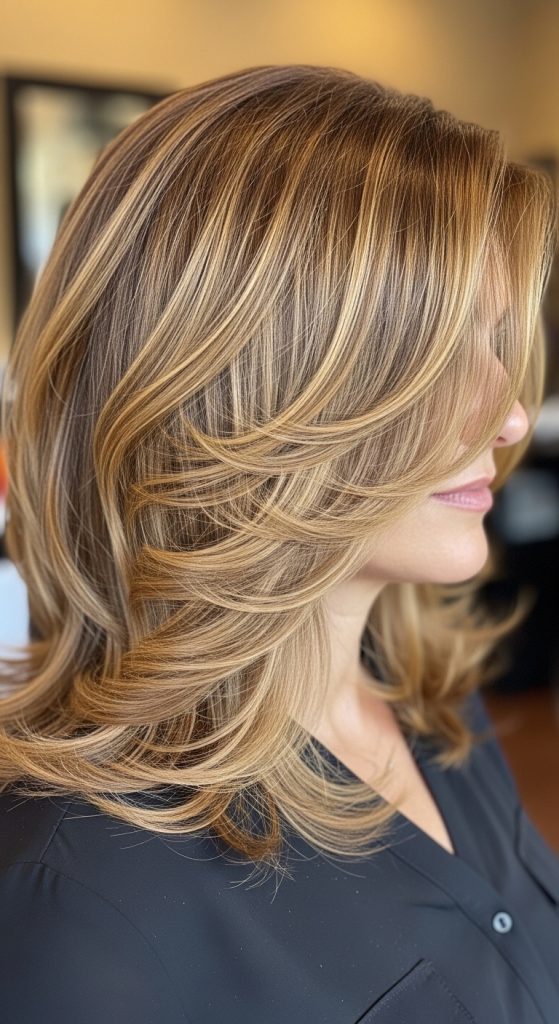
Idea 5: Golden Bronze Balayage
Setup Method
Golden bronze balayage combines warm golden highlights with deeper bronze tones to create a rich, earthy look. This style emphasizes depth and dimension, making it suitable for those who want a more dramatic effect while still maintaining a natural blend. The combination of tones creates a warm and inviting appearance, aligning with home decor-inspired color schemes that focus on earthy palettes and layered textures.
To create this style, apply the lightener in strategic sections, focusing on areas that naturally catch light. Blend the highlights into the base color using a brush to soften transitions. After processing, apply a bronze-toned gloss followed by a golden toner to enhance warmth. Conditioning treatments help maintain the integrity of the hair. This method ensures a balanced and cohesive result that reflects current trending ideas in hair design.
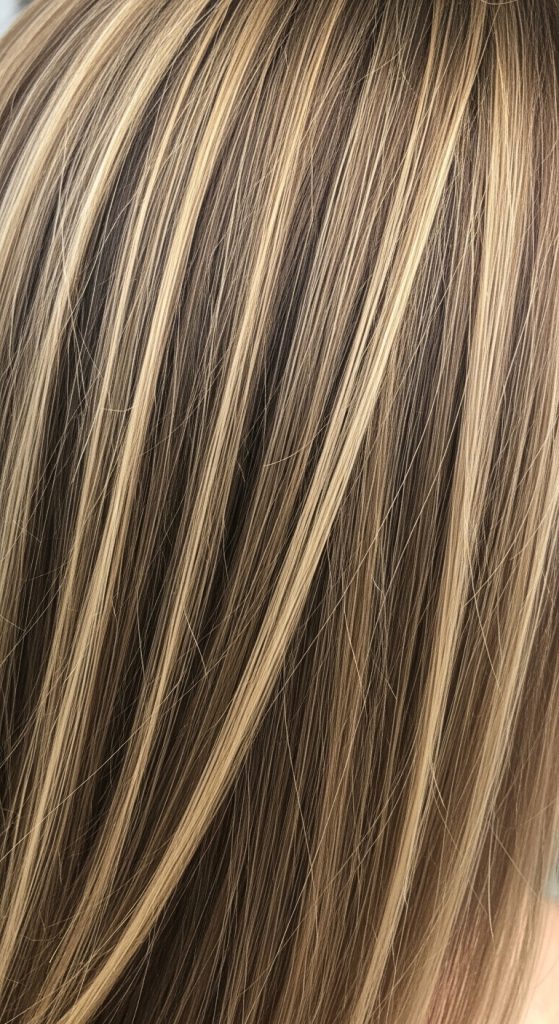
Idea 6: Subtle Golden Babylights
How to Create
This style focuses on very fine, delicate highlights that create a barely noticeable yet luminous effect. The concept is to enhance the natural color rather than transform it completely. The result is soft, blended brightness that appears effortless and refined. This approach is ideal for those who prefer a minimalist style and want a low-maintenance option that still adds dimension and shine.
To achieve this look, take very small sections of hair and apply the lightener sparingly. Focus on the top layers and around the face for a natural highlight effect. After processing, apply a light golden toner to unify the color. Finish with a conditioning treatment to maintain softness. This method requires patience but delivers a subtle and elegant result that aligns with modern aesthetic preferences.
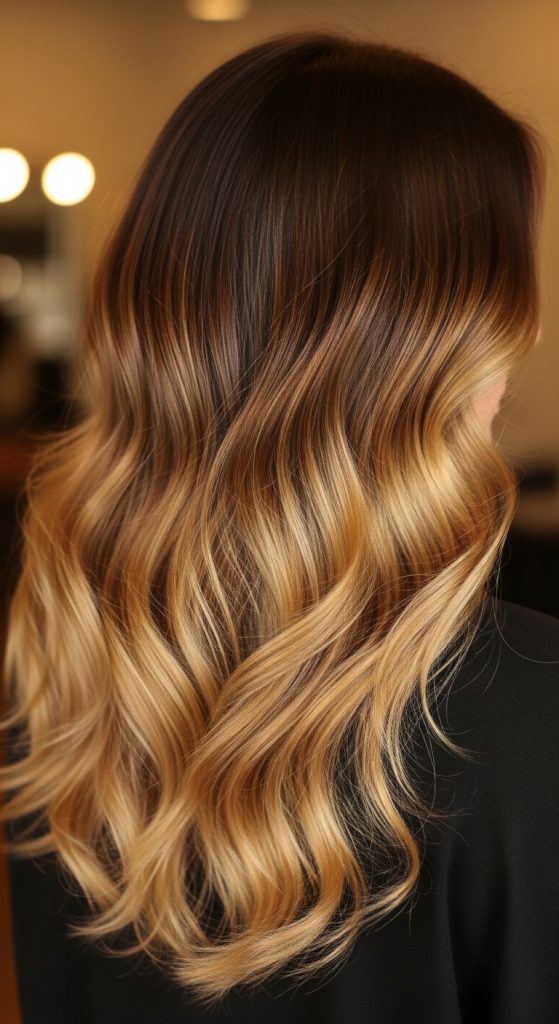
Idea 7: Warm Golden Ombre Balayage
Step-by-Step Guide
Warm golden ombre balayage creates a more noticeable transition between darker roots and lighter ends. The concept involves a gradual shift in color that becomes more pronounced toward the tips. This style is suitable for those who want a bold yet blended look. It combines the softness of balayage with the structure of ombre, resulting in a balanced and visually appealing design.
To create this effect, section the hair and apply the lightener starting from the mid-lengths, increasing saturation toward the ends. Blend the product upward to avoid harsh lines. After processing, apply a golden toner to unify the color. Conditioning treatments help maintain hair health. This structured approach ensures a smooth transition and a polished finish.
Idea 8: Golden Beige Balayage
How to Make
Golden beige balayage introduces a neutral tone while maintaining warmth. The concept focuses on balancing golden hues with soft beige tones to create a sophisticated and understated look. This style is ideal for those who prefer a subtle and refined appearance. It aligns with modern design trends that emphasize neutral palettes and clean aesthetics.
To achieve this look, apply the lightener in thin, even sections to ensure consistent lift. After processing, use a beige-toned gloss combined with a hint of gold to create the desired shade. Blend thoroughly to avoid uneven tones. Conditioning treatments enhance the final result. This method ensures a smooth and natural finish that complements a variety of styles.

Idea 9: Deep Golden Root Melt
Execution Process
This style emphasizes darker roots that gradually melt into golden ends, creating a seamless and natural transition. The concept focuses on depth at the roots and brightness at the ends, resulting in a balanced and dimensional look. This approach is ideal for those seeking a low-maintenance style that grows out naturally without frequent touch-ups.
To create this look, apply the lightener primarily to the ends while keeping the roots untouched. After lifting, use a root shadow technique to blend the transition. Apply a golden toner to the lighter sections and condition thoroughly. This process ensures a smooth gradient and a polished finish that reflects current Pinterest ideas.
Idea 10: Bright Golden Face-Framing Balayage
How to Create
This style focuses on highlighting the front sections of the hair to frame the face. The concept is to create brightness around the face while keeping the rest of the hair more natural. This approach enhances facial features and adds dimension without requiring full coverage. It is a practical and beginner friendly option for those exploring balayage for the first time.
To achieve this look, section the front pieces and apply the lightener carefully to create soft highlights. Blend the color into the rest of the hair for a cohesive finish. After processing, apply a warm golden toner and condition the hair. This method provides a focused and effective way to enhance overall appearance while maintaining simplicity.
Common Beginner Mistakes and How to Avoid Them
One common mistake is applying too much product, which can lead to harsh lines and uneven color distribution. Beginners often underestimate the importance of blending, resulting in a lack of smooth transition between shades. Another issue is skipping the strand test, which can cause unexpected results depending on the hair’s natural tone and condition. Improper sectioning also leads to inconsistent placement, making the final look appear unbalanced. To avoid these problems, it is essential to work in small sections and apply the product gradually. Using a light hand and focusing on blending ensures a natural finish. Proper planning and preparation reduce errors and improve overall results.
Practical Tips for Better Results
Consistent sectioning is key to achieving even color placement. Using quality tools, such as a proper balayage brush, improves control during application. Timing is also important, as leaving the product on for too long can damage the hair. Hydration treatments before and after the process help maintain hair health. Working in natural lighting allows for better visibility of color placement. These practical tips ensure a smoother process and enhance the final outcome.
Styling, Presentation, or Organization Ideas
Styling plays a significant role in showcasing balayage. Soft waves help highlight the color transitions, while straight styles emphasize the gradient effect. Organizing hair into layers during styling enhances dimension and movement. Using minimal styling products maintains a natural appearance, aligning with modern aesthetic preferences. Proper presentation ensures the color is visible and balanced.
Budget or Time Planning
Balayage can be approached as a budget-friendly DIY project with proper planning. Purchasing essential materials in advance reduces costs and avoids interruptions. Allocating sufficient time for sectioning, application, and processing ensures better results. Breaking the process into manageable steps makes it more efficient. Careful planning helps achieve professional-looking results without unnecessary expense.
Creative Expansion and Advanced Inspiration
Advanced variations include combining multiple tones or experimenting with placement techniques to create unique patterns. Incorporating subtle lowlights adds depth and dimension. Exploring different shades within the golden spectrum allows for personalized results. Creative expansion encourages experimentation while maintaining the core principles of balayage.


Leave a Reply