Slick back ponytails combined with braids have become a highly sought-after hairstyle in modern Pinterest ideas due to their clean structure and versatile appeal. This hairstyle merges polished styling with detailed texture, creating a balanced look suitable for both everyday wear and special occasions. The slicked-back base offers a neat, controlled finish, while braids introduce dimension and creativity without overwhelming the overall appearance. This combination works across various hair types and lengths, making it a practical and adaptable option for many users exploring DIY beauty tutorials.
This article explains how to create ten distinct slick back ponytail with braid ideas using beginner friendly techniques and accessible materials. Each concept is broken down into clear steps to ensure the process is easy to follow. Readers will learn how to prepare their hair, select appropriate styling methods, and achieve long-lasting results. The guide also focuses on planning, organization, and execution, allowing users to confidently recreate each style. These creative ideas serve as both inspiration and practical solutions for achieving a polished, modern design hairstyle at home.
Why This Idea Is Trending or Useful
Slick back ponytail styles with braids are trending ideas because they combine simplicity with visual interest. On platforms focused on aesthetic presentation and home decor-inspired beauty trends, hairstyles that appear clean yet detailed are consistently popular. The slicked-back structure reflects minimalist style principles, while braids add handcrafted detail, making the overall look suitable for both casual and formal settings. This balance allows the hairstyle to fit seamlessly into different personal styles and occasions.
The popularity of this look is also driven by its accessibility as an easy project. Many variations require minimal tools and can be completed using basic materials such as combs, elastics, and styling products. Beginners can follow step by step tutorials to achieve professional-looking results without specialized training. Additionally, these styles support organization and planning by offering structured techniques that improve consistency. The ability to customize braid patterns, placement, and ponytail height adds flexibility, making these hairstyles practical for everyday use while still maintaining a polished, aesthetic appearance that aligns with current Pinterest inspiration trends.
Materials and Preparation
Before starting any slick back ponytail with braid project, proper preparation ensures a smooth and consistent result. Begin by gathering essential materials, including a fine-tooth comb for precision, a paddle brush for detangling, hair elastics, and bobby pins for securing sections. Styling products such as gel or smoothing cream are important for achieving the sleek base, while a light hairspray helps maintain hold. For braided sections, sectioning clips can improve organization and control during the process.
Hair preparation plays a key role in the final outcome. Start with clean, dry hair or slightly damp hair depending on the desired finish. Detangle thoroughly to avoid uneven tension during styling. Apply a smoothing product evenly from roots to mid-lengths to create the slick effect, focusing on controlling flyaways. Planning the placement of the ponytail and braid is also important before beginning. Decide whether the style will sit high, mid-level, or low, and determine where the braid will be incorporated. This preparation stage ensures the process remains efficient and reduces the need for adjustments later. Proper planning supports a cleaner finish and improves the overall aesthetic of the hairstyle.
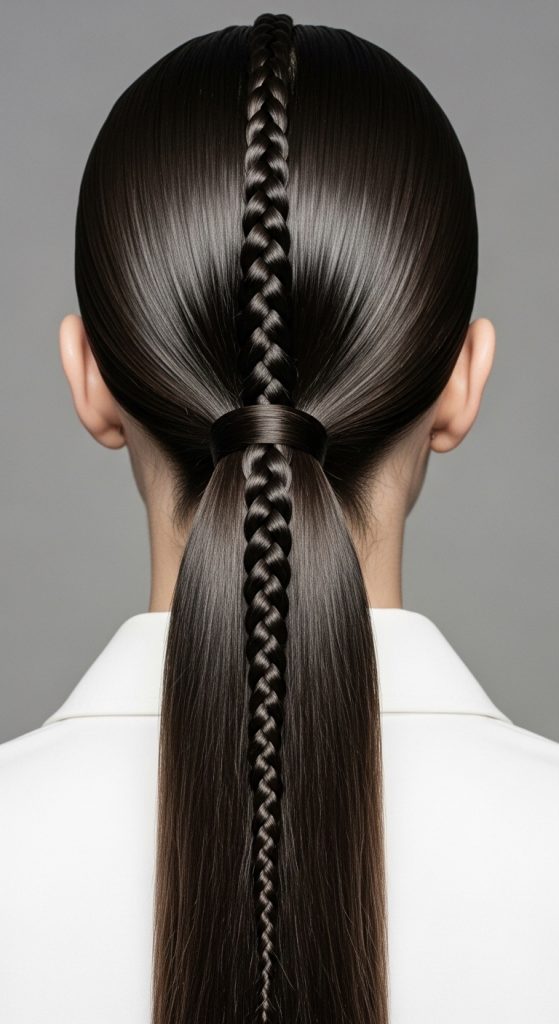
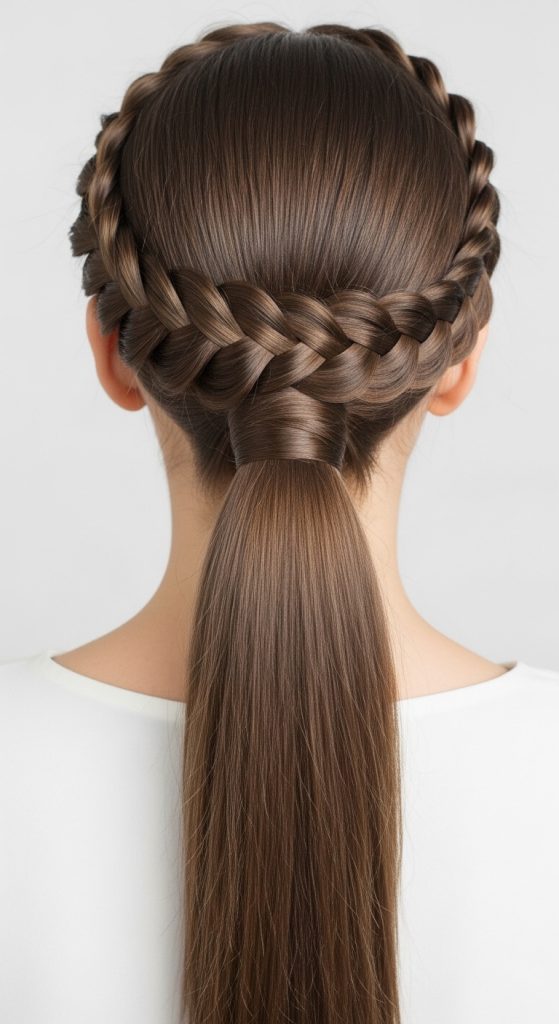
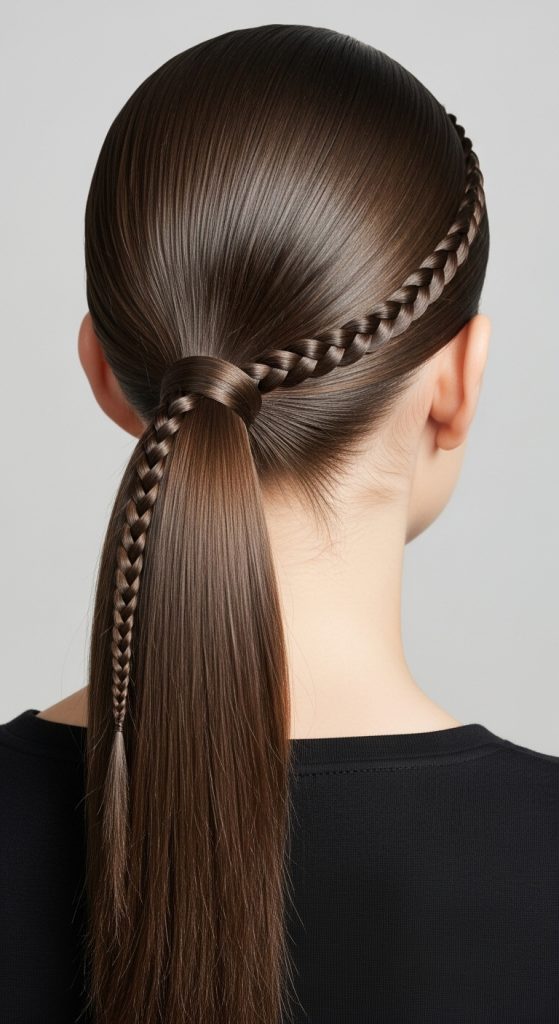
Idea 1: Classic Center Braid Ponytail
How to Create
This style focuses on a symmetrical and structured look, where a single braid runs through the center of a sleek ponytail. The design emphasizes balance and clean lines, making it suitable for minimalist style preferences. The slick back base ensures the hair appears smooth and controlled, while the central braid adds a subtle focal point without disrupting the overall simplicity. This hairstyle works well for both casual settings and professional environments due to its neat appearance and controlled texture.
To create this style, begin by applying smoothing product evenly across the hair and brushing it back into a mid-height ponytail. Secure the ponytail firmly using an elastic. Next, take a small section from the center of the ponytail and divide it into three strands to form a basic braid. Continue braiding downward and secure the end with a small elastic. Adjust the braid slightly to maintain even tension and ensure it aligns with the center. Finish with a light application of hairspray to maintain hold. This step by step method keeps the process beginner friendly while delivering a polished result.
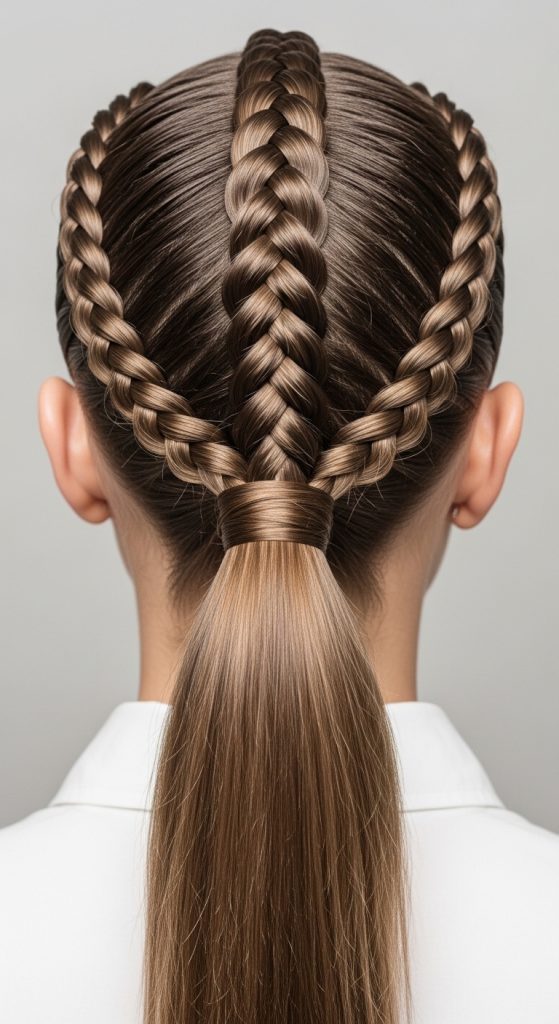
Idea 2: Double Side Braid Ponytail
How to Create
This variation introduces two braids positioned along each side of the head, blending into a slick back ponytail. The dual braid structure creates symmetry while adding visual interest to the hairstyle. It is an effective creative project for those looking to enhance a simple ponytail with more detail without complicating the overall design. The side braids frame the head and lead naturally into the ponytail, maintaining a cohesive and organized appearance.
Start by parting the hair into three sections: one center and two side sections. Apply styling product to each section to ensure smoothness. Create a braid on each side, starting from the front and working toward the back. Secure each braid temporarily. Once both braids are complete, gather all hair, including the braids, into a ponytail and secure it with an elastic. Adjust the braids so they blend seamlessly into the ponytail. Use bobby pins if necessary to secure loose areas. Finish with hairspray to maintain structure. This step by step tutorial ensures consistency and control throughout the process.
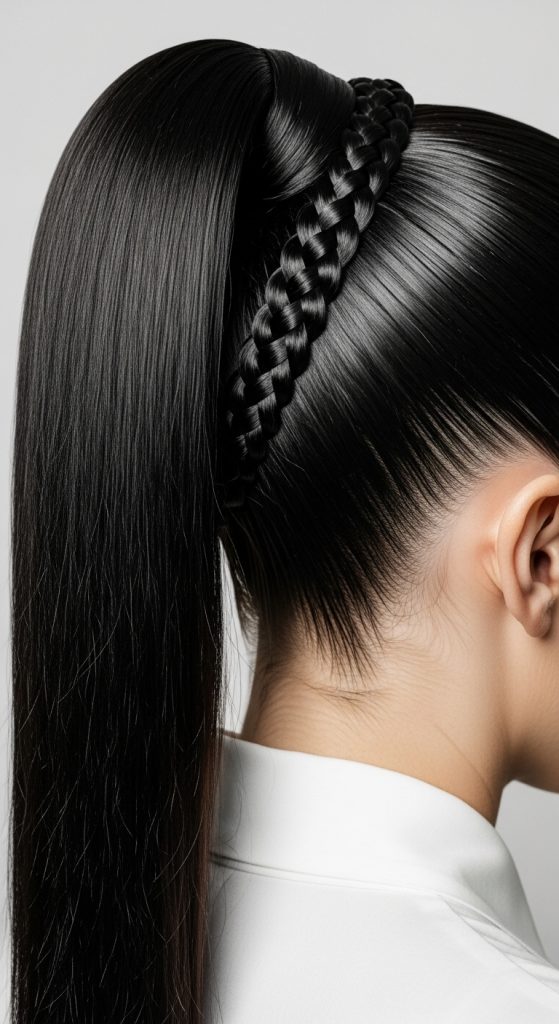
Idea 3: High Ponytail With Wrapped Braid
How to Create
This style features a high ponytail with a braid wrapped around its base, creating a refined and decorative finish. The wrapped braid adds a structured detail that enhances the sleekness of the ponytail. This design aligns well with modern design trends that emphasize clean shapes combined with subtle texture. It is particularly effective for formal or event-based styling due to its polished appearance.
To achieve this look, brush the hair upward into a high ponytail and secure it tightly. Take a small section from the ponytail and create a simple braid. Wrap the braid around the base of the ponytail to conceal the elastic and secure it with bobby pins. Ensure the wrap is tight and evenly placed. Smooth any flyaways using styling product and finish with hairspray. This method provides a clean and professional finish while remaining an easy project for beginners.
Idea 4: Bubble Ponytail With Braided Sections
How to Create
This hairstyle combines the structure of a bubble ponytail with braided accents, creating a layered and textured effect. The alternating sections provide depth while maintaining a clean and organized look. It is a creative idea that blends multiple styling techniques into one cohesive design.
Begin by creating a slick back ponytail and securing it. Add additional elastics along the length of the ponytail to form bubble sections. Between each section, create small braids or insert braided strands for added detail. Gently pull each section to create volume while maintaining structure. This step by step approach ensures even spacing and a balanced appearance.

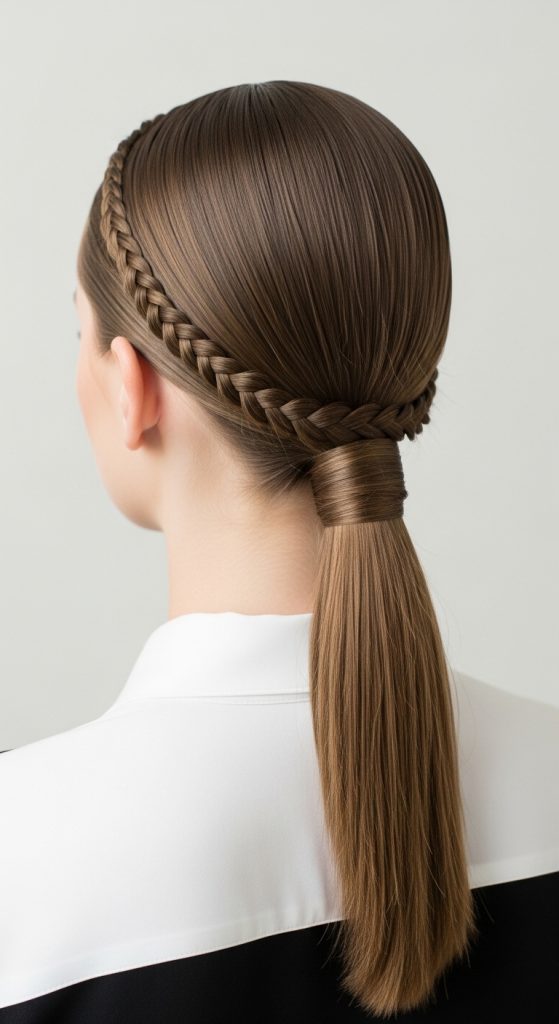
Idea 5: Low Sleek Ponytail With Side Braid
How to Create
This variation focuses on a low ponytail paired with a single side braid for subtle detail. The placement creates a soft yet structured aesthetic suitable for everyday styling. The design emphasizes simplicity and control.
Start by parting the hair to one side and creating a braid along the heavier section. Gather all hair into a low ponytail and secure it. Ensure the braid blends smoothly into the ponytail. Apply finishing spray for hold and smoothness.
Idea 6: Braided Crown Into Ponytail
How to Create
This style incorporates a crown braid that transitions into a ponytail, creating a continuous flow. It offers a balanced mix of structure and detail.
Create a braid that follows the hairline like a crown, then gather the remaining hair into a ponytail. Secure and adjust for even tension. This method ensures a cohesive design.
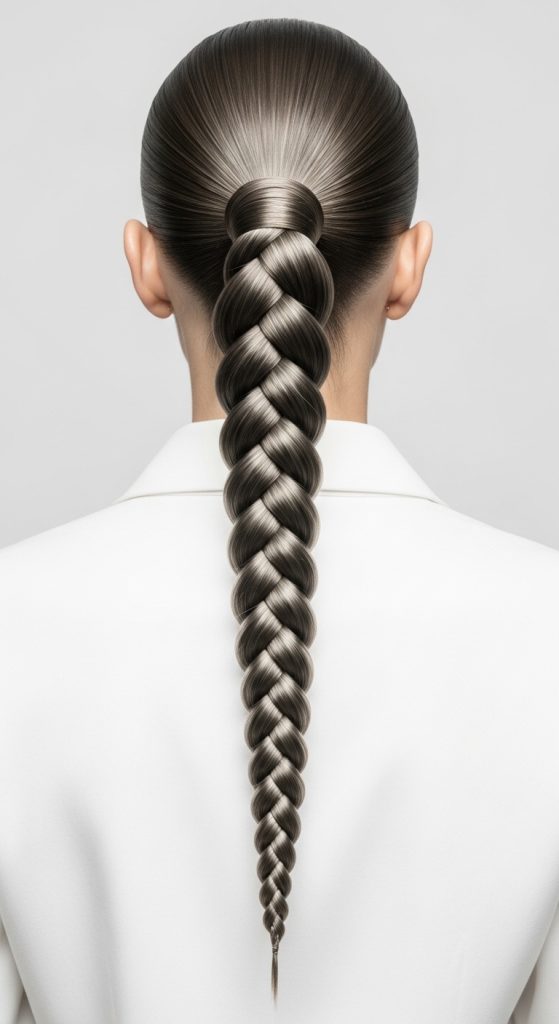
Idea 7: Rope Braid Ponytail
How to Create
This design uses a rope braid technique for a modern and textured finish. It provides a unique alternative to traditional braiding.
Twist two sections of hair together to form a rope braid within the ponytail. Secure and smooth the base for a sleek finish.
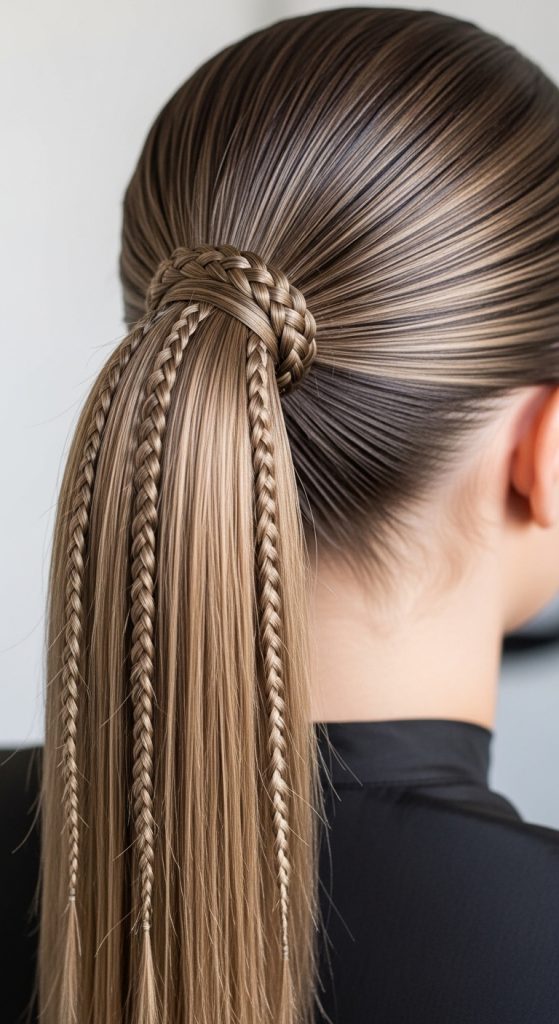
Idea 8: Multiple Mini Braids Ponytail
How to Create
This style includes several small braids throughout the ponytail for added texture. It enhances visual interest without complexity.
Create multiple thin braids within the ponytail and secure each one. Adjust spacing for balance and finish with spray.
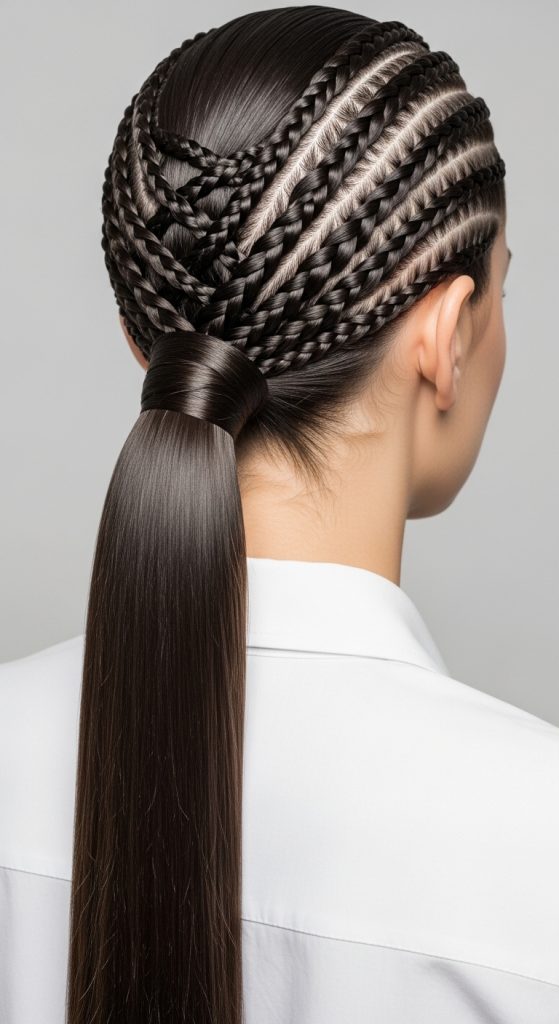
Idea 9: Criss-Cross Braided Ponytail
How to Create
This variation uses intersecting braid sections to create a geometric pattern. It aligns with modern aesthetic trends.
Section the hair and create crossing braids before forming the ponytail. Secure and adjust for symmetry.
Idea 10: Braided Accent Slick Ponytail
How to Create
This design features a single accent braid placed strategically for subtle detail. It maintains simplicity while adding dimension.
Create a small braid near the hairline and incorporate it into the ponytail. Secure and finish for a polished look.
Common Beginner Mistakes and How to Avoid Them
A common mistake in creating slick back ponytail with braid styles is uneven tension during brushing and braiding. This can lead to bumps or loose sections that disrupt the sleek appearance. To avoid this, apply styling product evenly and use a fine-tooth comb to smooth the hair gradually. Another issue is improper sectioning, which can result in asymmetrical braids or uneven ponytails. Clear planning and using clips to separate sections help maintain organization. Beginners may also secure elastics too loosely, causing the style to lose structure. Ensuring firm but comfortable tension improves durability. Skipping finishing products often leads to flyaways, so applying a light hairspray is essential for maintaining the final look.
Practical Tips for Better Results
Consistent results depend on preparation and technique. Using slightly damp hair can improve control when slicking back the base. Applying product in layers rather than all at once ensures even distribution. When braiding, maintaining equal strand size creates a cleaner appearance. Practicing basic braiding techniques before attempting complex designs improves overall execution. Working in front of a mirror with good lighting helps identify uneven areas early. Using high-quality elastics prevents breakage and improves hold. These practical adjustments enhance the outcome while keeping the process beginner friendly.
Styling, Presentation, or Organization Ideas
Presentation plays an important role in achieving a polished aesthetic. Keeping the ponytail aligned with facial structure enhances balance. Pairing these hairstyles with simple accessories such as neutral clips or pins can complement the design without overwhelming it. Organizing tools and materials before starting reduces interruptions and improves efficiency. Maintaining clean lines and smooth surfaces supports a minimalist style, which aligns with current Pinterest inspiration trends. Careful arrangement ensures the hairstyle appears intentional and well-executed.
Budget or Time Planning
These hairstyles are considered budget ideas because they require minimal materials. Most tools are reusable, making them cost-effective for repeated use. Time planning is also manageable, as many styles can be completed within 15 to 30 minutes once the technique is understood. Preparing materials in advance reduces styling time. Beginners may require additional time initially, but practice improves efficiency. This makes the styles practical for both daily routines and occasional use.
Creative Expansion and Advanced Inspiration
Once basic techniques are mastered, these styles can be expanded into more advanced variations. Combining multiple braid types within a single ponytail introduces complexity and uniqueness. Adding extensions can increase length and volume for more dramatic results. Experimenting with different ponytail heights and braid placements allows for customization. These creative ideas provide ongoing inspiration for evolving the hairstyle into more intricate designs while maintaining the foundational slick back structure.

Leave a Reply