Poinsettia nail designs are a beautiful way to bring the charm of winter flowers into your manicure. Inspired by the poinsettia plant, which is famous for its red petals and festive feel, these nail designs are popular during the winter and holiday season but can also be worn year-round with creative color choices. Poinsettia nails look elegant, feminine, and artistic, making them suitable for everyday wear, special occasions, and celebrations.
This style allows both beginners and professional nail artists to experiment with floral patterns, color blending, and fine detailing. From classic red poinsettias to modern neutral or glitter variations, there is a design for every taste and nail length. Before starting any poinsettia nail design, it is important to prepare the nails properly, choose quality materials, and understand basic nail art techniques. Proper preparation ensures long-lasting results and protects nail health.
In this blog post, you will find ten clearly explained poinsettia nail design ideas. Each design includes preparation steps, materials used, and application tips. Whether you prefer simple designs or detailed artwork, these ideas will help you create stunning poinsettia nails with confidence and ease.
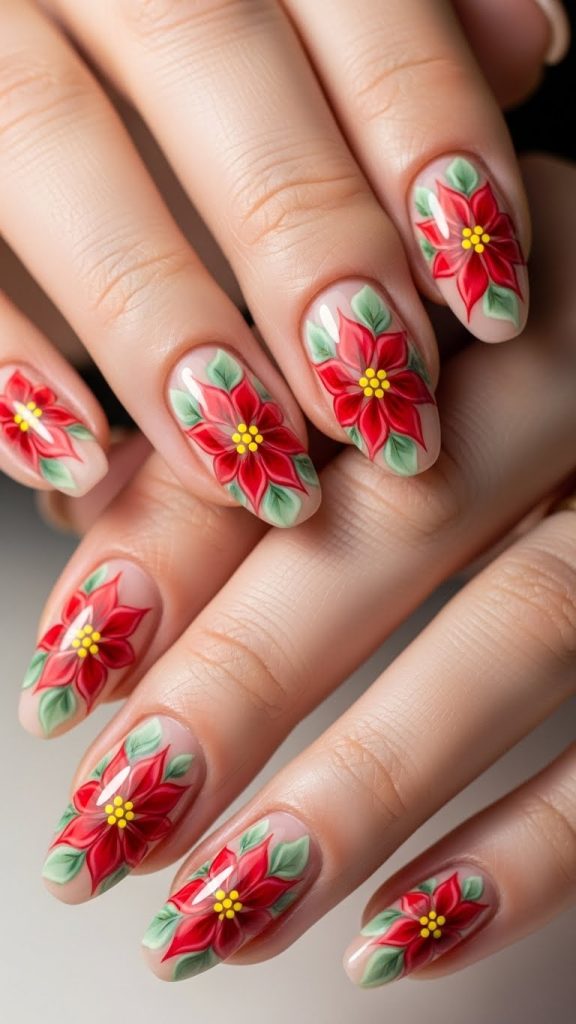
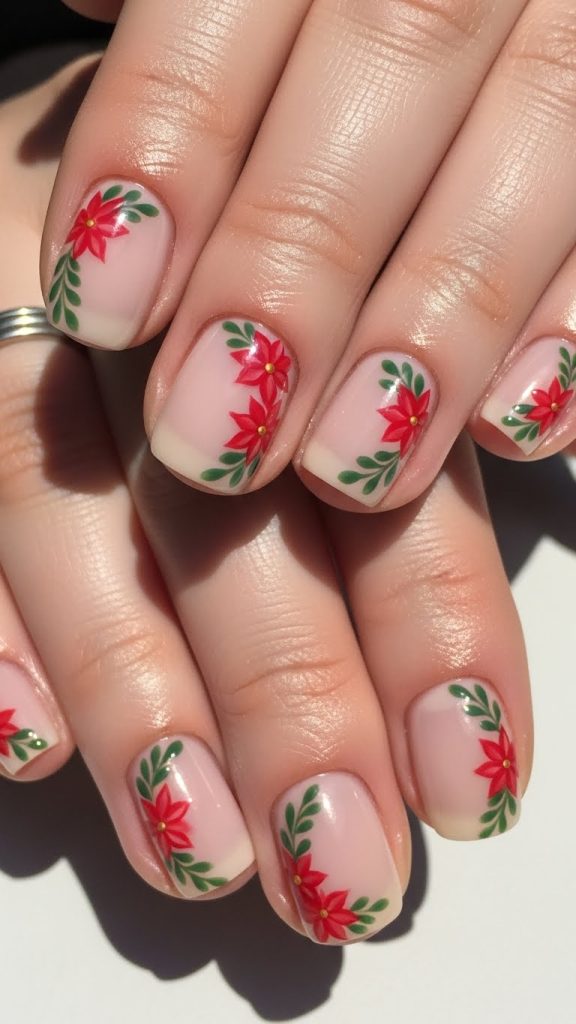
1. Classic Red Poinsettia Nail Design
The classic red poinsettia nail design is the most traditional and widely loved style. It reflects the natural beauty of the poinsettia flower with bold red petals and a yellow or gold center. This design works well on medium to long nails and looks elegant on both glossy and matte finishes.
Preparation starts with cleaning the nails, shaping them evenly, and pushing back the cuticles. Apply a strengthening base coat to protect the natural nails. For this design, a neutral or soft nude base color is ideal because it makes the red flowers stand out clearly.
Materials needed include red nail polish or gel, green polish for leaves, yellow or gold for the center, a thin nail art brush, dotting tool, and a top coat. Begin by painting the base color and letting it dry completely. Using a thin brush, paint five pointed petals in a star shape. Add small green leaves around the flower for a natural look. Finish by adding tiny dots in the center.
Seal the design with a top coat to add shine and durability. This design is perfect for beginners who want a timeless floral look.
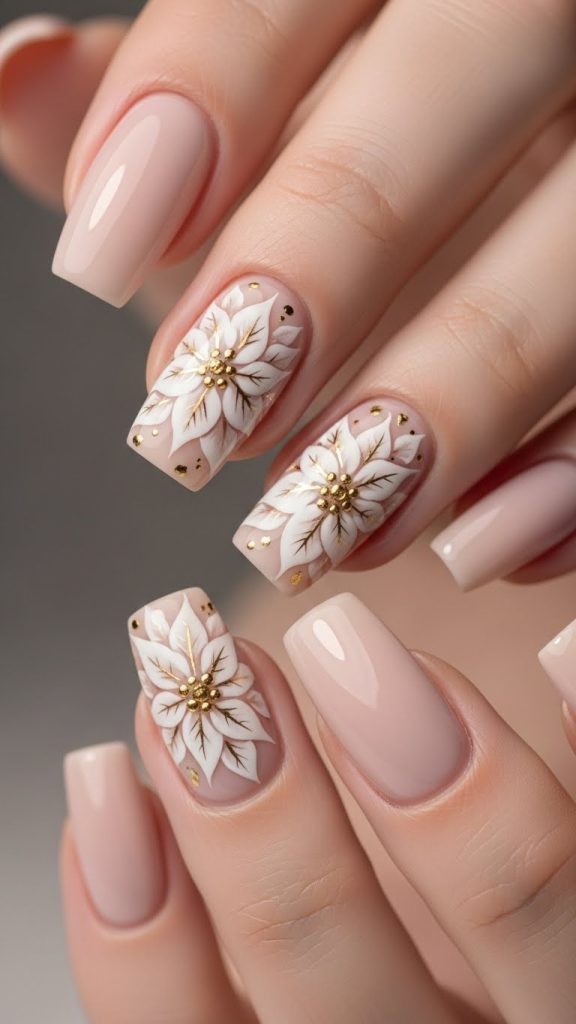
2. White and Gold Poinsettia Nails
White and gold poinsettia nails offer a soft and luxurious twist on the traditional design. This style is perfect for weddings, winter parties, and elegant events. The combination of white petals and gold accents creates a clean and sophisticated appearance.
Start by preparing the nails through trimming, filing, and buffing the surface lightly. Apply a base coat to prevent staining and improve polish adhesion. A pale pink, beige, or sheer white base color works best for this design.
Materials include white nail polish, gold nail paint or foil, a fine brush, dotting tool, and a glossy top coat. Paint the base color and allow it to dry fully. Create the poinsettia petals using white polish, layering gently to build shape. Add gold details at the center and lightly outline the petals for definition.
This design requires patience, especially when applying gold accents. Use a steady hand and minimal product to avoid smudging. Finish with a top coat to protect the design. White and gold poinsettia nails are ideal for those who prefer subtle yet elegant nail art.
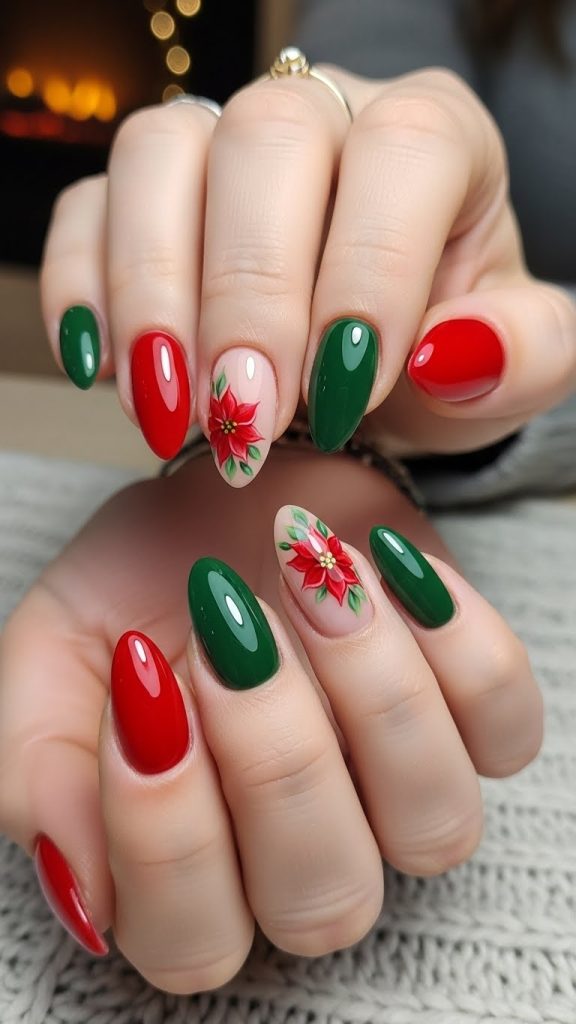
3. Red and Green Poinsettia Accent Nails
Red and green poinsettia accent nails are a great choice if you want floral art without covering every nail. This design focuses on one or two statement nails while keeping the rest simple. It is practical, stylish, and easy to maintain.
Begin with nail preparation by cleaning, shaping, and applying a base coat. Choose a solid red or green color for most nails. For the accent nail, a neutral or light background is recommended to highlight the poinsettia design.
Materials needed include red, green, and yellow nail polish, a thin brush, dotting tool, and top coat. Paint the main nails first and let them dry. On the accent nail, draw the poinsettia flower using red petals and green leaves. Add a small yellow center to complete the flower.
This design is perfect for people with busy schedules who still want artistic nails. It also suits short nails well and can be customized with glitter or matte finishes for added interest.
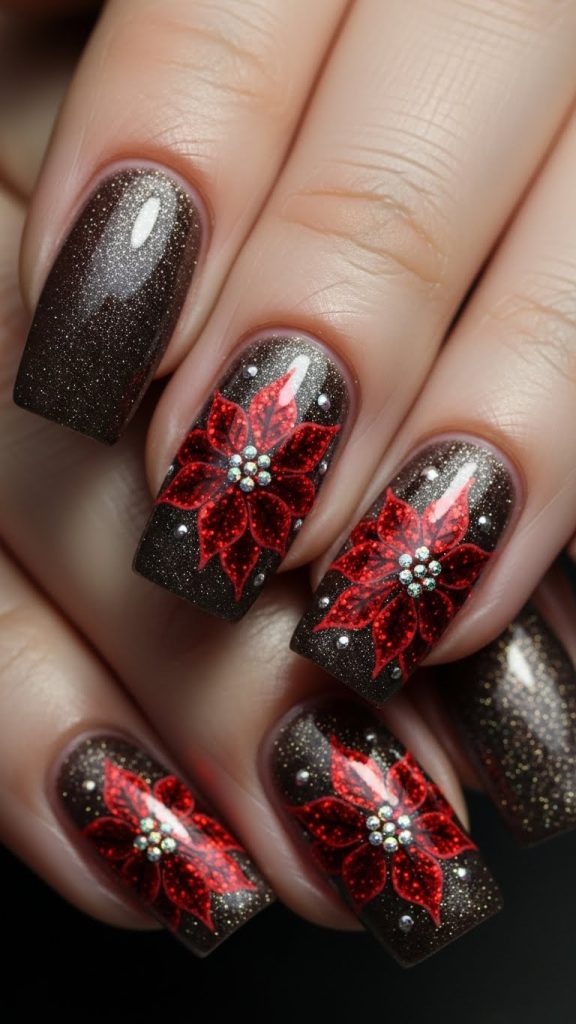
4. Glitter Poinsettia Nail Design
Glitter poinsettia nails add sparkle and glamour to floral nail art. This design is ideal for festive seasons and special occasions when you want your nails to stand out. Glitter can be used subtly or boldly depending on personal preference.
Prepare the nails by filing and buffing to create a smooth surface. Apply a base coat and choose a base color such as deep red, black, or champagne. Glitter polish or loose glitter can be used for the petals or background.
Materials include glitter polish, red or white nail paint, nail art brushes, adhesive for loose glitter, and a top coat. Paint the base color and allow it to dry. Create poinsettia petals using glitter polish or apply loose glitter carefully over painted petals.
It is important to seal glitter properly with a thick top coat to prevent rough texture. This design requires extra drying time but offers a stunning result. Glitter poinsettia nails are perfect for evening events and festive celebrations.
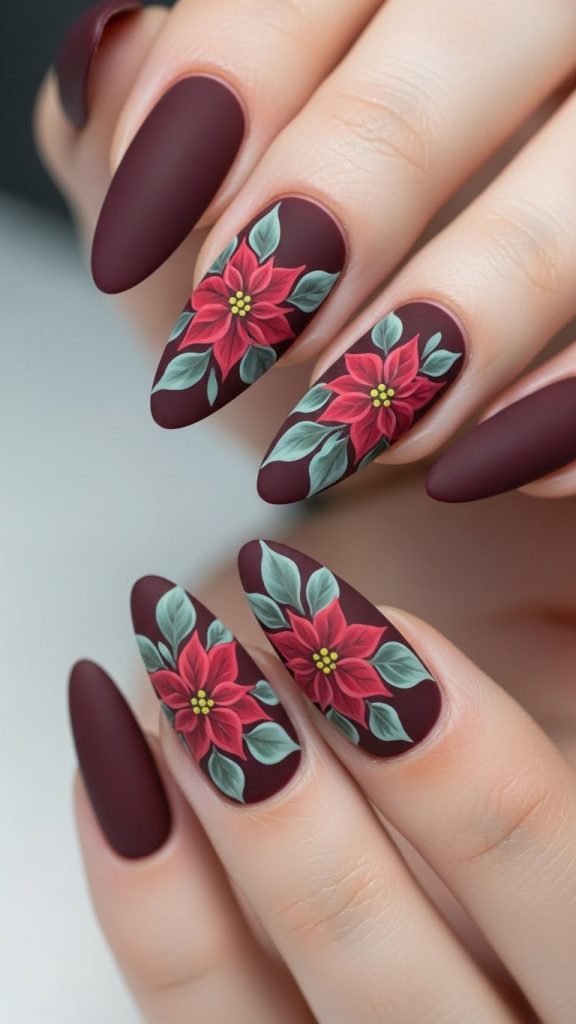
5. Matte Poinsettia Nail Art
Matte poinsettia nail art offers a modern and stylish look that is different from traditional glossy designs. The matte finish softens the colors and gives the nails a velvety appearance.
Start by cleaning and shaping the nails, then apply a base coat. Choose deep shades like burgundy, forest green, or charcoal for a bold base. Matte top coats work best on smooth surfaces, so proper preparation is essential.
Materials include matte nail polish or matte top coat, red or white polish for the poinsettia, thin brushes, and dotting tools. Paint the base color and apply the matte finish before adding the flower design. Create the poinsettia carefully using flat strokes to maintain the matte effect.
Avoid using too much product, as matte finishes show imperfections more clearly. Once the design is complete, seal lightly with a matte top coat. This design suits fashion-forward individuals who prefer understated elegance.
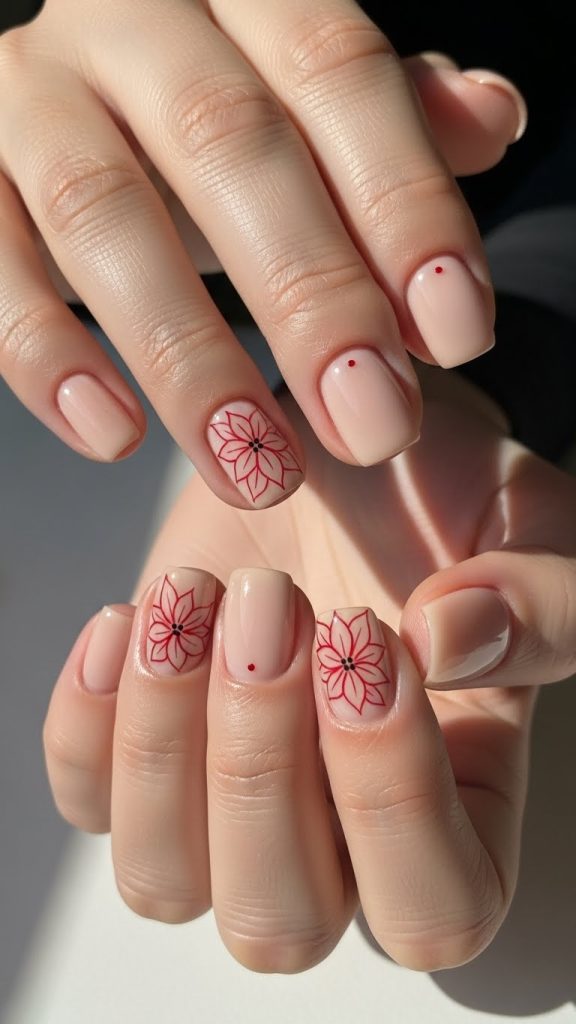
6. Minimalist Poinsettia Line Design
Minimalist poinsettia nails are perfect for those who prefer simple and clean nail art. This design uses fine lines and minimal color while still representing the poinsettia flower shape.
Preparation includes basic nail care such as trimming, filing, and applying a base coat. A neutral base color like nude, soft pink, or beige works best for minimalist designs.
Materials include a thin liner brush, red or black nail paint, dotting tool, and top coat. After applying the base color, draw simple outlines of poinsettia petals using fine lines. Add a small dot at the center to suggest the flower without heavy detail.
This design is quick to create and easy to maintain. It is suitable for professional settings and everyday wear. Minimalist poinsettia nails show that floral art does not have to be complex to look beautiful.
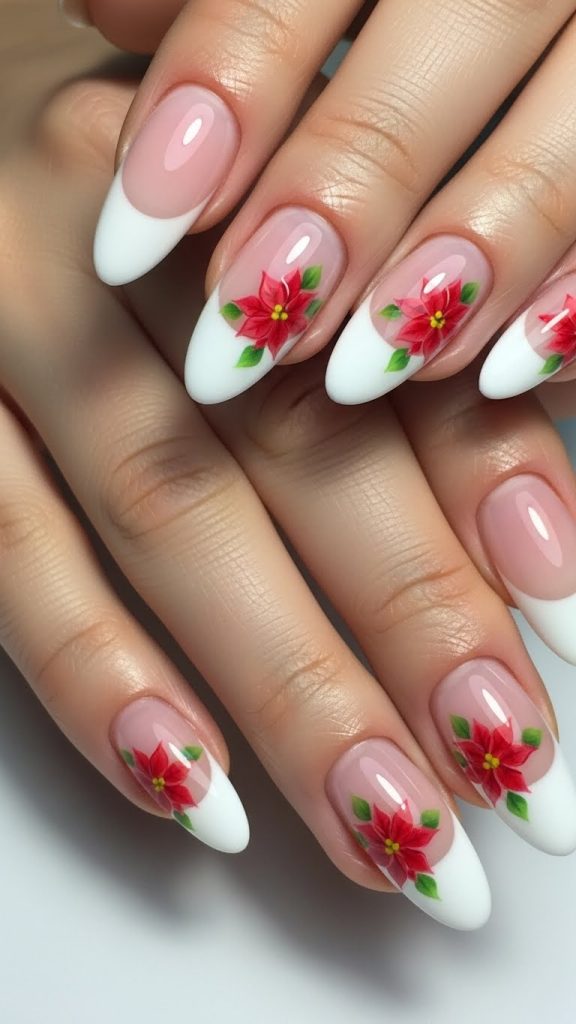
7. French Tip Poinsettia Nail Design
French tip poinsettia nails combine classic nail styling with floral creativity. This design features traditional French tips enhanced with poinsettia flowers near the cuticle or tip.
Begin with nail preparation by shaping the nails evenly and applying a base coat. A sheer pink or nude base color works best for French designs.
Materials include white polish for tips, red and green for the poinsettia, nail art brushes, dotting tool, and top coat. Paint the French tips first and let them dry. Add a small poinsettia design near one corner of the nail for a balanced look.
This design is elegant and versatile, making it suitable for both casual and formal occasions. It is especially popular among those who enjoy classic nail styles with a creative twist.
8. Ombre Poinsettia Nail Design
Ombre poinsettia nails feature a blended background that adds depth and dimension to the floral design. This style looks artistic and professional when done correctly.
Prepare the nails and apply a base coat. Choose two complementary colors such as red and pink or white and beige for the ombre effect.
Materials include makeup sponges, ombre colors, red or white polish for the poinsettia, thin brushes, and top coat. Create the ombre background using a sponge, blending the colors smoothly. Once dry, paint the poinsettia flower on top.
This design requires patience and practice but produces stunning results. Ombre poinsettia nails are ideal for those who enjoy creative nail art techniques.
9. Short Nail Poinsettia Design
Poinsettia designs can look just as beautiful on short nails when done thoughtfully. This style focuses on compact designs that fit smaller nail surfaces.
Start by trimming and shaping the nails neatly. Apply a base coat and choose light or neutral colors to avoid overcrowding the nail.
Materials include fine brushes, minimal color palette, dotting tools, and top coat. Paint small poinsettia flowers using fewer petals and simplified shapes.
This design is practical and comfortable for daily wear. It proves that nail length does not limit creativity or beauty.
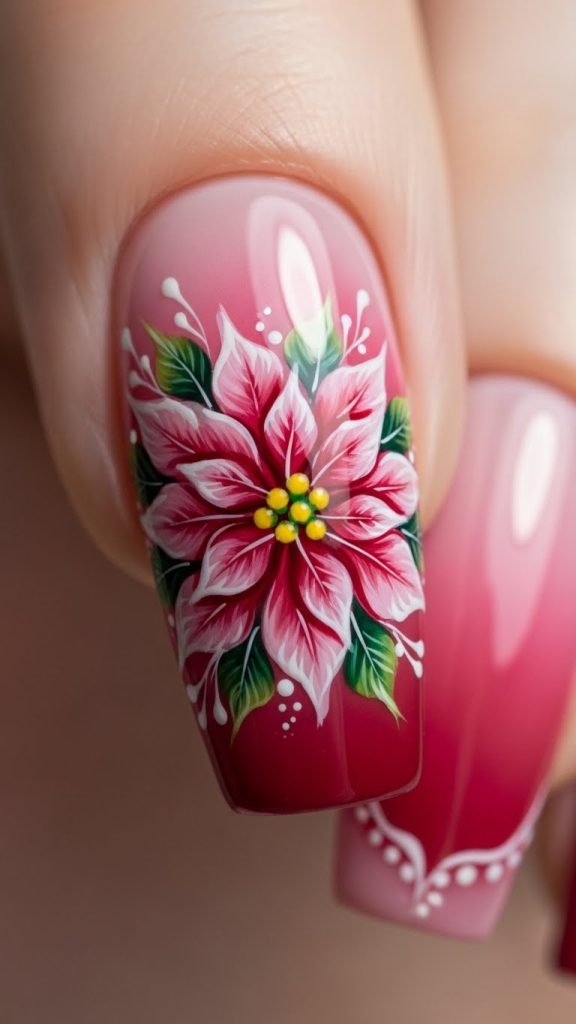
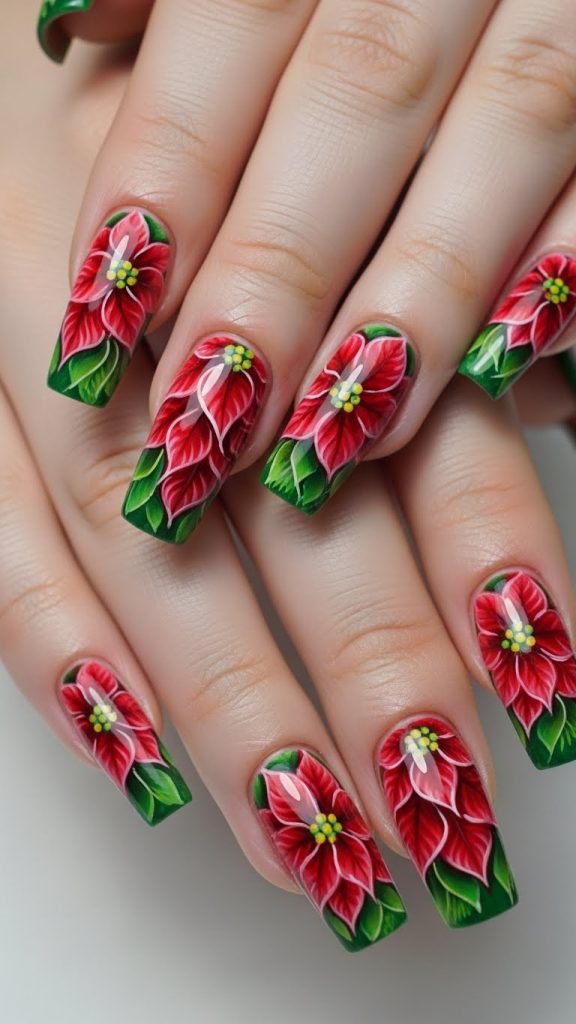
10. Hand-Painted Detailed Poinsettia Nails
Hand-painted detailed poinsettia nails are perfect for those who love intricate nail art. This design requires skill, time, and precision but offers stunning results.
Prepare the nails carefully and apply a strong base coat. Choose a smooth base color that enhances the detailed artwork.
Materials include multiple nail art brushes, high-quality polish or gel paints, dotting tools, and a durable top coat. Paint layered petals, shaded leaves, and detailed centers to create a realistic flower.
This design is best for special occasions and professional nail artists. Proper sealing ensures long-lasting wear. Hand-painted poinsettia nails are true works of art that showcase creativity and craftsmanship.


Leave a Reply