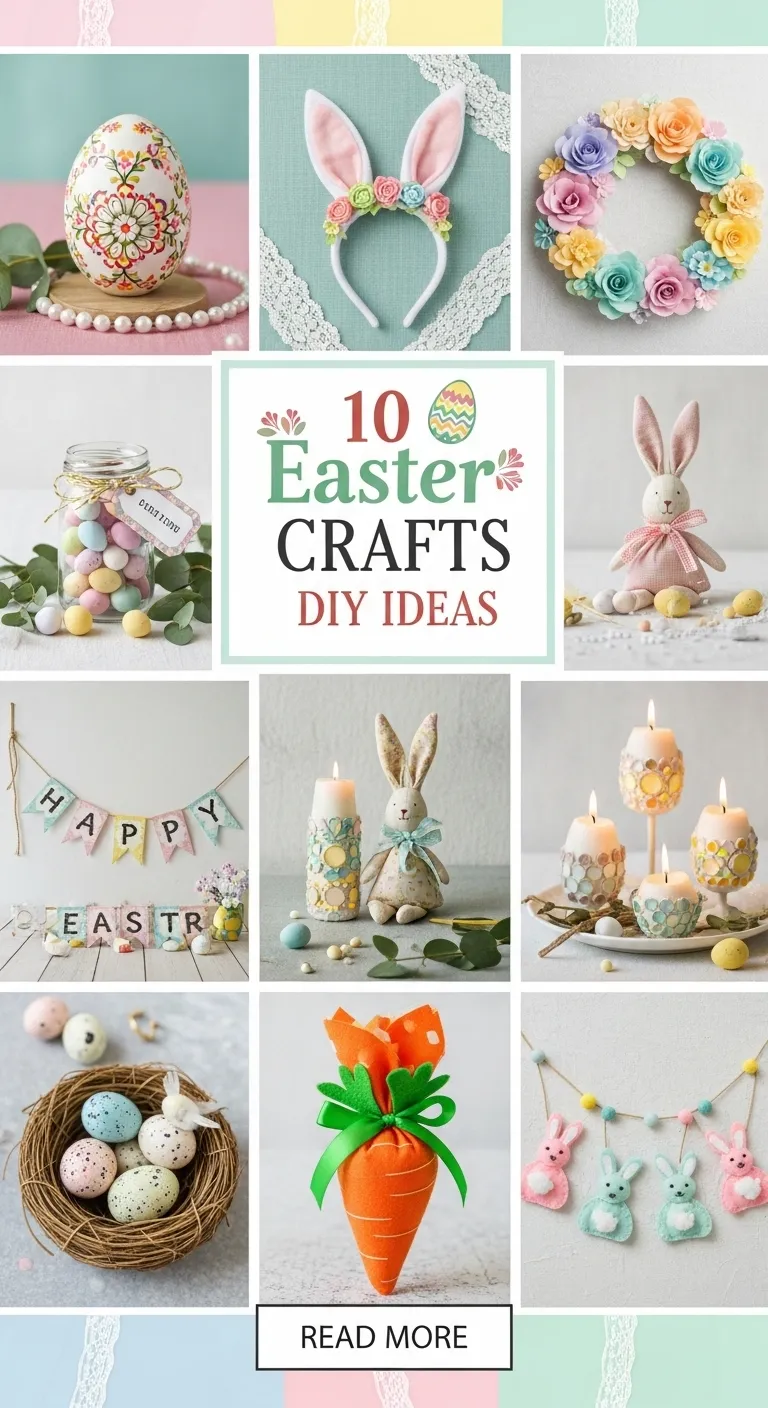
Easter is a joyful time of year that brings together family, creativity, and celebration. It is a season filled with soft pastel colors, fresh spring flowers, decorated eggs, and handmade gifts. DIY Easter crafts are a wonderful way to make the holiday more personal and meaningful. Whether you are crafting with children, planning decorations for your home, or preparing handmade gifts, there are many simple and affordable ideas you can try. Most Easter crafts use basic materials such as paper, paint, glue, fabric, ribbons, and recycled items. With a little planning and creativity, you can create beautiful decorations that reflect the spirit of the season.
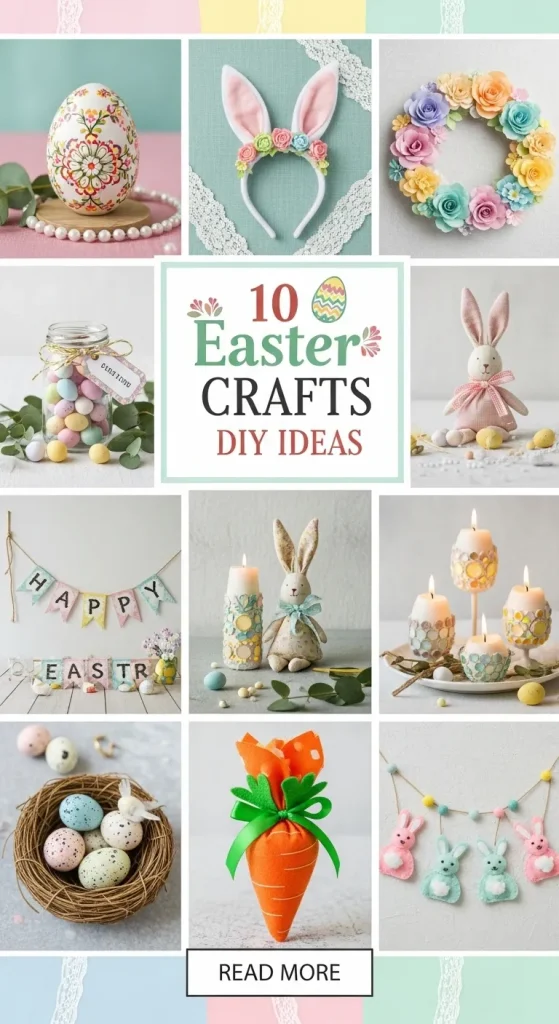
Crafting also allows you to slow down and enjoy quality time with loved ones. Children can develop fine motor skills and creativity, while adults can relax and express their artistic side. Many Easter crafts can be customized to match your home decor, party theme, or personal taste. In this detailed guide, you will find ten Easter DIY craft ideas. Each idea includes preparation steps, materials needed, and helpful tips to make your project successful. These crafts are designed to be simple, budget friendly, and enjoyable for all skill levels.
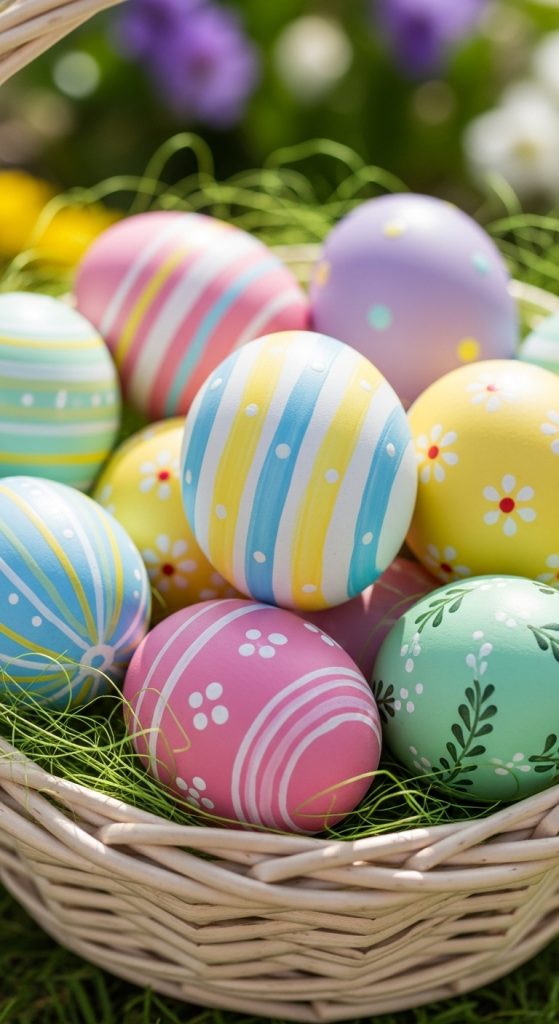
1. Hand Painted Easter Eggs
Hand painted Easter eggs are a classic and timeless craft. They are simple to make and allow for endless creativity. You can use real eggs that have been emptied and cleaned, or plastic craft eggs for durability. Begin by preparing your eggs. If you are using real eggs, carefully poke small holes at the top and bottom, blow out the contents, and rinse the shell gently. Let them dry completely before painting.
Materials needed include eggs, acrylic paint, paintbrushes, a cup of water, paper towels, and a clear sealant spray. You may also use sponges, cotton swabs, or small stencils for extra designs. Start by applying a base coat of paint and allow it to dry. Then add patterns such as stripes, dots, flowers, or small bunny shapes. Pastel colors like soft pink, light blue, yellow, and mint green are popular choices for Easter.
Once the paint is fully dry, apply a clear sealant to protect the design. This will help the eggs last longer and maintain their shine. You can display the eggs in a basket, arrange them in a bowl, or use them as table centerpieces. This craft is perfect for children and adults alike and encourages artistic freedom.
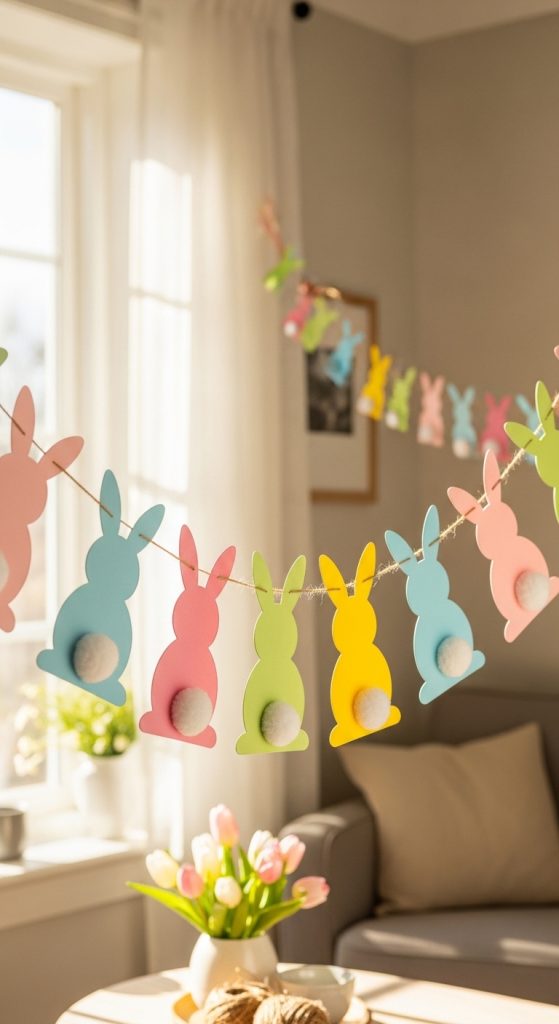
2. DIY Easter Bunny Garland
An Easter bunny garland is a charming decoration for walls, windows, or party spaces. It adds a playful touch to your home and is very easy to make. Start by choosing thick colored paper or cardstock in pastel shades. You can also use patterned scrapbook paper for extra detail.
Materials required include cardstock, pencil, scissors, glue, cotton balls, string or twine, and a hole punch. First, draw a simple bunny shape on paper and cut it out to create a template. Use this template to trace multiple bunny shapes on your cardstock. Cut out as many bunnies as you need to create your desired garland length.
Next, glue a small cotton ball onto each bunny to create a fluffy tail. Punch a small hole near the ears of each bunny and thread them onto a piece of twine or string. Space them evenly and tie small knots if necessary to keep them in place. You can also add small bows around the bunny necks for extra decoration.
Hang the garland across a mantel, doorway, or above a dessert table. This craft is inexpensive and quick to complete. It is also a fun group activity for children during Easter gatherings.
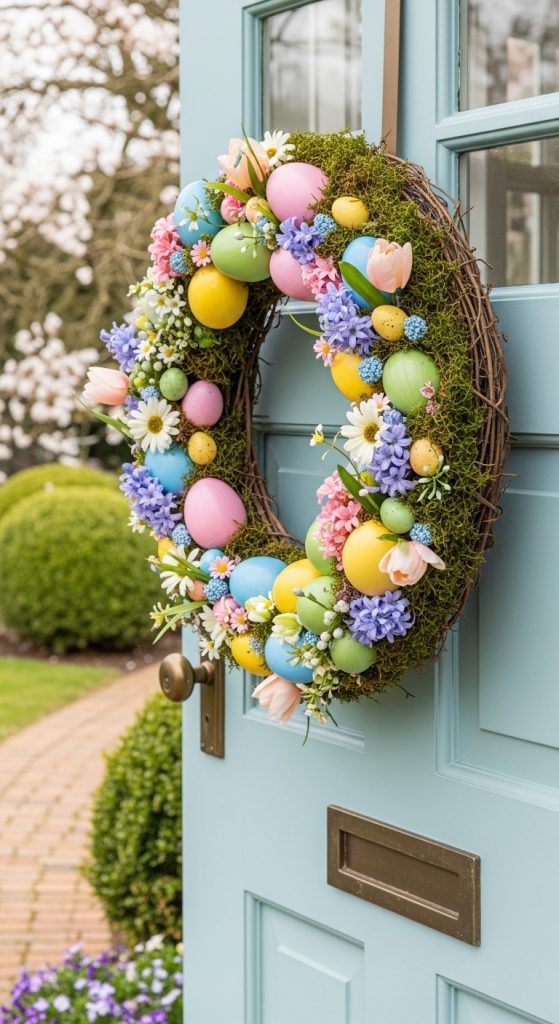
3. Easter Egg Wreath
An Easter egg wreath is a beautiful decoration for your front door. It creates a warm and welcoming atmosphere for guests. To begin, you will need a foam or grapevine wreath base. These can be found at most craft stores.
Materials include a wreath base, plastic eggs, hot glue gun, glue sticks, ribbon, artificial flowers, and decorative moss. Choose eggs in different pastel colors or paint plain plastic eggs yourself. Before gluing, arrange the eggs around the wreath to plan your design. This helps ensure even spacing and balance.
Once satisfied with the layout, attach the eggs securely using a hot glue gun. Add artificial flowers and small leaves between the eggs to create a full and layered look. You can also tuck small pieces of decorative moss around the base to hide any gaps.
Finish the wreath by attaching a wide ribbon at the top for hanging. Make a bow to add an elegant touch. Allow the glue to dry completely before hanging the wreath on your door. This project requires a bit more time and care, but the final result is impressive and can be reused every year.
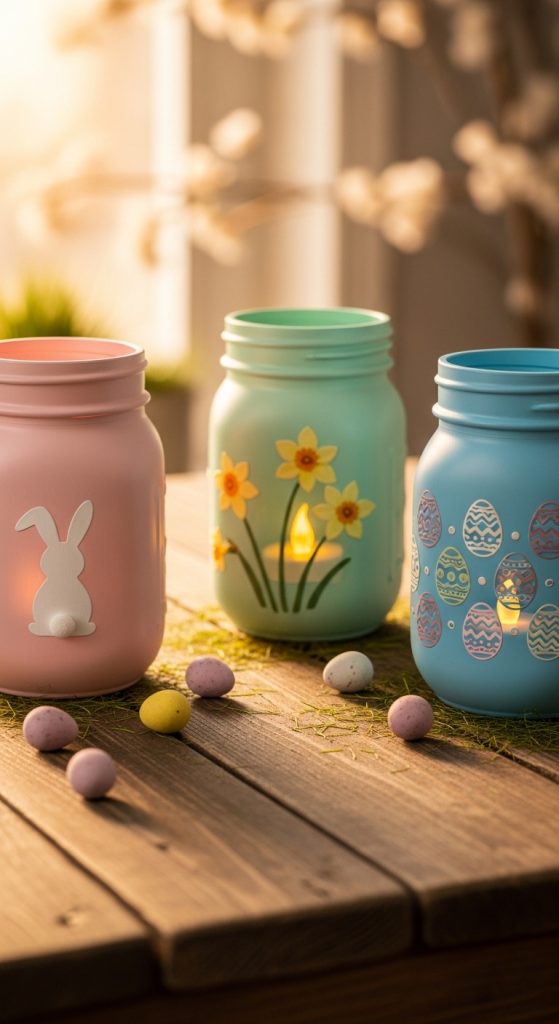
4. Mason Jar Easter Lanterns
Mason jar Easter lanterns create a soft and cozy glow for evening celebrations. They are perfect for decorating tables, shelves, or outdoor patios. Begin by cleaning your mason jars thoroughly and drying them completely.
Materials needed include mason jars, acrylic paint, paintbrushes, small LED tea lights, ribbon, and decorative stickers. You can paint the outside of the jar in pastel colors or create frosted glass effects by mixing white paint with a little water. Allow the paint to dry fully before continuing.
Add Easter themed designs such as bunnies, chicks, or eggs using stickers or freehand painting. Once your decorations are complete and dry, place an LED tea light inside the jar. Avoid real candles for safety reasons, especially if children are present.
Wrap a ribbon around the top of the jar and tie it into a bow. These lanterns look beautiful when placed in groups. They are simple to make but create a warm and inviting atmosphere. You can also personalize them with names if you are hosting an Easter dinner.
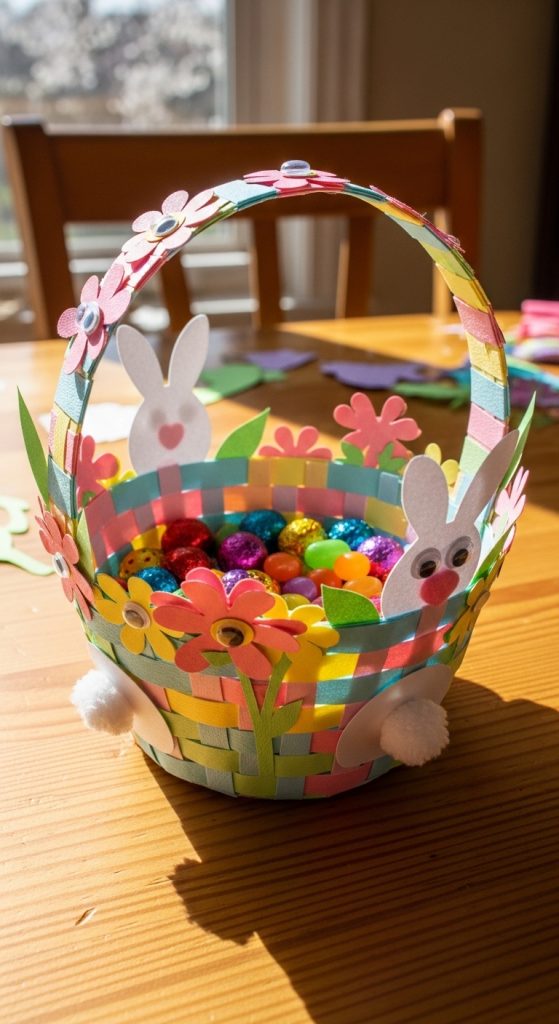
5. DIY Easter Basket from Paper
Creating a handmade Easter basket from paper is a fun and affordable craft. It is ideal for children and can be used to hold small treats or decorative eggs. Start with sturdy construction paper or lightweight cardboard.
Materials include colored paper, scissors, glue or tape, ruler, pencil, and decorative items such as stickers or markers. Cut a square piece of paper. Fold it evenly and make small cuts along the sides to form flaps. Fold the flaps inward and secure them with glue to form the basket shape.
Cut a long strip of paper to create the handle. Attach it to opposite sides of the basket using glue or tape. Once the basic structure is complete, decorate the basket with drawings, stickers, or glued shapes. You can add paper flowers or small bunny faces for extra detail.
Allow the glue to dry before placing items inside. These baskets are lightweight and best suited for small candies or plastic eggs. This craft encourages creativity and can be customized in many ways.
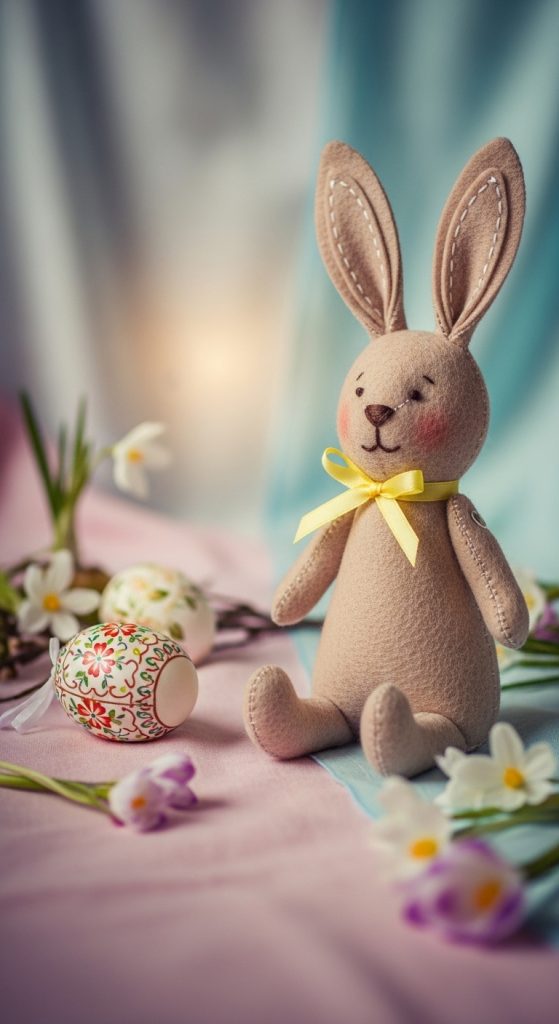
6. Felt Easter Bunny Plush
A felt Easter bunny plush is a soft and adorable handmade decoration. It can also be given as a gift. Begin by drawing a simple bunny outline on paper to create a template.
Materials required include felt sheets, scissors, needle, thread, stuffing material, fabric glue, and small buttons or embroidery thread for facial features. Trace the bunny shape onto felt twice and cut out both pieces. Place them together and sew around the edges, leaving a small opening.
Fill the bunny with stuffing until it feels soft but firm. Sew the opening closed carefully. Use embroidery thread to stitch eyes, a nose, and a mouth. You can also glue small buttons for eyes if preferred.
Add a ribbon bow around the neck for decoration. This project requires basic sewing skills but is simple enough for beginners. It is a wonderful keepsake that can be used year after year as part of your Easter decorations.
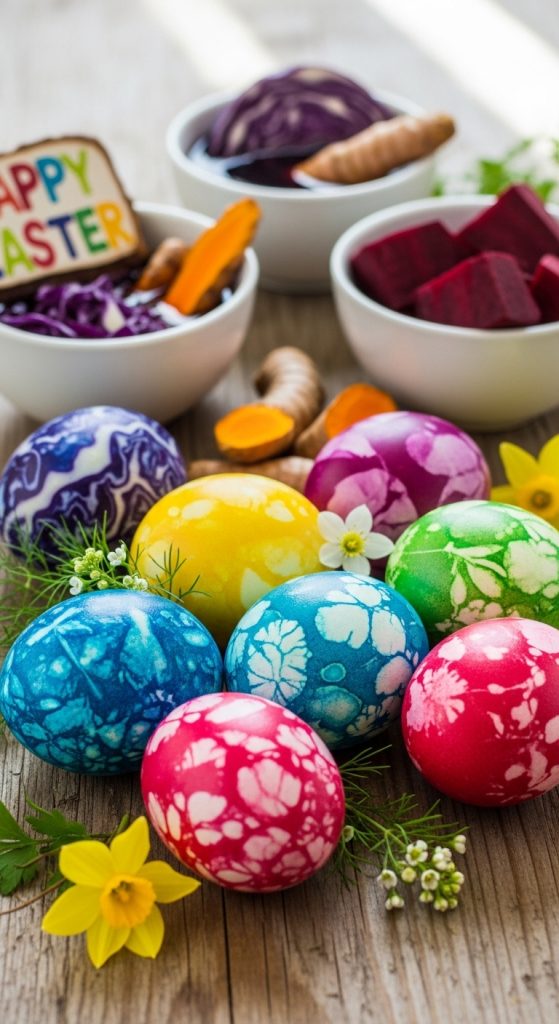
7. Easter Egg Decorating with Natural Dyes
Using natural dyes to color Easter eggs is a creative and eco friendly idea. It also teaches children about natural ingredients. Instead of artificial coloring, you can use fruits, vegetables, and spices.
Materials include white eggs, vinegar, water, and natural ingredients such as red cabbage, turmeric, onion skins, or beetroot. Boil each ingredient separately in water to create colored dye. Strain the liquid and add a tablespoon of vinegar to help the color stick.
Place boiled eggs into the dye and let them soak for several hours or overnight for deeper colors. Red cabbage creates blue shades, turmeric gives yellow, and beetroot produces soft pink tones. The results may vary, which adds to the beauty of the craft.
Once dry, lightly rub the eggs with a little vegetable oil to give them a soft shine. This method avoids harsh chemicals and produces beautiful earthy tones. It is a meaningful way to connect Easter traditions with nature.
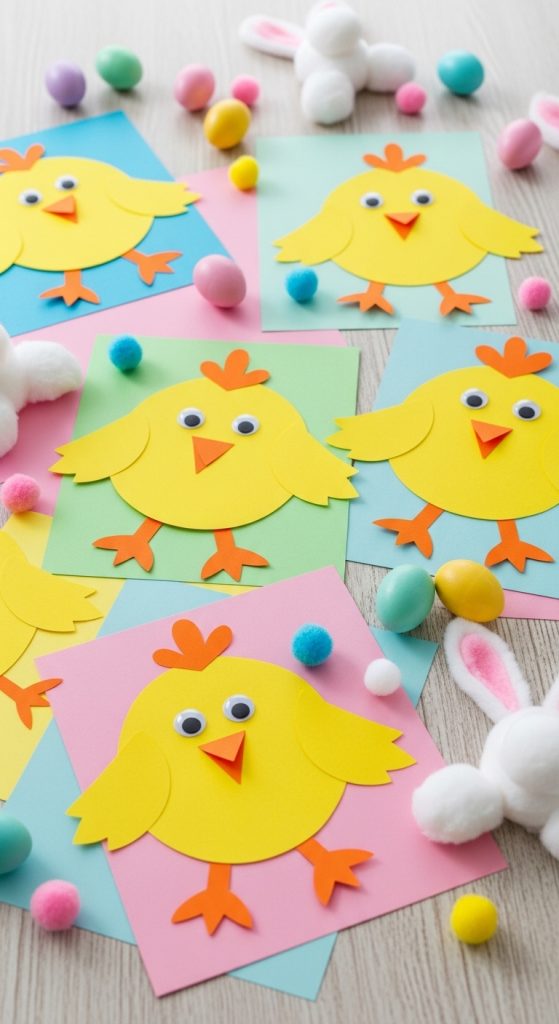
8. Easter Chick Paper Craft
An Easter chick paper craft is bright and cheerful. It is perfect for young children and classroom activities. Start with yellow construction paper as the main base.
Materials include yellow and orange paper, glue, scissors, black marker, and googly eyes if desired. Cut a large circle from yellow paper for the chick’s body. Cut smaller wing shapes and glue them to the sides. Use orange paper to cut out a small triangle for the beak and two small feet shapes.
Attach the beak and feet to the body using glue. Draw eyes with a marker or glue on googly eyes. You can add details such as small feathers or patterns on the wings.
This craft is quick and simple but brings lots of joy. It can be displayed on walls or refrigerators. Children enjoy creating their own unique chicks by changing facial expressions or adding accessories.
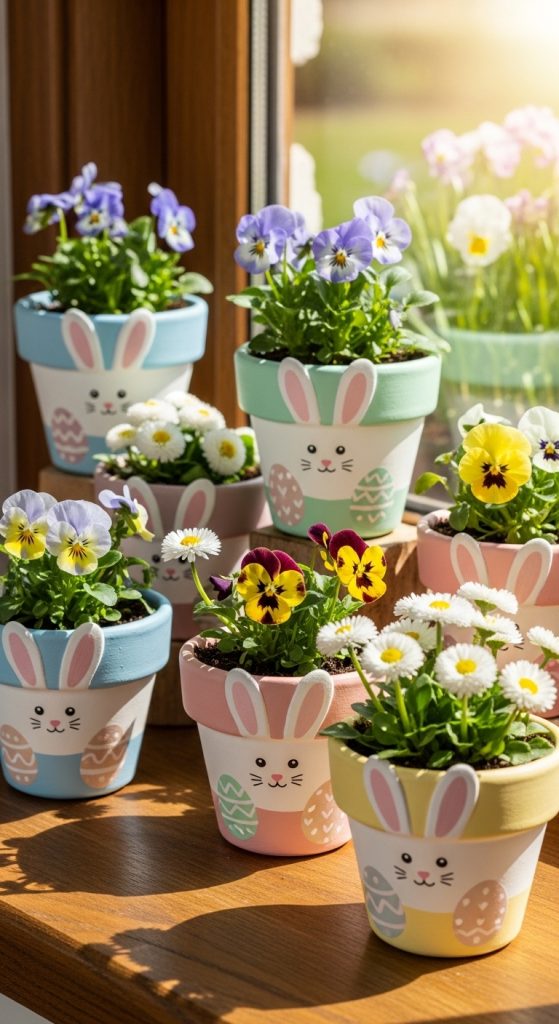
9. Easter Flower Pot Decoration
Decorating flower pots for Easter combines crafting with gardening. It is a lovely way to welcome spring. Begin with plain clay pots, which are easy to paint.
Materials needed include clay pots, acrylic paint, paintbrushes, clear sealant, potting soil, and small spring flowers like pansies or daisies. First, clean the pots and allow them to dry. Paint them in soft pastel shades or design them with bunny faces or egg patterns.
Allow the paint to dry fully and apply a clear sealant to protect the design. Fill the pots with soil and plant your chosen flowers. Water them gently and place them near windows or on porches.
These decorated pots brighten up your home and garden. They also make thoughtful gifts for friends or neighbors. Combining plants with craft adds life and freshness to your Easter decorations.
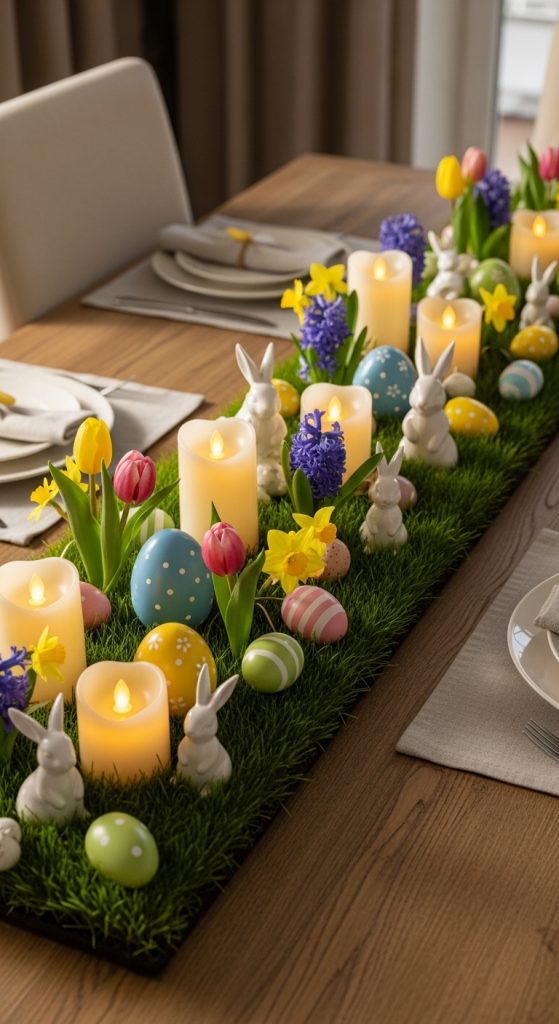
10. DIY Easter Table Centerpiece
A DIY Easter table centerpiece can transform your dining area into a festive space. It does not have to be complicated or expensive. Start with a simple tray or shallow basket as the base.
Materials include decorative eggs, candles, artificial grass, flowers, ribbon, and small figurines such as bunnies or chicks. Arrange artificial grass at the bottom of the tray. Place decorative eggs around the edges and position a candle in the center. Use LED candles for safety if children are present.
Add small flowers or greenery to fill empty spaces. Keep the arrangement balanced and not too crowded. Tie ribbon around the tray handle or place small name cards for guests.
This centerpiece becomes the focal point of your Easter meal. It reflects effort and creativity while bringing warmth to the table. You can reuse the items for future celebrations by storing them carefully.
These ten Easter DIY crafts provide a variety of creative options for celebrating the season. From simple paper projects to decorative wreaths and centerpieces, there is something suitable for every age and skill level. With basic materials and thoughtful preparation, you can create meaningful decorations and lasting memories.


Leave a Reply