
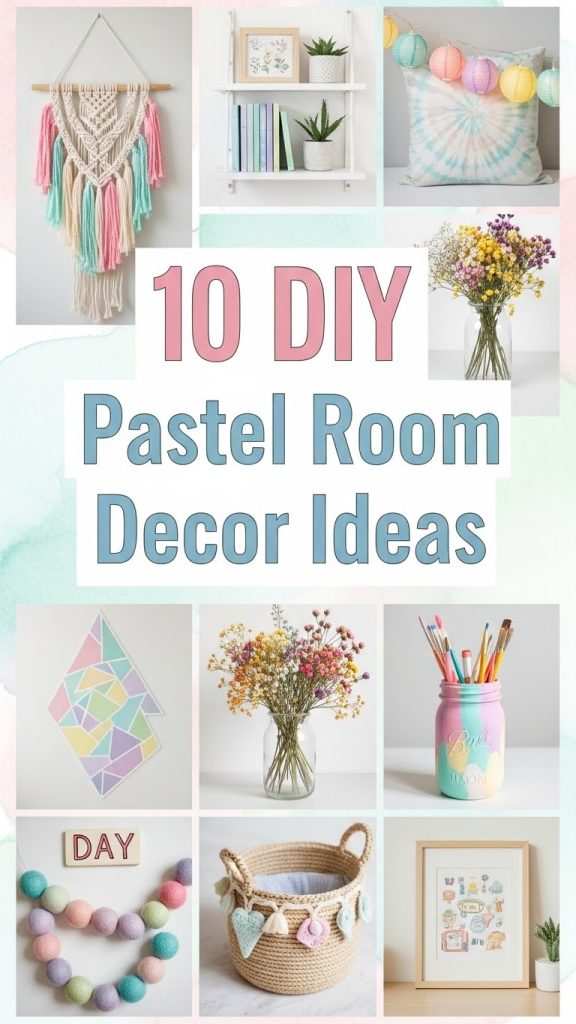
Creating a pastel themed room is one of the most calming and visually pleasing choices for home decor. Pastel colors bring a soft and dreamy atmosphere to any space, making your room feel airy, relaxing, and aesthetically consistent. Whether you prefer shades of blush pink, soft lavender, mint green, baby blue, or muted peach, pastel tones help create a balanced environment that feels both youthful and elegant. Decorating with pastels does not require a large budget or professional level crafting skills. Many beautiful pastel themed decor elements can be created using simple materials available at craft stores or even from items you already have at home. In this detailed blog post, you will find ten DIY pastel room decor ideas, each explained with preparation, materials needed, and a step by step guide to help you complete the projects with ease. These ideas are designed for all skill levels and will assist you in transforming your room into a cohesive pastel inspired space. Whether you want small accent pieces or larger statement decor, these projects will add charm and personality to your room while allowing you to express your creativity through soft and soothing colors.
1. DIY Pastel Painted Wooden Shelves
Pastel painted wooden shelves are an excellent way to add both storage and charm to your pastel themed room. To begin this project, you need small to medium sized wooden shelves, sandpaper, primer, pastel acrylic or chalk paint, brushes, and a clear matte sealer. Start by sanding the surface of the shelves to remove any uneven texture or old finish. Wipe off dust with a dry cloth before applying a thin layer of primer. Primer is essential because pastel colors are lighter and may require more coats if painted directly onto wood. Once the primer dries, apply your first coat of pastel paint. You can choose a single color for a sleek look or paint each shelf a different pastel shade for a more playful appearance. After the first coat dries, apply a second coat for a smooth and opaque finish. Once fully dry, seal the paint with a matte clear coat to protect it from scratches and moisture. Finally, mount the shelves using proper wall anchors. These pastel shelves provide extra storage for books, display items, or small plants while enhancing your room with a clean and soft aesthetic.

2. Pastel Ombre Wall Art Canvas
Creating pastel ombre canvas art is a simple yet elegant way to bring more color into your room. You will need one or more blank canvases, pastel acrylic paints, a blending sponge or wide flat brush, painter tape, and a palette for mixing. Begin by selecting your color combinations. Choose two or three pastel tones that blend well together, such as pink to peach or blue to lavender. Tape the canvas edges if you want clean borders. To create the ombre effect, start at one end of the canvas with your darkest pastel tone. Apply a horizontal band of color. Next, apply the second pastel shade slightly overlapping the first. Use a blending sponge or brush to blend the colors where they meet. Continue this technique until you reach the opposite end of the canvas. Work quickly while the paint is still wet to ensure smooth transitions. Let the canvas dry completely before removing the tape. You can create a set of canvases to hang as a trio for a coordinated pastel gallery wall. This art adds a soft gradient effect to your room and makes the space appear calm and spacious.

3. DIY Pastel Macrame Wall Hanging
A pastel macrame wall hanging adds texture, artistic detail, and a handcrafted touch to your room. For this project, gather pastel cotton macrame cord, a wooden dowel, scissors, and a measuring tape. Start by cutting cords into equal lengths depending on the size of the hanging you want. Attach each cord to the wooden dowel using a larks head knot. Once all cords are attached, begin creating your chosen knot pattern. Basic macrame knots such as square knots, spiral knots, or diagonal clove hitch knots work particularly well with pastel cord because the soft colors enhance the gentle nature of the design. Continue knotting row by row until you reach your preferred length. Trim the bottom cords to create a straight, pointed, or wavy finish. You can also incorporate multiple pastel shades for a gradient or striped effect. Macrame hangings pair well with minimalist pastel rooms, offering both structure and softness. Hang the finished piece above your bed, near your desk, or as part of a feature wall.

4. Pastel Painted Mason Jar Organizers
Pastel mason jars are an affordable DIY decor option that doubles as practical storage for pens, brushes, makeup, or other small items. You will need clear mason jars, pastel chalk paint, painter tape, brushes or sponges, and a matte sealer. Clean the jars thoroughly before painting. Apply painter tape if you want clean stripes or geometric patterns. For a solid pastel look, apply two thin coats of chalk paint to the exterior of the jars. Chalk paint works best because it adheres well to glass and creates a smooth matte finish. Allow the first coat to dry completely before applying the second. Once dry, lightly sand edges for a distressed pastel look or keep them smooth for a polished finish. Seal the jars with a matte clear spray to prevent chipping. You can create a matching pastel set using colors like mint, lilac, and blush. Arrange the jars on your desk, vanity, or shelf for a cohesive and functional pastel storage system.

5. DIY Pastel Throw Pillow Covers
Pastel throw pillows add softness and comfort to your room decor. To create your own pastel pillow covers, gather plain white or off white fabric pillowcases, pastel fabric paint or dye, fabric brushes, painter tape, and a plastic sheet to protect your workspace. Begin by choosing your design style. You can create tie dye patterns, watercolor effects, stripes, or stenciled shapes using pastel paints. For a watercolor style, dilute fabric paint with water and apply broad strokes to the pillow cover. For stripes or geometric shapes, use painter tape to create clean lines before applying pastel colors. If you prefer fabric dye, prepare a dye bath using a light concentration to achieve soft pastel tones. Dip sections of the pillowcase or fully submerge it for a uniform color. Allow the covers to dry completely before heat setting the color with an iron. These pastel pillows add visual interest and coordinate well with other pastel decor elements in your space.

6. Pastel Desk Organizer Using Cardboard
Creating a pastel desk organizer from cardboard is a budget friendly and customizable decor project. Collect sturdy cardboard sheets, glue, a cutter, pastel acrylic paints, and a ruler. Begin by planning the compartments you want in your organizer. Draw and cut out the base, walls, and dividers. Assemble the structure using strong craft glue or hot glue. Allow it to dry completely so it becomes stable. Next, paint the entire organizer with pastel paints. Aim for two coats to achieve a smooth finish. You can paint different sections in various pastel shades or keep it uniform for a cleaner look. Optional decorative choices include adding pastel polka dots, stripes, or blending two shades for a soft gradient. Once dry, you can use the organizer to store stationery, notebooks, planners, or small accessories. This project helps maintain a tidy workspace while enhancing your desk environment with soft pastel visuals.

7. DIY Pastel Bead Garland
A pastel bead garland is an easy DIY project that adds subtle decoration to walls, shelves, mirrors, or door frames. To make one, gather wooden beads, pastel acrylic paints, brushes, twine or string, and a needle if needed. Start by painting the beads in your chosen pastel shades. Use light coats to preserve the natural texture of the wood or apply extra coats for a solid finish. Allow the beads to dry completely before stringing them. You can create a repeating color pattern or mix random pastel tones for a playful effect. Once all beads are strung, tie knots at both ends of the garland to secure them. You can also add tassels made from pastel yarn for extra texture. Hang the garland along shelves or drape it over a picture frame to enhance your pastel aesthetic without overwhelming the space.

8. DIY Pastel Mirror Border Frame
A pastel mirror frame brightens your room while offering a subtle decorative accent. For this project, use a plain wall mirror, painter tape, pastel spray or acrylic paint, sandpaper, and a matte sealer. If the mirror has a wooden or plastic frame, lightly sand it to help the paint adhere. Clean the surface, then cover the mirror glass with painter tape or newspaper. Apply the first coat of pastel paint evenly across the frame. Spray paint creates a smoother finish, but acrylic paint works just as well with a flat brush. Allow it to dry before adding a second coat. If you want a multi toned frame, tape off sections to apply contrasting pastel colors. Once the frame is fully painted and dry, apply a matte sealer for durability. This pastel mirror works well above a vanity, desk, or entry table, contributing to a cohesive pastel theme.

9. Pastel Fabric Bunting Banner
A pastel bunting banner is a simple decoration that adds charm to your walls or windows. To create one, collect pastel fabric scraps or felt sheets, scissors, ribbon or twine, a hot glue gun, and cardboard templates for cutting consistent shapes. Start by drawing and cutting triangle or semicircle templates. Use the templates to cut multiple pieces of pastel fabric. Arrange the fabric pieces in your preferred color order. Next, lay out the twine or ribbon and attach each fabric piece by folding the top edge over the string. Secure with hot glue and press gently until set. Make sure the spacing between pieces is even for a clean finished look. Once the glue dries, hang the banner above your bed, across a window, or near a bookshelf. This pastel bunting adds a whimsical, soft touch to your room while being easy to customize based on your favorite pastel shades.

10. DIY Pastel Painted Clay Trinket Dishes
Pastel trinket dishes are not only decorative but also useful for jewelry, keys, or small items. You will need air dry clay, pastel acrylic paints, a rolling pin, a small bowl for shaping, and a matte sealer. Begin by kneading the clay until soft. Roll it out to an even thickness and use a bowl to cut out a circular shape. Place the clay circle inside the bowl to form a slight curve. Allow it to dry for at least 24 hours until fully hardened. Once dry, sand any rough edges before painting the dish in pastel colors. You can paint the entire dish or create simple designs like stripes, dots, or blended color patterns. Once the paint dries, apply a matte sealer to protect the surface. These pastel clay dishes look delicate and elegant on vanities, nightstands, or desks.

Leave a Reply