Creating home decor through simple do it yourself projects allows you to personalize your living space while staying within budget. DIY projects also help you experiment with different styles without committing to expensive store bought decor. The following ideas are designed to be easy, beginner friendly, and achievable with commonly available materials. Each idea includes preparation steps, materials needed, and an explanation of how to execute the design effectively. Whether you are updating a bedroom, living room, or a small corner of your home, these ideas can add style, warmth, and personality to your environment. They do not require advanced crafting experience and most can be completed in a few hours or less. With the right approach, you can elevate your home decor through creativity and simple hands on work. Below are ten detailed DIY home decor ideas to help you transform your space.
1. Painted Mason Jar Flower Vases
Painted mason jar vases are an excellent DIY project because they are affordable, versatile, and customizable. To begin, gather clean mason jars, acrylic paint, a paintbrush, sandpaper optional, and a clear sealant spray. You can choose matte or glossy paint depending on the final finish you prefer. Before painting, make sure the jars are washed thoroughly and dried. A clean surface helps paint adhere properly. Apply the first coat evenly and let it dry completely before adding a second coat, which ensures solid coverage. If you prefer a rustic or distressed look, lightly sand the raised portions of the jar once the paint is fully dry. This technique creates depth and texture. Seal the jar with a clear spray sealant to protect the paint and provide durability. Use your painted jars as decorative flower vases, utensil holders, or standalone accent pieces. Customize colors to match the theme of your room. This project works well for seasonal decor changes or special events where color coordination matters. The result is an elegant handcrafted vase that adds charm to any room in your home.

2. Floating Rope Shelves
Floating rope shelves provide a natural and rustic style that fits well in modern, farmhouse, or coastal interiors. They are surprisingly simple to construct and require minimal tools. Materials include wooden planks, strong rope, a drill, hooks for ceiling or wall mounting, and sanding paper. Start by sanding the wooden planks to smooth rough edges. Next, drill two holes at each end of the plank where the rope will pass through. Cut equal lengths of rope based on the height of the shelf placement. Thread the rope through the holes and secure knots under the plank to hold it in place. You can stack multiple planks to create tiered shelving by repeating the knot process at determined intervals. Install sturdy hooks or brackets on the wall or ceiling and hang the shelves by tying the upper ends of the rope. Ensure the knots are tight to maintain balance. Floating rope shelves work well for holding lightweight decor items such as plants, candles, books, or photo frames. They add a handcrafted and natural touch to your home and can be customized with paint or wood stain to match your preferred style.

3. Fabric Covered Canvas Wall Art
Fabric covered canvases are an inexpensive way to introduce color, pattern, and personality to your walls. This DIY project requires canvas frames, fabric pieces, scissors, a stapler or fabric glue, and an optional iron. Choose a piece of fabric that complements your room decor. Patterns like floral prints, geometric designs, or textured linens can dramatically change the look of a plain wall. Before attaching the fabric, iron it to remove wrinkles for a cleaner finish. Place the fabric face down and center the canvas frame on top of it. Stretch the fabric tightly around the edges and staple it to the wooden back of the canvas. Make sure the corners are folded neatly to achieve a professional appearance. If you prefer a no staple method, fabric glue can be used to secure the edges. Once finished, hang the canvas pieces in groups of two or three to create visual balance. Fabric covered wall art is easy to update whenever you want a new look. Simply recover the canvas with a different fabric. This project is ideal for renters or anyone decorating on a budget.

4. Decorative Wooden Crate Storage
Wooden crates can be transformed into stylish storage solutions with minimal effort. They are versatile and can be used for book organization, plant display, or functional shelving. For this project, you need wooden crates, sandpaper, paint or stain, a brush, and optional caster wheels. Begin by sanding the crate to smooth out rough surfaces. Decide whether you prefer a natural wood look using stain or a colorful painted finish. Apply your chosen product evenly and allow it to dry before applying a second coat. If you plan to use the crate as a mobile storage unit, attach caster wheels to the bottom using screws. You can stack multiple crates vertically to build a shelving system or place them horizontally for a low storage unit. Decorative crate storage adds texture and charm to any room, whether placed in a living room, bedroom, or entryway. The open design keeps items visible and accessible. It is an affordable way to add style and organization to your home.

5. Hand Painted Accent Throw Pillows
Creating your own accent pillows allows you to customize patterns and colors that reflect your personal style. For this project, use plain pillow covers, fabric paint, stencils optional, painter tape, and brushes or sponges. Begin by laying the pillow cover on a flat surface and inserting cardboard inside to prevent paint from bleeding through. Use stencils or freehand designs to apply paint to the fabric. Painter tape can be used to create clean lines for geometric shapes. Fabric paint dries quickly but allow at least a few hours before handling to avoid smudging. Once dry, heat set the paint by ironing the pillow cover on low heat if recommended by the paint manufacturer. This ensures long lasting designs. Hand painted pillows can enhance sofas, chairs, or beds with a personalized touch. You can create seasonal designs for holidays or trendy patterns like stripes, brush strokes, or abstract shapes. It is an affordable alternative to purchasing decorative pillows from stores.

6. Simple Indoor Plant Terrariums
Terrariums offer a refreshing natural element to home decor and are easy to assemble. The materials include a clear glass container, small pebbles, potting soil, activated charcoal optional, and small indoor plants such as succulents. Start by cleaning the glass container thoroughly. Add a layer of pebbles at the bottom to allow drainage and prevent roots from sitting in water. A thin layer of activated charcoal helps control odors and moisture. Next, add potting soil suitable for the chosen plants. Position your plants inside the container and gently press the soil around the roots to secure them. Avoid overwatering as terrariums require minimal moisture. Place the terrarium in a well lit area but avoid direct sunlight as glass can trap heat. Terrariums can be placed on shelves, desks, or coffee tables where they act as calming focal points. They are low maintenance and suitable for small spaces. This project brings nature indoors and enhances the beauty of your home with minimal effort.

7. DIY Photo Clip String Display
A photo clip string display is a charming and personalized way to showcase photographs, notes, or small artwork. To create one, gather string or twine, mini wooden clips, nails or adhesive hooks, and optional fairy lights for added effect. Start by deciding where you want the display to be placed. Measure the length of the wall or area and cut the string accordingly. Attach the ends of the string to the wall using nails or adhesive hooks. Make sure the string is taut enough to hold weight without sagging too much. Clip your photos along the string using wooden clips. For a more decorative look, weave a string of fairy lights along the photos. This adds warmth and ambiance to your space. Photo clip displays are flexible, allowing you to update pictures easily without damaging walls. They work perfectly in bedrooms, living rooms, or hallways and provide a handmade, cozy feel to your home.

8. Painted Wooden Signs
Painted wooden signs are a timeless DIY decor option used to display meaningful quotes, welcome messages, or single word accents. To begin, collect a wooden board, sanding paper, paint, brushes, stencils optional, and sealant. Start by sanding the wood to eliminate rough spots. Apply a base coat of paint or leave the wood natural depending on your desired look. Once the base is dry, use a stencil or freehand techniques to paint letters or designs onto the board. Keep your strokes neat and steady for a clean finish. After the paint dries, apply a clear sealant to protect the design from wear. Hang the sign using hooks or lean it against a shelf for a casual look. Wooden signs complement rustic, farmhouse, and traditional decor styles. They are easy to personalize and can be made in various sizes. This project adds warmth and character to your home through handcrafted artwork.

9. Decorative Candle Jars
Decorative candle jars bring soothing warmth to any interior and are simple to create. The required materials include empty glass jars, wax flakes, wicks, a melting container, essential oils optional, and decorative elements such as ribbon or twine. Begin by cleaning the jars to remove any labels or residue. Melt the wax over low heat, ensuring it becomes liquid without overheating. Place the wick in the center of the jar, using a wick holder or pencil to keep it upright. Add essential oils for fragrance if desired. Carefully pour the melted wax into the jar, leaving a small gap at the top. Allow the candle to cool and harden for several hours. Once fully set, trim the wick and decorate the jar with ribbon or twine. These custom candles can be displayed in living rooms, bedrooms, or bathrooms to create a cozy atmosphere. They also make thoughtful gifts. Candle making is cost effective and allows you to experiment with scents and colors.

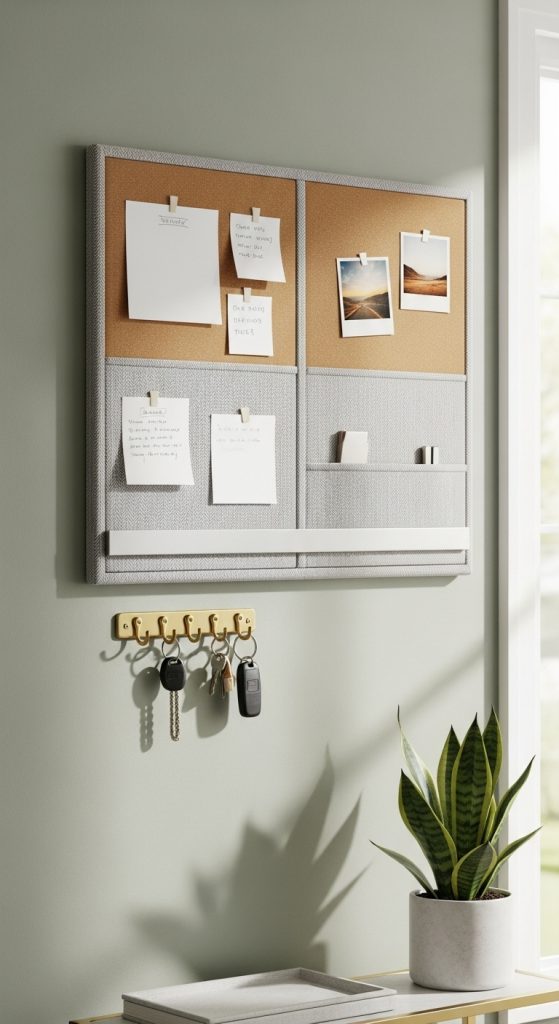
10. DIY Wall Mounted Organizer Board
A wall mounted organizer board helps keep your space neat while adding a stylish element to your decor. Materials include a cork board or wooden board, paint, push pins or hooks, adhesive tape, and optional fabric. Begin by painting or covering the board with fabric to match your home aesthetic. Stretch fabric tightly across the board and secure it on the back using adhesive tape. Add decorative trims or borders for a polished appearance. Install small hooks or clips to hold keys, notes, or accessories. Mount the organizer board on the wall using strong adhesive strips or screws. This project is ideal for entryways, offices, or kitchens where organization is essential. It serves both functional and decorative purposes. You can customize the board with specific sections for scheduling, reminders, or inspirational quotes. An organizer board keeps your daily essentials visible and accessible while enhancing the overall design of your space.


Leave a Reply