
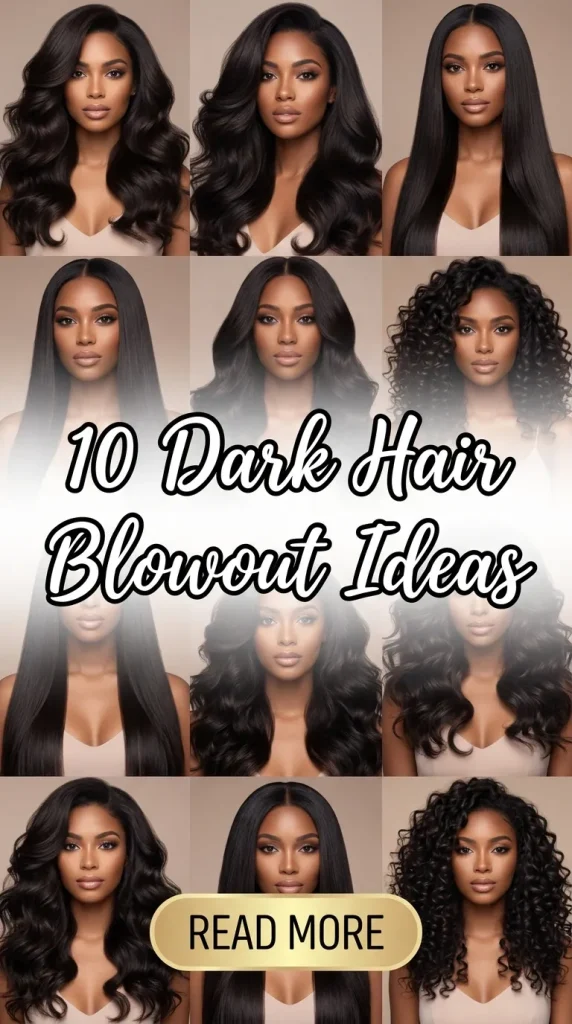
Dark hair offers a rich, versatile base that enhances shine, depth, and dimension when styled properly. Blowout techniques are especially effective for showcasing these qualities, making them a popular choice in modern Pinterest ideas and everyday beauty routines. A blowout is a styling method that uses heat and controlled airflow to smooth, shape, and add volume to hair without relying heavily on curling or straightening tools. This article explores ten distinct dark hair blowout styles that combine aesthetic appeal with practical execution. Readers will learn how to achieve each look through clear, step-by-step methods that are beginner friendly and adaptable to different hair types and lengths. Each idea focuses on realistic styling techniques, accessible materials, and consistent results. These styles are useful for both daily wear and special occasions, offering flexibility within a structured DIY approach. The goal is to provide creative ideas that align with current trends while remaining easy to replicate at home with proper planning and preparation.
Why This Idea Is Trending or Useful
Blowout hairstyles for dark hair have gained popularity due to their polished finish and compatibility with modern design preferences. Many Pinterest ideas emphasize clean lines, natural volume, and subtle movement, all of which are achievable through blowout techniques. These styles are practical because they do not require advanced hairstyling skills or expensive tools, making them accessible for beginners. The DIY appeal is strong, as most methods rely on basic materials such as a hairdryer, round brush, and heat protectant. Additionally, blowouts support organization in daily routines by offering long-lasting results that can extend across multiple days with minimal touch-ups. This makes them efficient for individuals managing time and styling needs simultaneously. The aesthetic value also aligns with minimalist style trends, where smooth, controlled hair complements structured outfits and simple home decor environments. Overall, dark hair blowout styles provide a balance between elegance and practicality, making them a consistent choice in trending ideas for personal grooming.
Materials and Preparation
Before starting any blowout style, proper preparation ensures consistent and high-quality results. Essential materials include a hairdryer with adjustable heat settings, a round brush suited to hair length, sectioning clips, a wide-tooth comb, and a heat protectant product. Optional tools such as a nozzle attachment for the dryer and a finishing serum can enhance precision and shine. Preparation begins with washing the hair using a lightweight shampoo and conditioner that supports smoothness without weighing the hair down. Towel-dry the hair gently to remove excess moisture, then apply heat protectant evenly from roots to ends. Detangle the hair using a comb to prevent breakage during styling. Section the hair into manageable parts using clips, typically dividing it into top, middle, and bottom layers. Planning the style in advance helps maintain consistency, especially when following a step-by-step tutorial. Choosing the right brush size and airflow direction is also important, as these factors influence volume and shape. Proper preparation reduces styling time and improves the final outcome.
Idea 1: Sleek Straight Blowout
How to Create
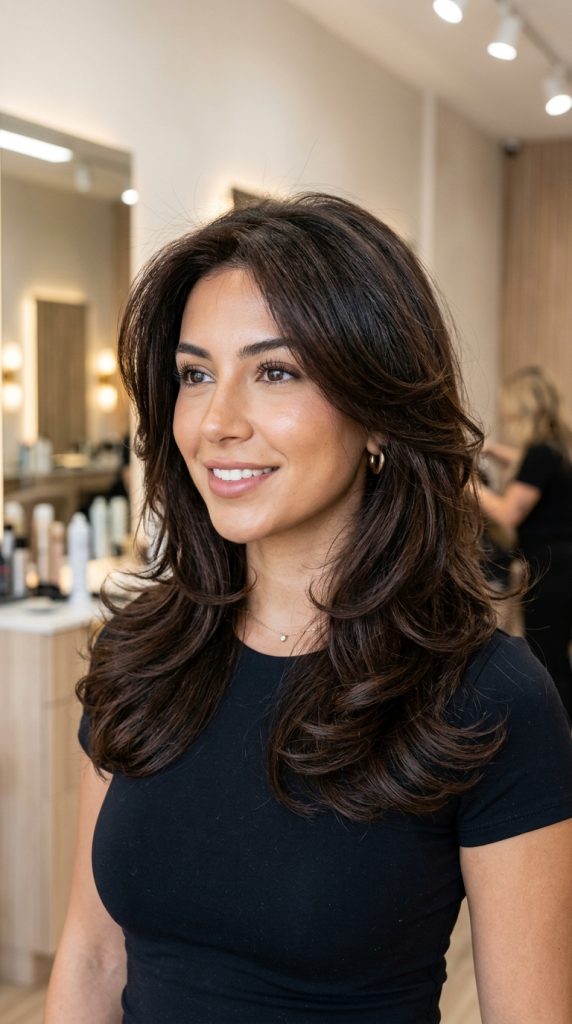
This style focuses on achieving a smooth, polished finish that highlights the natural shine of dark hair. The sleek straight blowout is defined by minimal volume and a clean, controlled silhouette. It works well for professional settings and aligns with minimalist style trends often seen in Pinterest ideas. The key concept is to reduce frizz and create uniform alignment of the hair strands. This look emphasizes precision and balance, making it suitable for medium to long hair lengths. The aesthetic remains simple yet refined, offering a timeless option for everyday wear. This creative project requires attention to detail, particularly in maintaining consistent tension while drying the hair. The result is a glossy, straight appearance that enhances the depth and richness of dark tones without additional decoration.
To achieve this style, begin by dividing the hair into small sections. Use a round brush or paddle brush, depending on hair length, and direct the airflow downward to smooth the cuticle. Work from the roots to the ends slowly, maintaining steady tension. Use a nozzle attachment for better control and focus. Repeat the process for each section until the entire head is dry. After drying, apply a small amount of serum to enhance shine and reduce flyaways. This step-by-step method ensures a uniform finish and long-lasting results. Keep movements consistent to avoid uneven texture. This easy project is beginner friendly and requires minimal adjustment once mastered.

Idea 2: Voluminous Root Lift Blowout
Step-by-Step Guide
The voluminous root lift blowout focuses on creating height at the roots while maintaining smooth ends. This style is widely used in home decor-inspired beauty aesthetics, where fullness and structure create visual balance. It is ideal for individuals with fine or flat hair who want to add dimension without curls. The concept revolves around lifting the hair upward during drying to create volume at the scalp. This approach enhances the overall shape of the hairstyle while keeping it controlled and manageable. It fits well within modern design trends that favor structured yet natural-looking finishes.
To create this look, start by sectioning the hair and focusing on the root area first. Use a round brush and lift each section upward while directing the dryer at the base. Hold the hair in place briefly to allow it to cool, which helps set the volume. Continue this process throughout the head, ensuring even distribution. For the ends, use a gentle inward curve to maintain softness. This method requires consistent angle control and airflow direction. Finish with a light mist of setting spray if needed. The process is straightforward and works well as a DIY tutorial for beginners seeking noticeable volume.

Idea 3: Soft Wave Blowout
How to Make
The soft wave blowout introduces gentle movement into dark hair while maintaining a natural appearance. This style balances between straight and curled textures, making it versatile for different occasions. It aligns with aesthetic trends that emphasize relaxed, effortless beauty. The waves are subtle and evenly distributed, avoiding sharp curls or overly structured shapes. This idea is suitable for those who want variation without complexity, making it a practical addition to beginner friendly Pinterest ideas.
To achieve soft waves, use a medium-sized round brush and rotate it slightly while drying each section. Focus on mid-lengths and ends to create movement without affecting the roots. Alternate the direction of the brush to avoid uniform patterns, which helps create a more natural effect. Work methodically across all sections, ensuring consistency. Once complete, gently run fingers through the hair to separate the waves. This step-by-step process creates a balanced texture that enhances the depth of dark hair while remaining easy to maintain.

Idea 4: Curved Ends Blowout
Execution Process
The curved ends blowout emphasizes the lower portion of the hair, creating a subtle inward bend at the tips. This style adds softness and shape without increasing overall volume. It is commonly used in organization-focused beauty routines due to its simplicity and low maintenance. The concept centers on shaping the ends while keeping the rest of the hair smooth and straight. This creates a clean, cohesive look that complements structured outfits and minimalist environments.
To create curved ends, dry the hair as usual until it is nearly straight. Then, use a round brush to roll the ends inward while applying heat. Hold each section briefly before releasing to set the curve. Repeat for all sections, ensuring uniform direction. Avoid excessive rotation to maintain subtlety. Finish with a lightweight product to hold the shape. This easy project requires minimal effort and provides a polished result suitable for daily wear.

Idea 5: Layered Bounce Blowout
How to Create
This blowout style enhances layered haircuts by emphasizing movement and separation between layers. It creates a dynamic, textured appearance that works well for medium to long hair. The layered bounce blowout aligns with trending ideas that focus on dimension and flow. Each layer is styled individually to highlight its shape, resulting in a fuller and more structured look.
To achieve this, section the hair according to its layers. Use a round brush to lift and slightly curl each layer outward or inward, depending on the desired effect. Maintain consistent tension and airflow to define each section clearly. Continue this process until all layers are styled. This method enhances the natural structure of the haircut and provides a balanced finish. It is a practical DIY approach that delivers professional-looking results.
Idea 6: Side-Part Volume Blowout
Setup Method
The side-part volume blowout shifts the hair distribution to one side, creating asymmetry and added fullness. This style is commonly featured in Pinterest inspiration due to its flattering and versatile nature. The side part enhances facial framing and introduces variation without requiring complex techniques.
To create this look, establish a deep side part before drying. Focus on lifting the heavier side at the roots while smoothing the opposite side. Use a round brush to shape the hair in the desired direction. Ensure that the part remains defined throughout the process. This step-by-step approach creates a balanced yet dynamic appearance suitable for various occasions.

Idea 7: Polished Low Volume Blowout
How to Make
This style focuses on control and smoothness with minimal volume. It is ideal for achieving a refined and understated look. The polished low volume blowout aligns with minimalist style trends and works well in professional environments.
To create this style, use a paddle brush to guide the hair straight while applying downward airflow. Avoid lifting the roots to maintain a flat profile. Work in small sections for precision. Finish with a smoothing product to enhance shine. This method is straightforward and suitable for beginners.

Idea 8: Feathered Blowout
Step-by-Step Guide
The feathered blowout creates light, outward flicks at the ends, adding movement and softness. This style is inspired by classic techniques but adapted for modern design preferences. It works well for medium-length hair and adds a playful yet controlled element.
To achieve this look, use a round brush to flip the ends outward while drying. Focus on maintaining consistent direction for a cohesive finish. Repeat across all sections, ensuring even distribution. This technique creates a light, airy effect that enhances the overall hairstyle.

Idea 9: Glossy Finish Blowout
How to Create
The glossy finish blowout prioritizes shine and smoothness, making it ideal for showcasing the richness of dark hair. This style is often used in aesthetic-focused Pinterest ideas due to its reflective quality.
To create this look, ensure the hair is thoroughly smoothed during drying. Use a nozzle attachment and direct airflow downward. Apply a small amount of finishing product to enhance shine. This method creates a sleek, polished result suitable for formal settings.

Idea 10: Textured Natural Blowout
Execution Process
The textured natural blowout maintains some of the hair’s natural pattern while refining its shape. This style balances structure and authenticity, making it a practical choice for everyday wear.
To achieve this, avoid over-smoothing the hair. Use a diffuser attachment if needed and focus on enhancing natural movement. Work in sections while maintaining a relaxed approach. This method preserves texture while improving manageability.
Common Beginner Mistakes and How to Avoid Them
One common mistake is using excessive heat, which can damage hair and reduce shine. Always use moderate heat and apply a protectant before styling. Another issue is improper sectioning, which leads to uneven results. Divide the hair carefully to maintain consistency. Beginners may also rush the process, resulting in incomplete drying and lack of shape. Taking time with each section improves the final outcome. Using the wrong brush size can also affect volume and control. Selecting appropriate tools based on hair length is essential. Avoiding these mistakes ensures better results and a more efficient styling routine.
Practical Tips for Better Results
Maintaining consistent airflow direction helps achieve smoothness and shine. Always dry hair from roots to ends to align the cuticle. Using clips to organize sections improves efficiency and control. Allowing each section to cool before moving on helps set the shape. Regular cleaning of tools ensures optimal performance. Practicing these techniques enhances overall results and supports long-term improvement in DIY styling.
Styling, Presentation, or Organization Ideas
Organizing tools and materials before starting simplifies the process and reduces interruptions. Keeping a dedicated space for styling supports consistency. Presentation can be enhanced by coordinating hairstyles with outfits and accessories. Maintaining a clean workspace also contributes to better results. These organization strategies improve both efficiency and final appearance.
Budget or Time Planning
Blowout styles can be completed efficiently with proper planning. Allocating 30 to 60 minutes depending on hair length ensures adequate time for each step. Using basic tools reduces costs while maintaining quality results. Planning ahead minimizes the need for repeated styling. This approach supports both time management and budget-friendly routines.
Creative Expansion and Advanced Inspiration
Once basic techniques are mastered, variations can be introduced by combining elements from different styles. Experimenting with parting, volume, and texture creates new creative ideas. Advanced inspiration may include incorporating accessories or adapting styles for special occasions. Expanding skills gradually allows for greater flexibility and personalization within the blowout process.
Leave a Reply