
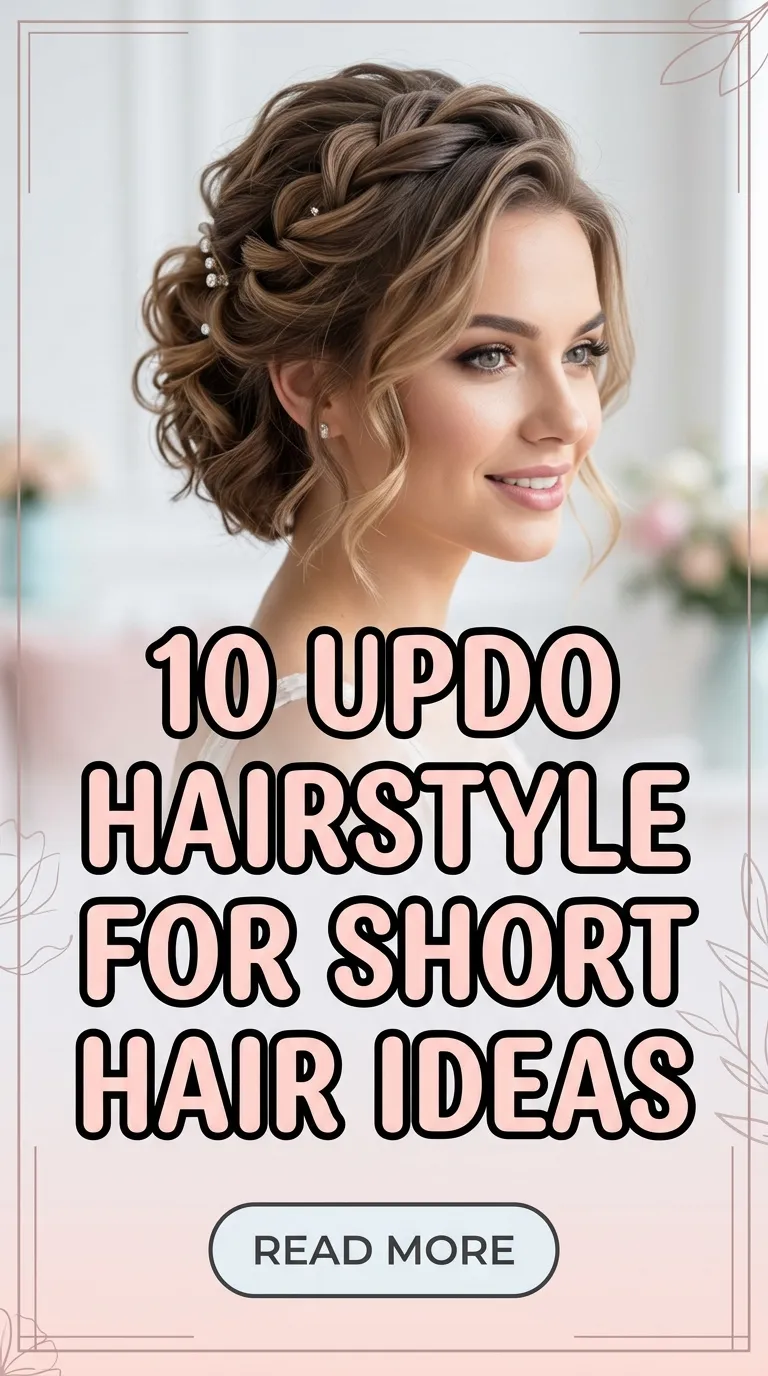
Medium length dark brown hair offers a balanced canvas for elegant and versatile wedding styling. This hair length provides enough volume for structured designs while remaining manageable for detailed shaping. Dark brown tones naturally enhance depth, shine, and dimension, making them ideal for both minimalist style and more intricate wedding looks. This article presents a collection of practical Pinterest ideas focused on creating polished, wearable hairstyles suitable for weddings, whether for brides, bridesmaids, or guests.
Readers will learn how to transform medium length dark brown hair into refined styles using simple DIY techniques and accessible materials. Each idea includes a clear explanation of the concept along with a step by step creation process, ensuring beginner friendly execution. The focus remains on realistic, achievable results rather than overly complex salon-only methods.
These creative ideas are useful because they combine aesthetic appeal with practicality. They can be adapted to different wedding themes, from modern design ceremonies to rustic outdoor settings. The goal is to provide clear inspiration that can be applied confidently with minimal tools and preparation.
Why This Idea Is Trending or Useful
Wedding hairstyles for medium length dark brown hair are trending due to their flexibility and natural elegance. This hair type aligns with current Pinterest inspiration that emphasizes effortless beauty, soft texture, and understated sophistication. Many users are searching for styles that look refined but do not require excessive styling time or advanced skills. These ideas respond to that demand by focusing on balance, structure, and accessibility.
The popularity also comes from the rise of DIY wedding preparation. Individuals prefer creating their own look or assisting others instead of relying entirely on professional services. Medium length hair is particularly suitable for DIY because it holds shape well without requiring extensive extensions or complicated techniques. This makes it ideal for beginner friendly tutorials and step by step styling methods.
Additionally, dark brown tones complement a wide range of wedding color palettes. Whether the theme is neutral, pastel, or bold, this hair color blends naturally while still providing visual contrast. The result is a cohesive aesthetic that works across different styles of home decor-inspired wedding settings, enhancing the overall visual harmony of the event.
Materials and Preparation
Preparing for wedding hairstyles requires organization and the right set of materials. For medium length dark brown hair, essential tools include a curling iron, flat iron, fine-tooth comb, paddle brush, hair elastics, bobby pins, and sectioning clips. A lightweight hairspray and texturizing spray are important for maintaining hold without stiffness. These materials allow flexibility when shaping and securing different styles.
Hair preparation begins with clean, fully dried hair. Slight texture improves styling results, so applying a small amount of mousse or texturizing spray before drying can help create grip. Planning the hairstyle in advance is essential. Consider the wedding theme, outfit, and accessories to ensure the hairstyle complements the overall look.
Sectioning the hair properly before starting simplifies the process. Divide the hair into manageable parts depending on the chosen style. This improves control and consistency during styling. Using mirrors or assistance can help maintain symmetry. These preparation steps make the creative project more efficient and ensure that the final hairstyle appears polished and intentional.
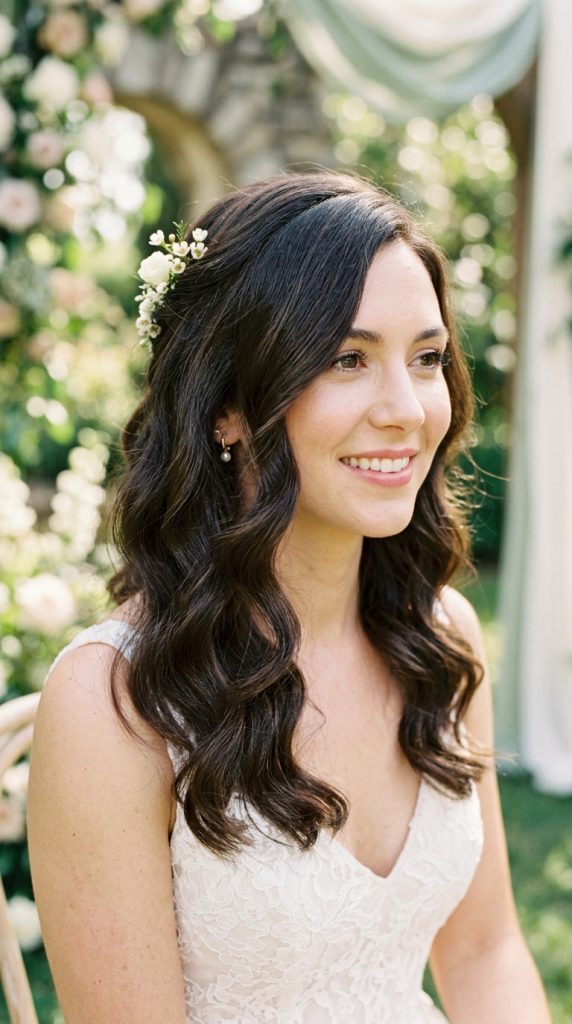
Idea 1: Soft Loose Waves with Side Part
How to Create
Soft loose waves with a defined side part create a timeless and elegant appearance for medium length dark brown hair. This style emphasizes natural movement while maintaining structure. The deep side part adds volume at the crown and frames the face effectively, making it suitable for various face shapes. The dark brown color enhances the wave definition, creating subtle highlights and shadows that add depth. This look aligns with minimalist style trends and works well in both indoor and outdoor wedding settings.
To create this style, begin by parting the hair deeply on one side using a fine-tooth comb. Use a curling iron to form loose waves, wrapping sections away from the face for a consistent flow. Allow the curls to cool before gently brushing them out to soften the shape. Apply a light texturizing spray to maintain movement without stiffness. Secure one side behind the ear with a discreet pin if needed. Finish with a flexible hold spray to ensure longevity. This step by step method ensures a polished yet natural finish.
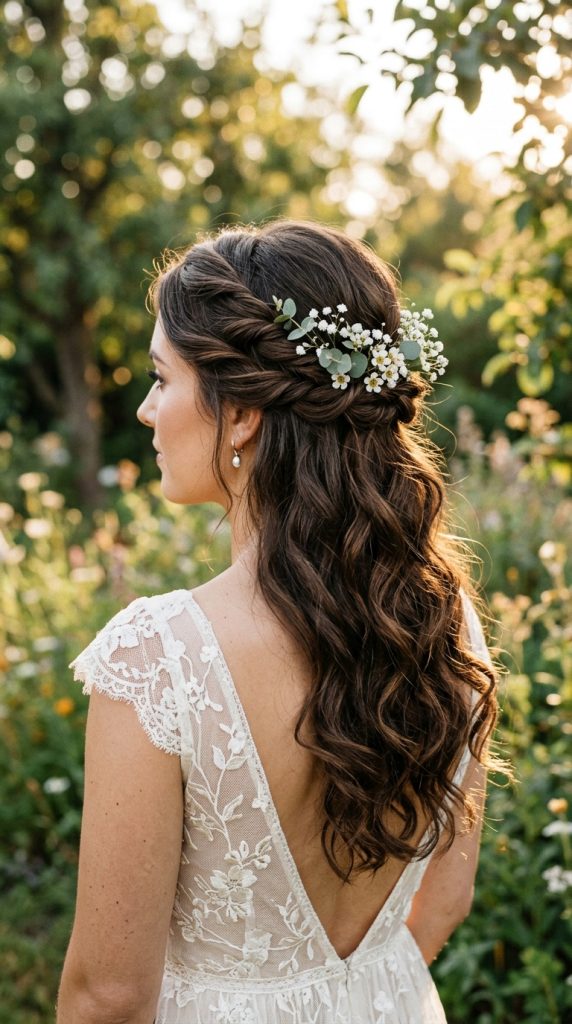
Idea 2: Half-Up Twisted Crown
How to Make
The half-up twisted crown combines structure with softness, making it a popular Pinterest idea for wedding styling. This design involves twisting sections from each side of the head and securing them at the back, creating a crown-like effect. It keeps hair away from the face while allowing the remaining length to flow naturally. The contrast between the twisted top and loose bottom creates visual interest and balance.
To achieve this look, section the top portion of the hair from both sides. Twist each section toward the back of the head, keeping the tension even. Secure the twists together using bobby pins or a small elastic. Curl the remaining hair lightly to add texture. Adjust the twists to ensure symmetry and fullness. Use hairspray to hold the structure in place. This DIY tutorial approach ensures a clean and elegant result without requiring advanced skills.
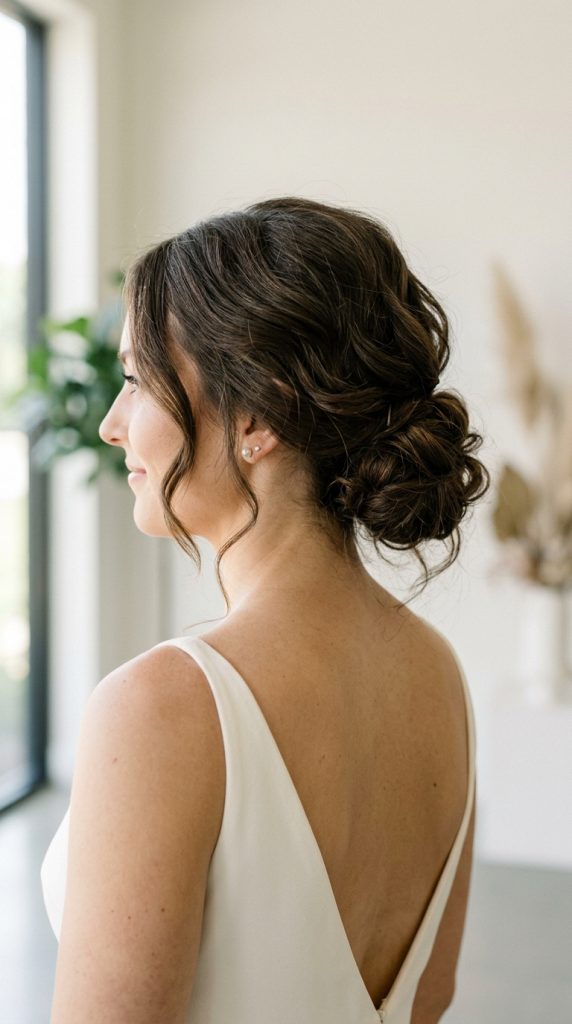
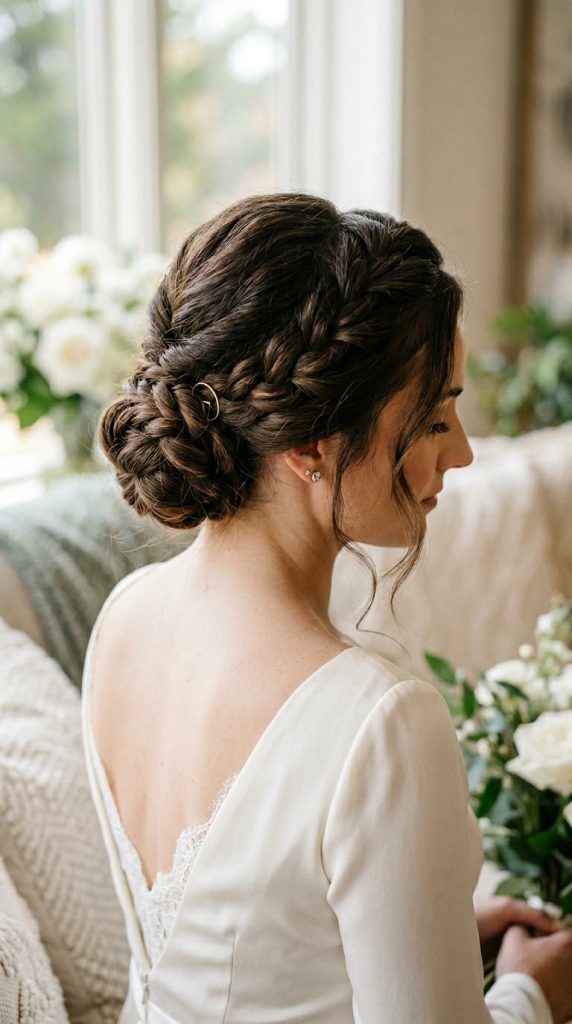
Idea 3: Low Textured Bun
Step-by-Step Guide
A low textured bun offers a refined and structured option for wedding hairstyles. Positioned at the nape of the neck, this style provides a classic appearance with a modern twist. The texture adds dimension, preventing the bun from appearing flat. This makes it a suitable choice for formal ceremonies and minimalist design aesthetics.
Begin by adding texture to the hair using a curling iron or texturizing spray. Gather the hair into a low ponytail and secure it loosely. Twist the ponytail and wrap it around its base to form a bun. Secure with bobby pins, ensuring the shape remains soft rather than tightly compact. Pull out a few strands around the face for a relaxed finish. Set with hairspray for hold. This method ensures a balanced combination of structure and softness.
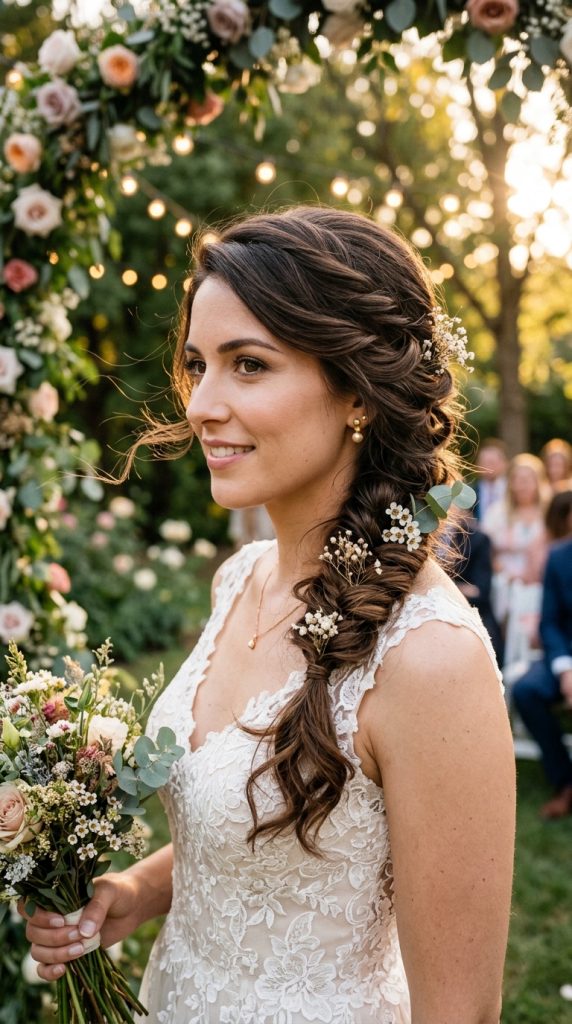
Idea 4: Braided Side Sweep
How to Create
The braided side sweep is a creative project that combines braiding with asymmetrical styling. This look involves sweeping the hair to one side and incorporating a loose braid for added detail. It highlights the natural shine of dark brown hair while creating a dynamic silhouette.
Start by parting the hair to one side and gathering it over the shoulder. Create a loose braid along the side, incorporating sections gradually. Secure the braid with an elastic and gently pull it apart to add volume. Curl the remaining hair for texture. Use pins to secure any loose sections and maintain the shape. Finish with a light spray. This approach creates a balanced and elegant design suitable for various wedding themes.
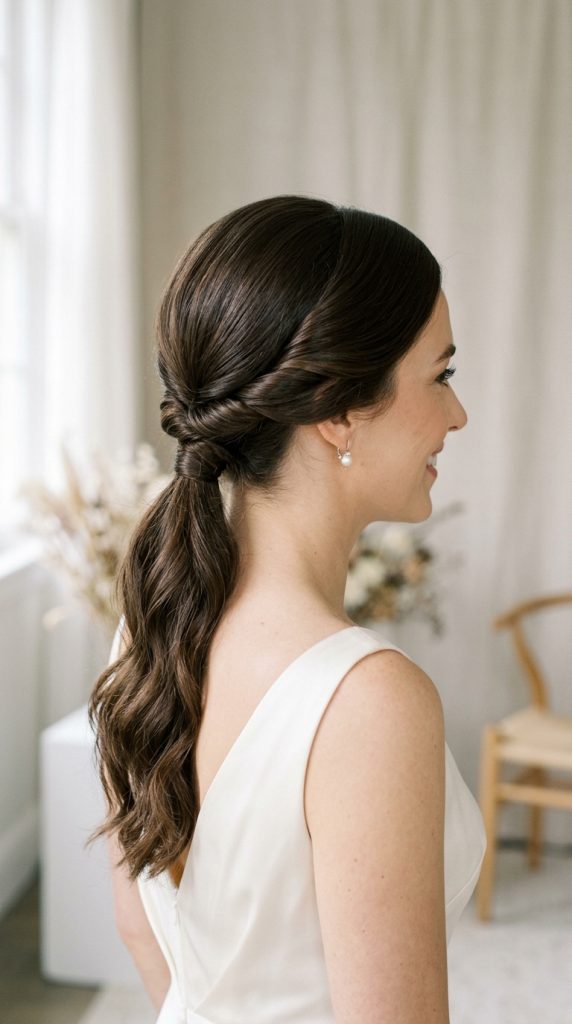
Idea 5: Twisted Low Ponytail
Execution Process
The twisted low ponytail is a simple yet sophisticated option that works well for medium length hair. It combines clean lines with subtle detailing, making it ideal for modern design weddings. The twists add visual interest without overwhelming the overall look.
To create this style, divide the hair into two sections at the back. Twist each section and bring them together into a low ponytail. Secure with an elastic and wrap a small section of hair around the base to conceal it. Add soft waves to the ponytail for texture. Use hairspray to maintain hold. This easy project ensures a polished finish with minimal effort.
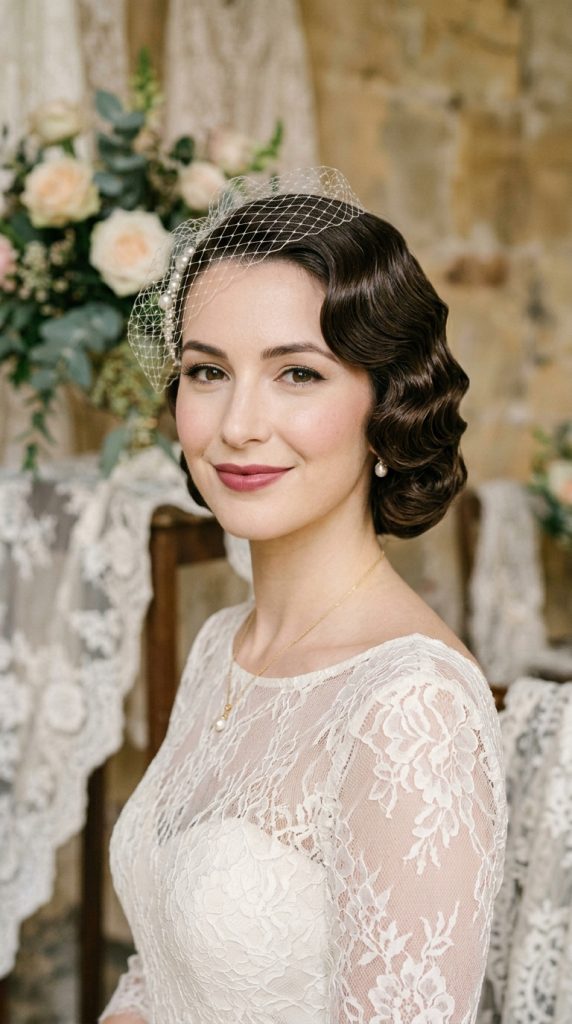
Idea 6: Vintage-Inspired Finger Waves
How to Make
Finger waves bring a vintage aesthetic to wedding hairstyles, offering a structured and elegant appearance. This style works well with dark brown hair due to its ability to reflect light and define the wave pattern clearly. It is ideal for formal or themed weddings.
To achieve finger waves, apply styling gel to damp hair and use a comb to shape the waves in an S pattern. Secure each section with clips until set. Allow the hair to dry completely before removing the clips. Smooth any flyaways and apply shine spray. This step by step process ensures a clean and defined result.
Idea 7: Messy Half Bun
Setup Method
The messy half bun combines casual texture with structured styling. It is a popular choice for outdoor or relaxed wedding settings. This style balances volume at the top with flowing length below.
Start by sectioning the top half of the hair and gathering it into a loose bun. Secure with pins while allowing some strands to fall naturally. Curl the remaining hair for texture. Adjust the bun to achieve a balanced shape. Finish with texturizing spray. This approach creates a relaxed yet intentional look.

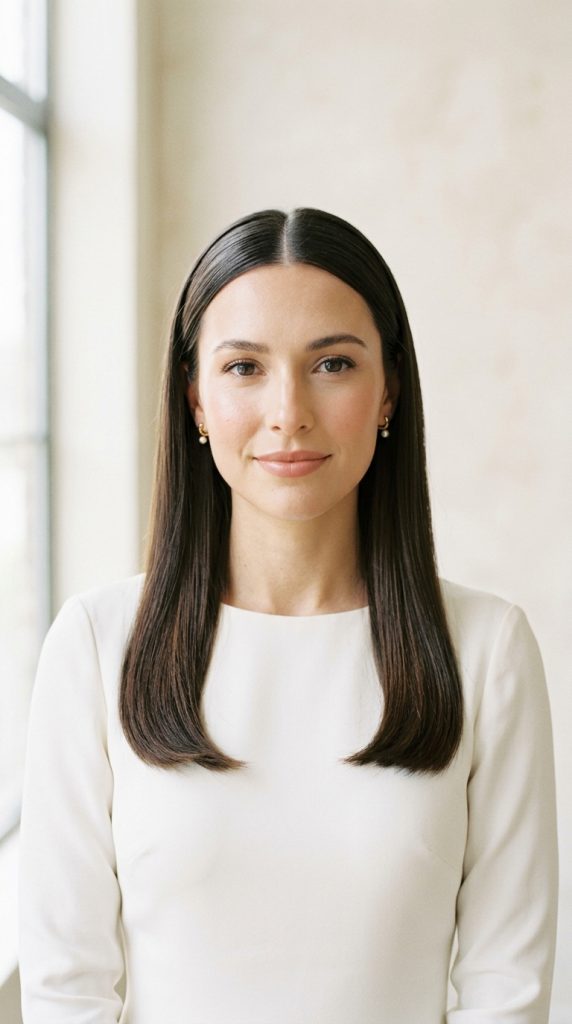
Idea 8: Classic Straight with Middle Part
How to Create
A sleek straight style with a middle part offers a clean and modern aesthetic. It highlights the natural shine of dark brown hair and works well with minimalist wedding themes.
Straighten the hair using a flat iron, ensuring smooth and even sections. Create a precise middle part using a comb. Apply a smoothing serum to enhance shine. Tuck sections behind the ears if desired. Use light hairspray to maintain the style. This method ensures a polished and refined appearance.
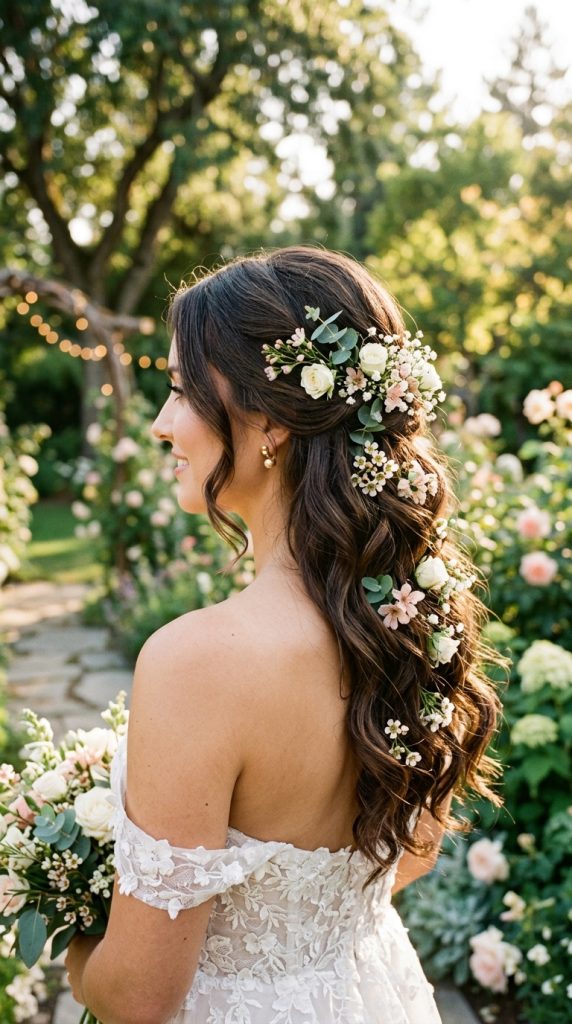
Idea 9: Floral-Enhanced Waves
Step-by-Step Guide
Adding floral elements to loose waves creates a romantic and decorative hairstyle. This style integrates natural elements with soft texture, making it suitable for outdoor weddings.
Create loose waves using a curling iron. Select small floral accessories and position them strategically within the hair. Secure with pins to ensure stability. Adjust the placement for balance. Apply hairspray to hold the style. This creative idea enhances visual appeal without complex techniques.
Idea 10: Rope Braid Updo
How to Create
The rope braid updo combines twisting and braiding techniques to create a structured hairstyle. It offers a unique alternative to traditional braids and works well for medium length hair.
Divide the hair into sections and twist each section tightly. Wrap the twists into an updo shape and secure with pins. Adjust the structure for symmetry. Apply hairspray for hold. This method creates a distinctive and elegant finish.
Common Beginner Mistakes and How to Avoid Them
One common mistake is skipping proper hair preparation. Styling clean but overly smooth hair can result in styles that do not hold well. Adding texture before styling improves grip and longevity. Another issue is using too many products, which can weigh down medium length hair and reduce movement. Applying lightweight products in controlled amounts ensures balance.
Improper sectioning can also lead to uneven results. Dividing the hair clearly before starting helps maintain symmetry and control. Beginners often rush the process, which affects the final appearance. Taking time to follow each step carefully improves overall results. Avoiding these mistakes ensures a more polished and professional outcome.
Practical Tips for Better Results
Using the right tools improves efficiency and precision. A quality curling iron and comb help create consistent shapes. Working in small sections ensures better control and even styling. Allowing curls to cool before styling further helps maintain structure.
Lighting and mirror placement also play an important role. Good visibility ensures accuracy when shaping and securing hair. Practicing the style before the event builds confidence and reduces errors. These practical tips help achieve reliable and consistent results for any DIY wedding hairstyle.
Styling, Presentation, or Organization Ideas
Presentation enhances the overall impact of wedding hairstyles. Coordinating the hairstyle with accessories such as veils or pins ensures a cohesive look. Placement of decorative elements should align with the hairstyle structure.
Organizing tools and materials before starting improves workflow. Keeping items within reach reduces interruptions during styling. Maintaining a clean workspace also contributes to better focus and efficiency. These organization ideas support a smooth and controlled styling process.
Budget or Time Planning
Planning helps manage both cost and time effectively. Many of these hairstyles require only basic tools, making them suitable for budget ideas. Investing in reusable tools reduces long-term expenses.
Allocating enough time for preparation and styling ensures a stress-free experience. Practicing the hairstyle in advance helps identify potential challenges. This approach improves efficiency and reduces the risk of last-minute issues.
Creative Expansion and Advanced Inspiration
Once basic techniques are mastered, these styles can be expanded into more complex variations. Combining braids with buns or adding layered textures creates unique designs. Experimenting with different partings and accessories provides additional creative ideas.
Advanced inspiration can include blending multiple techniques into one cohesive style. This allows for personalized designs that match specific wedding themes. Exploring new approaches enhances creativity while maintaining the practicality of the original concepts.
Leave a Reply