
Blow drying is a foundational hair styling technique used to shape, smooth, and add volume to different hair types. It plays an important role in everyday grooming routines and professional styling practices. The process involves using controlled airflow and heat to transform damp hair into a styled finish that can range from sleek and straight to voluminous and textured. In Pinterest-style inspiration boards, blow dry hair ideas are widely shared because they combine practicality with aesthetic results that suit both casual and formal looks. This article explores structured and creative blow dry approaches that can be adapted for different hair lengths, textures, and styling goals.
The following sections present step-by-step inspired blow dry methods that focus on achieving consistent results using simple techniques. Each idea is designed to be beginner friendly while still offering a polished outcome. The goal is to provide clear direction on how different blow drying styles are created, what preparation is needed, and how to maintain the finished look. These ideas support home styling routines, creative experimentation, and everyday grooming efficiency.
Why This Idea Is Trending or Useful
Blow dry styling has become widely popular in modern Pinterest ideas because it delivers salon-like results through accessible DIY methods. It allows individuals to shape their hair without complex tools or advanced skills. The adaptability of blow drying makes it suitable for multiple looks, including volume enhancement, sleek finishing, and soft wave formation. This versatility is one of the main reasons it remains relevant in creative hair inspiration boards.
Another important factor is its alignment with minimalist style and practical beauty routines. Many people prefer easy project techniques that reduce time while maintaining a polished appearance. Blow drying supports this need by offering controlled styling with basic materials and tools. It also fits well into budget ideas since it does not require expensive equipment beyond a standard dryer and brushes. This combination of accessibility, efficiency, and aesthetic value contributes to its continued popularity in creative project planning.
Materials and Preparation
Proper preparation is essential for achieving consistent blow dry results. The basic materials include a hair dryer with adjustable heat settings, a round brush for volume control, and a paddle brush for smoothing. Hair clips are often used to divide sections, ensuring even drying. A heat-safe towel is helpful for removing excess moisture before styling begins. These materials form the foundation of most blow dry techniques used in home styling routines.
Preparation begins with washing and gently towel-drying the hair until it is damp rather than soaking wet. Sectioning the hair is an important planning step, as it allows controlled airflow and prevents uneven drying. Applying a lightweight protective base helps maintain hair condition during heat exposure. Organizing tools before starting improves workflow and reduces interruptions during the styling process. This preparation stage ensures that the blow dry process remains structured, efficient, and suitable for both beginner friendly and advanced styling goals.
MAIN IDEAS SECTION
Idea 1: Voluminous Root Lift Blow Dry
How to Create
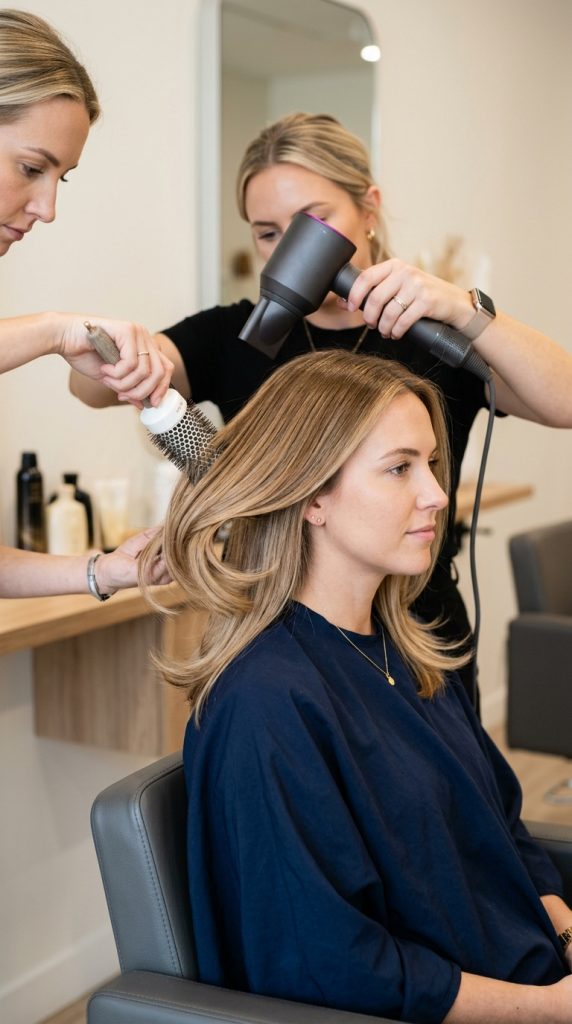
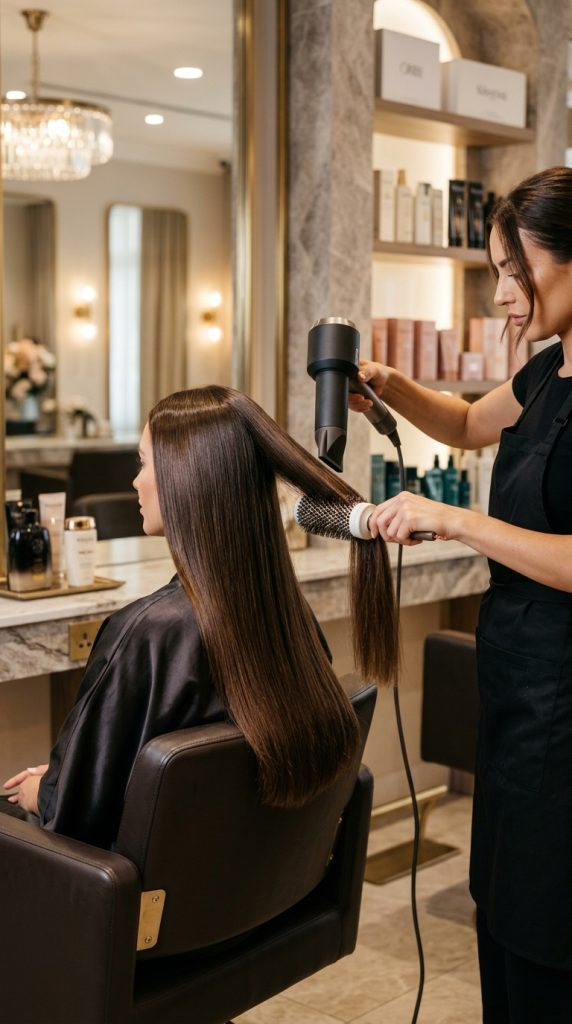
Voluminous root lift styling focuses on creating height and body at the scalp while maintaining smooth lengths. This technique is widely used in modern home decor-inspired beauty routines because it produces a soft yet structured appearance. The goal is to lift the roots without making the hair appear stiff or overly styled. This look works especially well for medium to long hair and is suitable for both casual and formal settings. The overall effect enhances natural hair density and creates a balanced silhouette that frames the face effectively.
This style is achieved by directing airflow toward the roots while lifting sections of hair upward during drying. Using a round brush or lifting tool helps maintain tension at the base, encouraging volume formation. Hair is typically divided into sections to ensure even lift across the entire scalp. The drying process begins at the crown and moves outward to maintain structure. Finishing involves cooling the roots to lock in shape and preserve volume throughout the day.
Execution Process
The execution begins with damp hair that has been lightly towel-dried and sectioned into manageable parts. The lower sections are clipped away first to focus on the crown area. A round brush is placed underneath a section of hair near the roots, and the blow dryer is directed upward while the brush lifts the hair away from the scalp. This motion creates controlled tension that builds volume at the base. Each section is dried thoroughly before moving to the next, ensuring consistent lift.
After completing the crown, the remaining sections are styled using the same lifting technique. Attention is given to maintaining uniform direction so the volume appears balanced. Once all sections are dry, a cool airflow setting is applied to set the shape. The final result is a structured, voluminous blow dry that supports everyday styling inspiration and aligns with easy project hair goals.

Idea 2: Sleek Straight Blow Dry Finish
How to Create
The sleek straight blow dry finish focuses on creating a smooth, polished appearance with minimal frizz and controlled alignment. This style is commonly featured in Pinterest ideas due to its clean aesthetic and versatility. It emphasizes straight lines and reflective shine, making it suitable for professional environments and minimalist style preferences. The result is a refined look that enhances natural hair length and creates a uniform surface.
This style requires careful tension control and consistent airflow direction. Hair is typically brushed downward using a paddle brush while the dryer follows the brush path. The heat is distributed evenly to avoid uneven texture formation. Sectioning is essential to ensure each layer is fully smoothed before moving forward. The process prioritizes precision and consistency rather than volume or movement.
Step-by-Step Guide
The hair is first prepared by removing excess moisture and dividing it into horizontal sections. The bottom layer is styled first using a paddle brush to guide the hair downward. The blow dryer is positioned above the brush, following its motion from root to tip. This continuous downward movement helps align the hair cuticle and reduce frizz. Each section is completed fully before releasing the next.
Once all sections are straightened, a final pass of cool air is applied to secure the shape. This step enhances smoothness and improves longevity of the style. The result is a sleek blow dry that fits well into modern design aesthetics and supports easy, everyday styling routines.

Idea 3: Soft Curled Blow Dry Shape
How to Create
The soft curled blow dry shape introduces gentle curves into the hair while maintaining a natural finish. It is a popular creative project in hair styling because it balances structure with softness. This technique enhances movement and creates a flowing appearance that works well for various hair lengths. It is especially effective for adding subtle elegance without rigid curls.
This style is created by wrapping sections of hair around a round brush and applying heat until the shape forms naturally. The direction of wrapping determines the curl pattern, allowing customization of inward or outward bends. The goal is not tight curls but smooth, rounded shapes that blend seamlessly into the overall hairstyle. Controlled airflow ensures that the curls remain soft and flexible.
Execution Process
The process begins with dividing the hair into medium-sized sections. Each section is wrapped around a round brush starting from the mid-lengths to the ends. The blow dryer is applied evenly while the brush is rotated slightly to form a curve. After heating, the section is gently released and allowed to cool in its shape.
Repeating this method across all sections creates a consistent wave-like structure. The final result is a soft curled blow dry that enhances natural texture and adds dimension without excessive styling effort.

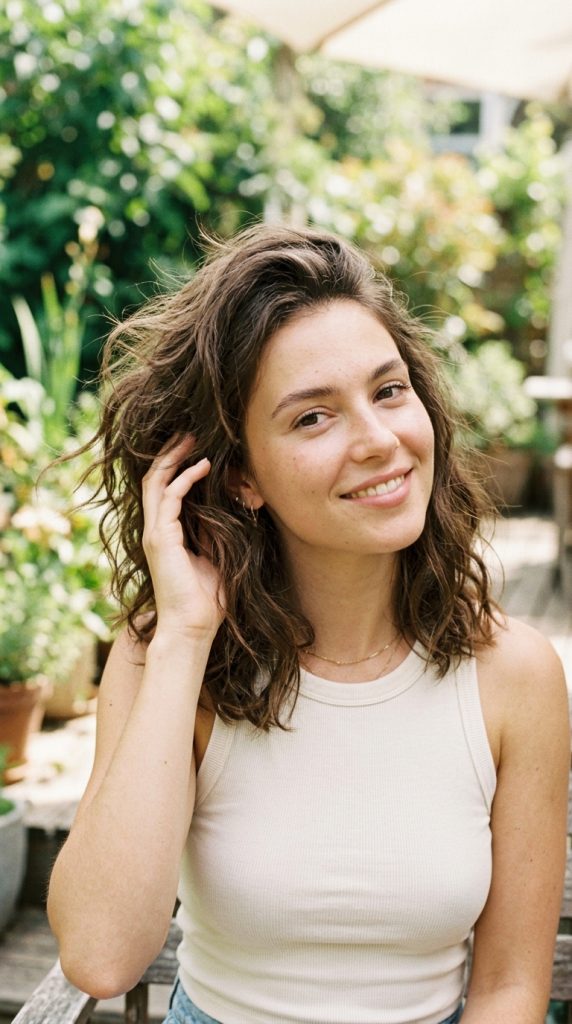
Idea 4: Beach Wave Blow Dry Texture
How to Create
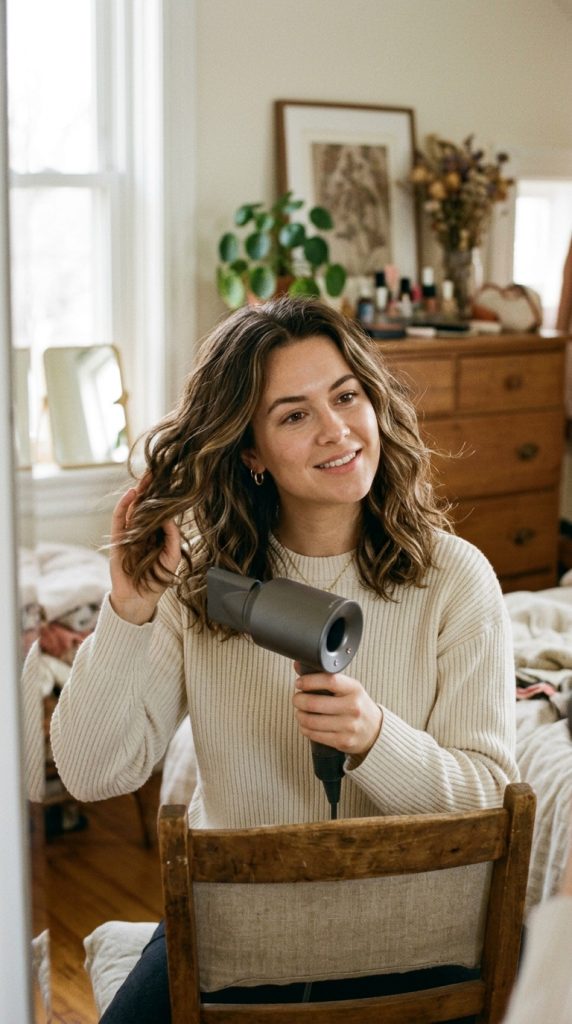
Beach wave blow drying focuses on creating relaxed, textured waves that resemble natural wind-styled hair. This look is widely used in Pinterest inspiration due to its effortless appearance and versatility. It enhances movement and creates a slightly undone aesthetic that fits modern casual styling trends. The design is ideal for medium to long hair lengths.
This technique involves twisting sections of damp hair while applying heat to set wave patterns. Unlike structured curls, beach waves prioritize irregular shapes and soft bends. The airflow is directed along twisted sections to encourage natural separation. The result is a relaxed texture that appears naturally formed.
Step-by-Step Guide
Hair is divided into multiple sections and lightly twisted from root to end. Each twist is held while the blow dryer applies medium heat along the length. Once dry, the twist is released carefully to maintain shape. This process is repeated throughout the head in alternating directions to create natural variation.
After completion, fingers are used to separate waves gently for a more relaxed finish. The result is a textured blow dry that fits creative inspiration boards and everyday styling routines.

Idea 5: Curtain Bangs Blow Dry Styling
How to Create
Curtain bangs blow dry styling focuses on shaping face-framing sections to create a soft, parted appearance. This style enhances facial balance and adds structure to the front of the hairstyle. It is commonly used in modern minimalist style routines because it creates definition without heavy styling.
The technique involves directing airflow away from the face while shaping bangs around a round brush. The goal is to create a natural curve that opens outward from the center part. This enhances symmetry and adds softness to the overall look.
Execution Process
The bangs are separated from the rest of the hair and divided into two sections. Each section is wrapped around a round brush and dried while directed outward. The brush is rolled slightly to form a curved shape at the ends.

After drying, the bangs are released and lightly adjusted for symmetry. The result is a soft, face-framing blow dry that integrates well with various hairstyles.
Idea 6: Flip Ends Blow Dry Style
How to Create
Flip ends styling focuses on turning the hair ends outward or inward to create a defined shape. This technique adds personality and structure to simple blow dry routines. It is widely used in creative ideas for adding subtle variation to straight hair.
The process involves directing the ends of the hair in a specific direction using a round brush. Heat is applied while shaping the tips, creating a flipped effect that enhances movement and style definition.
Step-by-Step Guide
Hair is sectioned and dried normally until the mid-lengths. At the ends, the brush is rotated outward or inward depending on the desired style. The blow dryer follows the brush to set the shape.
This process is repeated across all sections. The final result is a structured blow dry with styled ends that enhance visual interest.
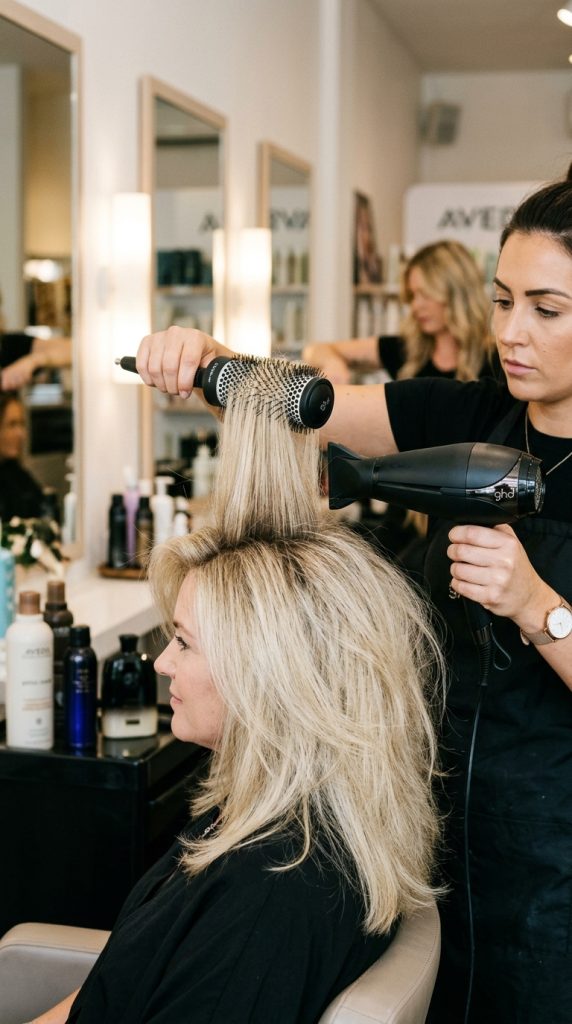
Idea 7: Root Volume Blow Dry Technique
How to Create
Root volume blow drying focuses exclusively on lifting the base of the hair for maximum fullness. It is often used in modern styling routines that prioritize height and structure.
The technique involves lifting sections vertically while applying heat directly to the roots. This encourages long-lasting volume and reduces flatness.
Execution Process
Hair is divided and lifted section by section. A brush is placed at the roots while the dryer applies upward airflow. Each section is cooled before release.
The result is a long-lasting volumized blow dry suitable for structured styling.
Idea 8: Messy Textured Blow Dry Look
How to Create
This style creates a naturally undone finish with controlled texture. It is popular in casual Pinterest ideas for its effortless appearance.
It involves alternating airflow directions and minimal brushing to maintain irregular texture.
Step-by-Step Guide
Hair is dried in random sections using hands and light brushing. Sections are twisted slightly to create variation.
The final look is relaxed and textured.
Idea 9: Smooth Salon Finish Blow Dry
How to Create
This style focuses on high smoothness and professional-level polish. It reduces frizz and enhances shine.
Controlled brushing and consistent airflow are essential.
Execution Process
Hair is sectioned and smoothed carefully from root to tip using a paddle brush and steady heat.
The result is a refined salon-style finish.
Idea 10: Natural Air-Assisted Blow Dry Shape
How to Create
This method blends natural drying with controlled blow drying for soft structure. It reduces heat exposure while shaping hair.
It is ideal for low-maintenance styling routines.
Step-by-Step Guide
Hair is partially air-dried before finishing with a blow dryer for shaping.
This creates a natural yet structured appearance.
Common Beginner Mistakes and How to Avoid Them
Many beginners apply excessive heat without section control, leading to uneven results. Another common mistake is skipping proper moisture removal before styling. This increases drying time and reduces shape retention. Using incorrect brush tension can also affect final texture. Proper sectioning, controlled airflow, and gradual drying help prevent these issues and improve consistency.
Practical Tips for Better Results
Consistent tension during brushing improves smoothness and structure. Maintaining medium heat prevents unnecessary damage and supports better shaping control. Section-based styling ensures even results across the entire head. Allowing hair to cool after drying helps lock in the final shape and improves durability.
Styling, Presentation, or Organization Ideas
Blow dry styles can be organized based on volume, texture, or smoothness categories. This helps in selecting appropriate looks for different occasions. Minimalist styling focuses on sleek finishes, while creative styling explores texture and movement. Organizing techniques by hair length also improves usability in daily routines.
Budget or Time Planning
Blow dry styling can be completed using basic tools, making it suitable for budget-friendly routines. Time requirements depend on hair length and sectioning precision. Short hair typically requires less time, while longer hair needs structured division. Efficient planning reduces styling duration and improves consistency.
Creative Expansion and Advanced Inspiration
Advanced variations include combining multiple blow dry techniques, such as volume with waves or sleek finishes with flipped ends. Layered styling enhances dimension and allows personalized results. Experimenting with direction changes and section sizes creates unique outcomes. These variations expand creative project possibilities while maintaining practical usability.
Leave a Reply