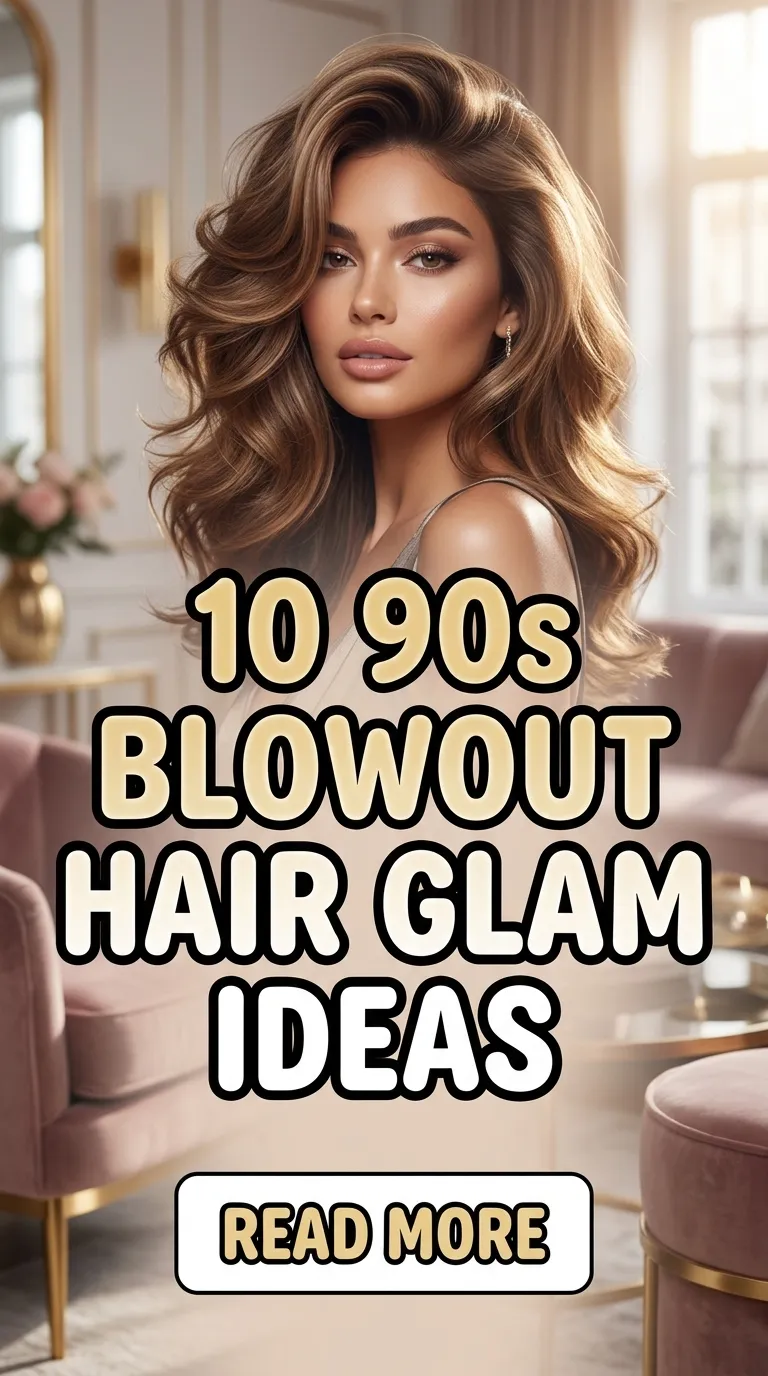

The 90s blowout hairstyle has returned as a major source of Pinterest inspiration, combining volume, smoothness, and effortless movement into one cohesive look. This iconic hair trend focuses on soft layers, lifted roots, and polished ends that frame the face naturally. Unlike overly structured styles, the 90s blowout creates a balanced finish that feels both refined and relaxed. This article explores ten creative ideas that reinterpret the classic blowout into modern, beginner-friendly variations suitable for everyday wear or special occasions. Readers will learn how to approach each style with clear preparation, practical techniques, and accessible materials. Each idea includes a step-by-step explanation to help achieve consistent results without requiring advanced skills. The topic is useful because it aligns with current aesthetic trends while remaining adaptable to different hair types and lengths. Whether used for home decor styling shoots, personal grooming, or creative projects, these blowout ideas provide a structured yet flexible approach to achieving polished, voluminous hair.
Why This Idea Is Trending or Useful
The resurgence of 90s blowout hairstyles reflects a broader shift toward timeless beauty techniques that emphasize natural volume and soft structure. On Pinterest, this trend is widely shared because it offers both visual appeal and practical application. The blowout style complements minimalist fashion, modern design aesthetics, and everyday organization routines by presenting a clean and polished look without excessive effort. It is especially popular among beginners because it does not require complicated tools or professional-level skills. The DIY aspect makes it accessible, allowing individuals to recreate salon-inspired results at home using basic materials. Additionally, the style adapts easily to different hair textures, making it inclusive and versatile. Its appeal also lies in its balance between casual and formal presentation, making it suitable for work, social events, or content creation. As a result, the 90s blowout continues to trend as a reliable and beginner-friendly creative idea that blends practicality with visual elegance.
Materials and Preparation
Before starting any 90s blowout hairstyle, proper preparation ensures smoother execution and longer-lasting results. Essential materials include a hair dryer with a nozzle attachment, a round brush, sectioning clips, and a heat protectant. Optional tools such as rollers or a flat iron can enhance specific styles, but they are not required for most beginner-friendly approaches. Preparation begins with washing the hair using a lightweight shampoo and conditioner to avoid excess weight that can reduce volume. Towel-dry the hair gently, then apply a heat protectant evenly to prevent damage during styling. Sectioning the hair into manageable parts is a key planning step that improves control and consistency. Each section should be dried and shaped individually using the round brush to create lift at the roots and smoothness along the lengths. Taking time to plan the direction of the blowout, whether inward or outward, also helps maintain a cohesive final look. Organized preparation supports efficiency and ensures that the styling process remains structured and easy to follow.
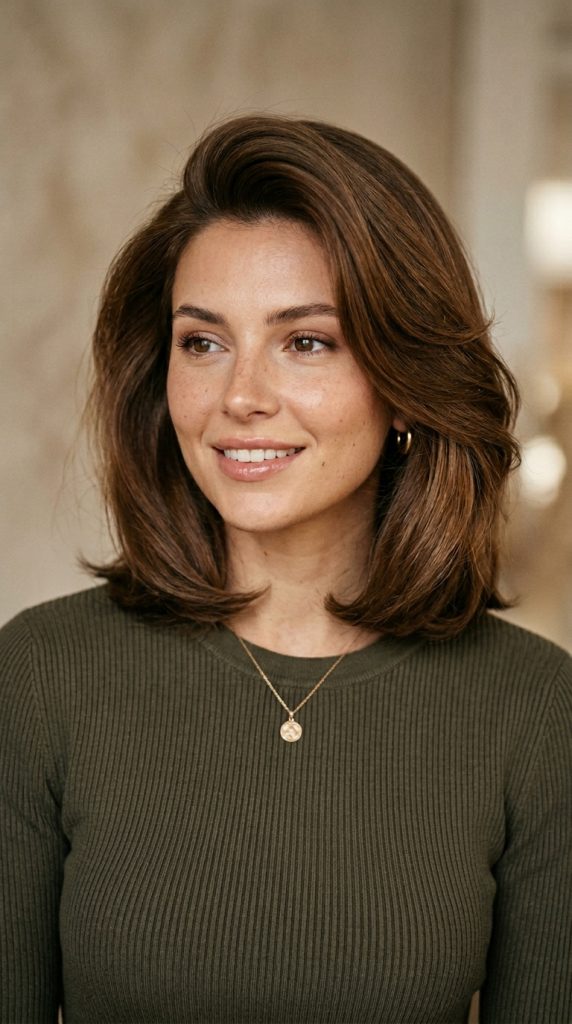
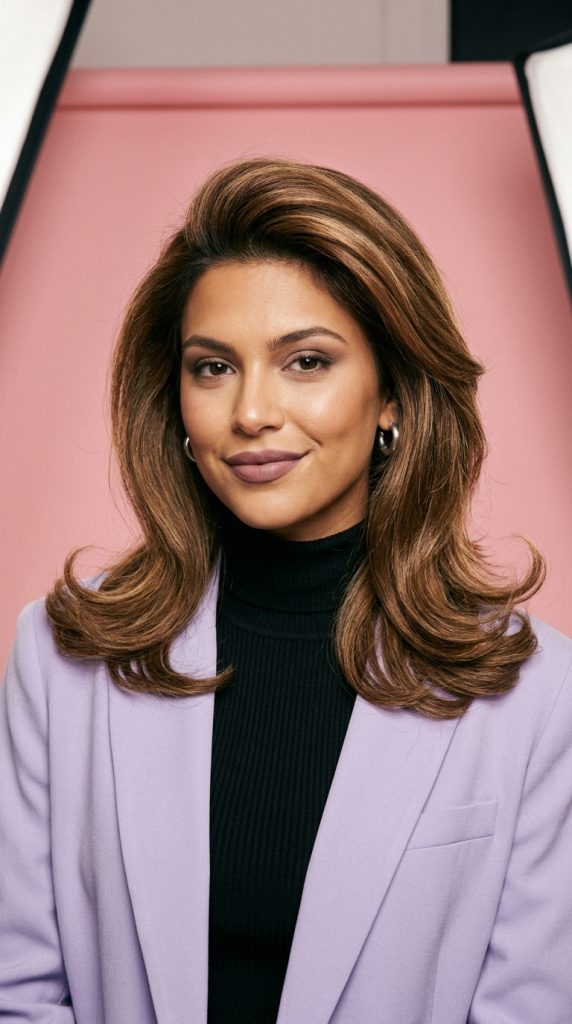
Idea 1: Classic Voluminous Blowout
How to Create
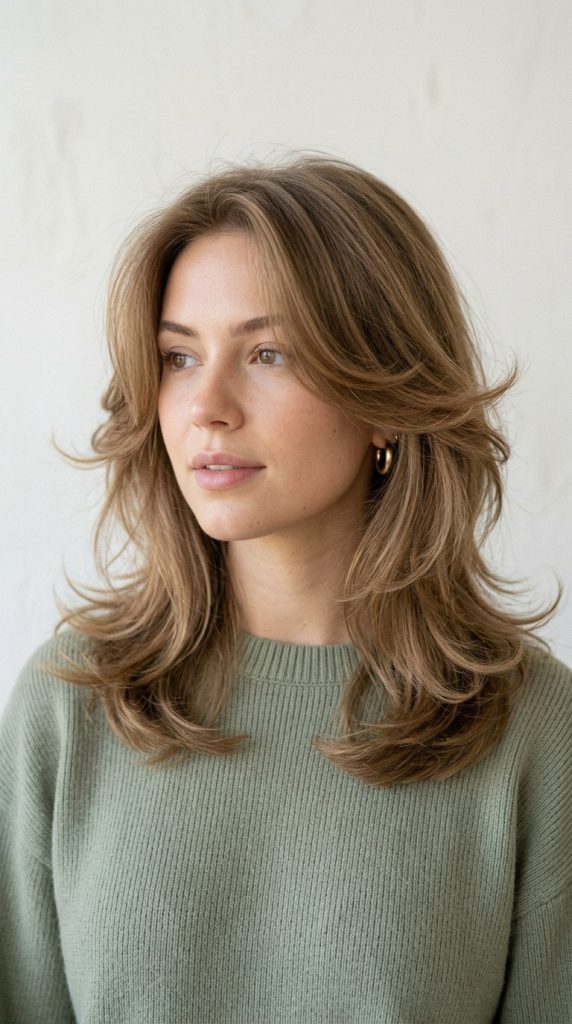
The classic voluminous blowout captures the essence of 90s glamour by focusing on full-bodied roots and smooth, curved ends. This style is defined by its balanced shape, where volume is evenly distributed without appearing overly styled. It works well for medium to long hair and complements a wide range of face shapes. The aesthetic relies on controlled airflow and brush movement to lift the hair upward while maintaining softness. Unlike modern flat styles, this blowout prioritizes height at the crown and gentle curvature at the ends. The result is a polished yet natural appearance that fits seamlessly into both casual and formal settings. This idea is especially useful for those exploring Pinterest ideas related to timeless beauty and minimalist style because it avoids excessive texture while maintaining visual impact.
To create this look, begin by dividing the hair into horizontal sections starting from the nape. Use a round brush to pull each section upward while directing heat from the dryer at the roots. Slowly glide the brush through the lengths, curling the ends slightly inward. Repeat this process across all sections, ensuring consistent tension and airflow. After completing the blowout, allow the hair to cool before gently brushing through it to blend the layers. A light mist of flexible hold spray can be applied to maintain structure without stiffness. This step-by-step method ensures a smooth and beginner-friendly execution.
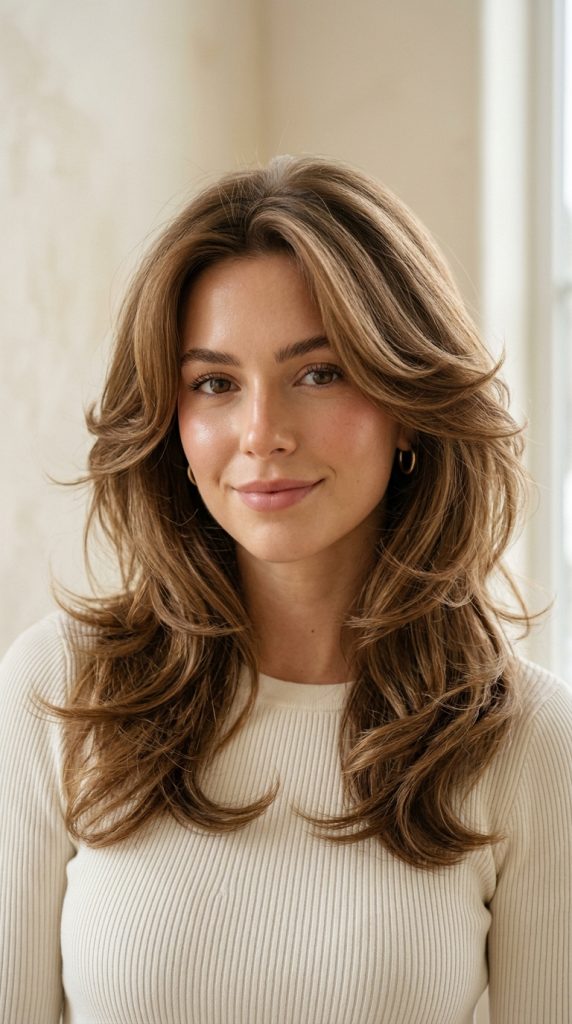
Idea 2: Face-Framing Layered Blowout
How to Create
The face-framing layered blowout emphasizes movement around the front sections of the hair, creating a soft contour that highlights facial features. This style is particularly popular in modern Pinterest inspiration because it blends structure with natural flow. The key characteristic is the gradual layering that starts near the cheekbones and extends downward, allowing the hair to curve outward or inward depending on preference. This approach creates dimension without requiring dramatic styling changes. It is ideal for individuals seeking a subtle yet effective update to their everyday look.
To achieve this style, start by isolating the front sections of the hair and clipping the rest away. Use a medium-sized round brush to lift these sections away from the face while applying heat. Rotate the brush slightly to guide the hair outward, creating a soft flip effect. For the remaining sections, follow a standard blowout technique to maintain consistency. Once all sections are styled, blend the front layers into the rest of the hair using gentle brushing. This execution process ensures a cohesive result while maintaining the defining feature of face-framing movement.
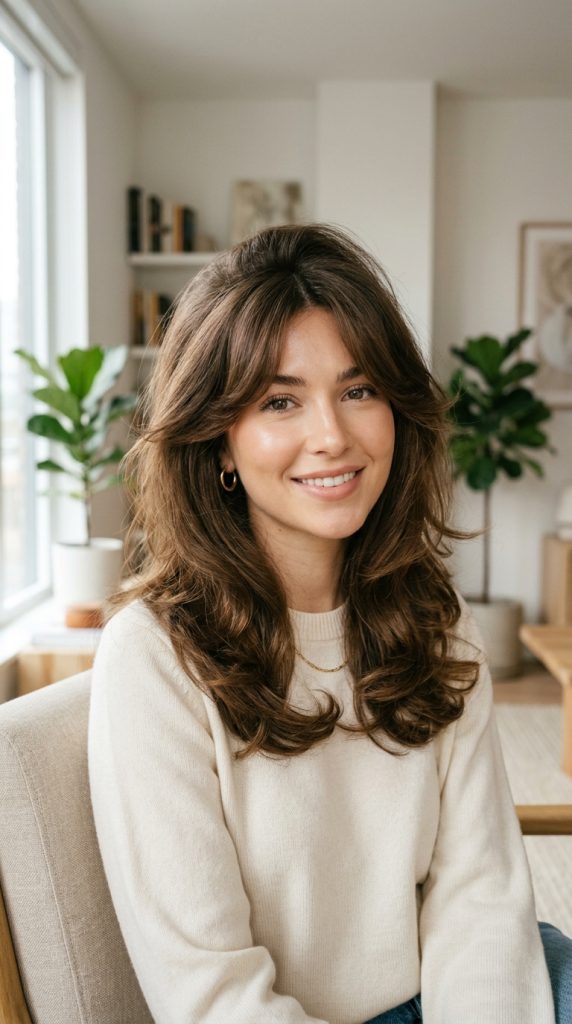
Idea 3: Soft Curtain Blowout
How to Create
The soft curtain blowout incorporates parted bangs that frame the face symmetrically, creating a relaxed yet structured appearance. This style aligns with trending ideas in minimalist beauty and aesthetic presentation. The curtain effect is achieved by directing the front sections away from the center part, allowing them to fall naturally on either side. This creates a balanced look that enhances facial symmetry while maintaining volume.
To create this look, establish a center part before drying. Focus on the front sections by using a smaller round brush to lift and guide the hair outward. Dry the roots thoroughly to maintain separation and prevent flattening. For the remaining hair, use a larger brush to create smooth, voluminous sections. After styling, lightly separate the curtain sections with fingers to enhance the natural flow. This step-by-step approach ensures the style remains soft and beginner friendly.
Idea 4: Flipped Ends Blowout
How to Create
The flipped ends blowout is defined by its outward-curving tips, adding a playful yet polished finish. This style reflects 90s fashion trends and is widely shared in creative projects due to its distinctive shape. It works well for medium-length hair and adds visual interest without requiring complex techniques.
To achieve this look, focus on directing the ends outward during the drying process. Use a round brush and rotate it away from the face while applying heat. Maintain consistent tension to ensure smoothness. After completing all sections, reinforce the flip using a quick pass with the dryer. This setup method creates a structured yet lively result that is easy to maintain.
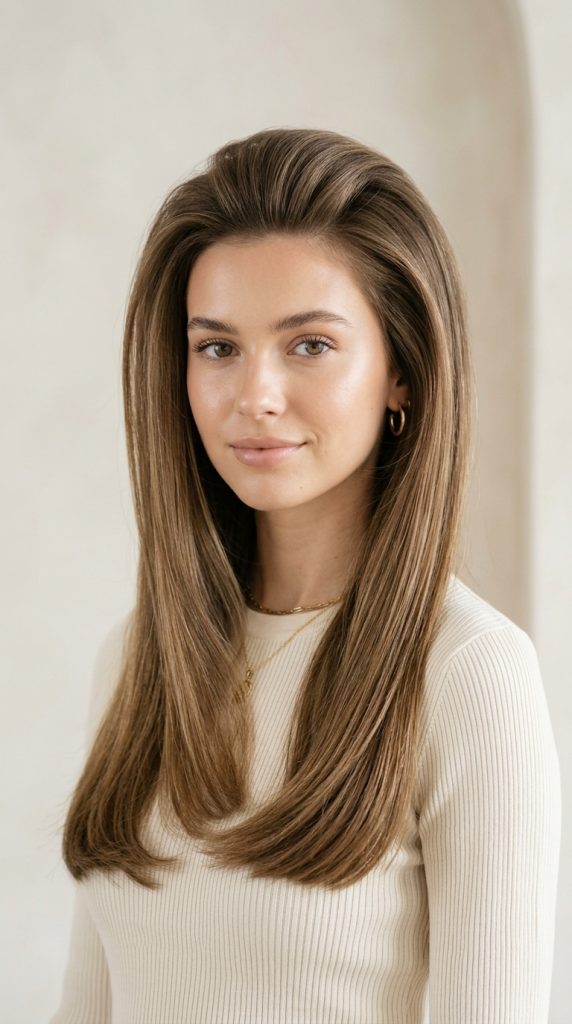
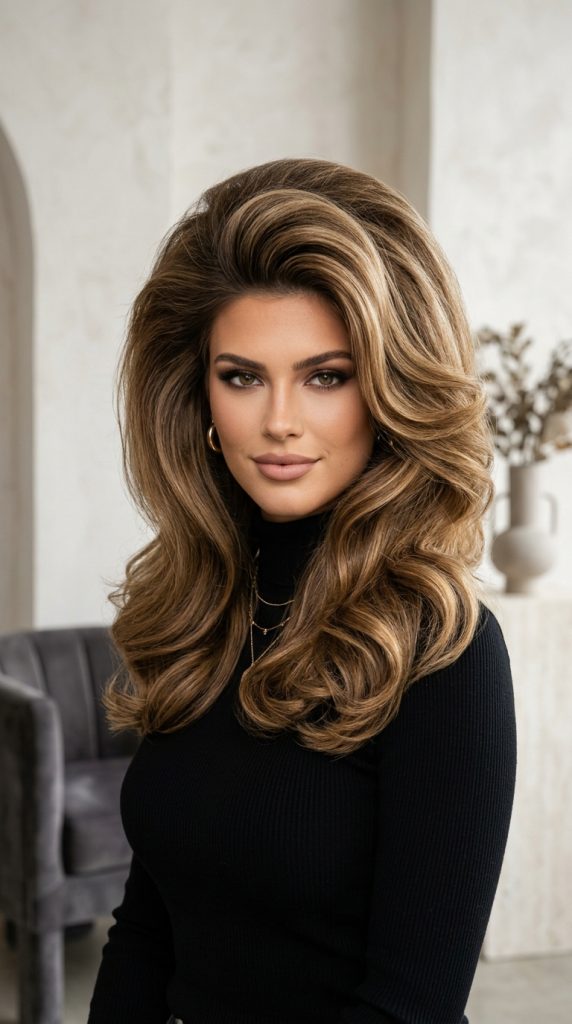
Idea 5: Sleek Straight Blowout with Volume
How to Create
This style combines straightened lengths with lifted roots, offering a refined and modern design. It is suitable for those who prefer a polished look without sacrificing volume. The aesthetic emphasizes smoothness while maintaining a subtle lift at the crown.
Begin by drying the roots with upward tension using a round brush. For the lengths, guide the brush straight downward while maintaining consistent airflow. Avoid excessive curling to preserve the sleek finish. Once complete, gently smooth the surface with a brush to blend all sections. This execution process ensures a clean and structured appearance.
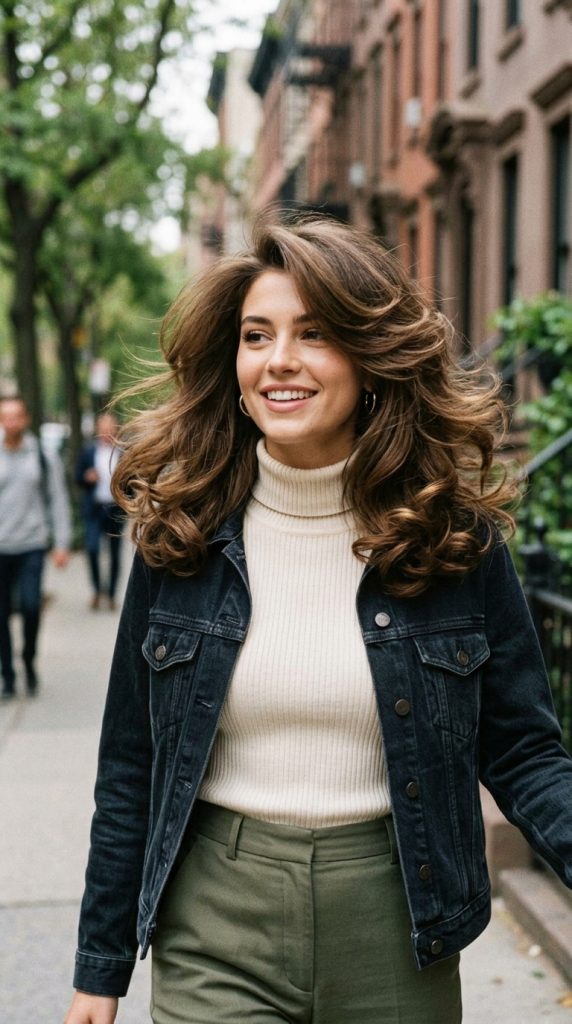
Idea 6: Bouncy Layered Blowout
How to Create
The bouncy layered blowout focuses on movement and elasticity, creating a lively and dynamic effect. This style is popular in DIY tutorials due to its versatility and visual appeal. Layers play a key role in distributing volume evenly.
To create this look, use a medium round brush to lift each layer individually. Rotate the brush slightly at the ends to create bounce. Work in small sections to maintain control. After styling, shake the hair gently to enhance movement. This step-by-step guide ensures a balanced and energetic finish.
Idea 7: Side-Part Glam Blowout
How to Create
The side-part glam blowout introduces asymmetry, adding depth and drama to the hairstyle. This approach aligns with aesthetic trends that favor structured yet natural looks.
Start by creating a deep side part before drying. Focus on lifting the heavier side to maintain balance. Use a round brush to guide the hair across the head, creating a smooth curve. Finish by blending both sides for a cohesive result.
Idea 8: Feathered Blowout
How to Create
The feathered blowout features light, airy layers that resemble soft feathers. This style adds texture without heaviness and is often used in creative ideas for modern hair styling.
To achieve this effect, use a round brush to flick the ends outward in thin sections. Maintain light tension to avoid flattening the layers. Repeat across all sections for consistency.
Idea 9: Minimalist Smooth Blowout
How to Create
The minimalist smooth blowout prioritizes simplicity and clean lines. It is ideal for those who prefer understated elegance in their styling routine.
Dry the hair using a paddle or round brush with minimal rotation. Focus on achieving a straight, smooth finish with slight root lift. This setup method ensures a polished yet subtle look.

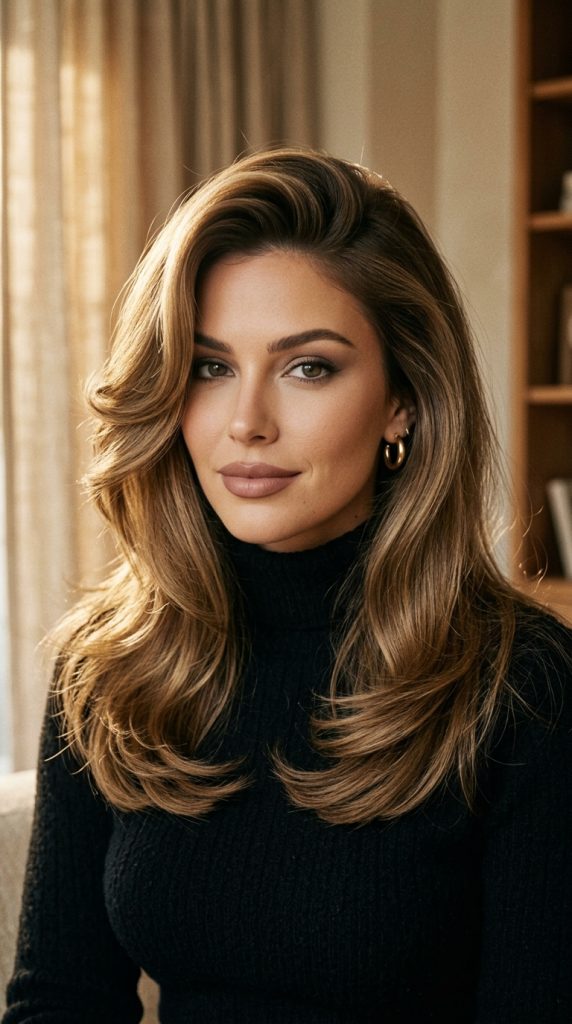
Idea 10: High-Volume Crown Blowout
How to Create
This style emphasizes height at the crown, creating a bold and structured silhouette. It is commonly featured in Pinterest inspiration for its dramatic effect.
To create this look, concentrate on lifting the top sections using a round brush and strong airflow. Hold each section upward while drying to set the volume. Blend the sides gently to maintain balance.
Common Beginner Mistakes and How to Avoid Them
One common mistake is using excessive heat without proper preparation, which can lead to dryness and reduced manageability. Applying a heat protectant evenly before styling helps prevent damage and ensures smoother results. Another issue is working with sections that are too large, making it difficult to control airflow and brush movement. Dividing the hair into smaller sections improves precision and consistency. Beginners also often skip the cooling phase, which is essential for setting the shape of the blowout. Allowing each section to cool before brushing helps maintain volume and structure. Additionally, incorrect brush size selection can affect the final outcome. Larger brushes are better for volume, while smaller ones provide more defined shaping. Avoiding these mistakes ensures a more effective and beginner-friendly styling process.
Practical Tips for Better Results
Consistent technique plays a key role in achieving professional-looking results. Holding the dryer at a downward angle helps smooth the hair cuticle, reducing frizz and enhancing shine. Maintaining steady tension with the brush ensures even shaping across all sections. It is also useful to adjust airflow settings based on hair thickness, using lower heat for fine hair and higher heat for thicker textures. Practicing controlled movements rather than rushing improves accuracy and reduces the need for corrections. These practical tips support a more efficient and polished styling experience.
Styling, Presentation, or Organization Ideas
Organizing tools and materials before starting the blowout process improves workflow and reduces interruptions. Keeping brushes, clips, and styling products within reach allows for smoother transitions between steps. Presentation also plays a role in enhancing the final look. Pairing the hairstyle with coordinated outfits or minimal accessories can highlight the clean lines of the blowout. Arranging hair sections neatly during styling ensures consistency and prevents tangling. These organization ideas contribute to a more structured and visually appealing result.
Budget or Time Planning
Efficient planning helps complete the blowout process within a reasonable timeframe. Setting aside 30 to 45 minutes is typically sufficient for most styles, depending on hair length and thickness. Using multi-purpose tools, such as a dryer with adjustable settings, reduces the need for additional equipment. Budget ideas include investing in durable basic tools rather than multiple specialized items. Planning the process in advance minimizes delays and ensures a smooth workflow.
Creative Expansion and Advanced Inspiration
Once the basic techniques are mastered, these blowout styles can be expanded into more advanced variations. Combining elements from different ideas, such as adding flipped ends to a layered blowout, creates unique results. Incorporating accessories like clips or headbands can enhance the aesthetic without altering the core style. Experimenting with parting styles and volume placement also allows for personalized adaptations. These creative ideas encourage ongoing exploration while maintaining the foundational principles of the 90s blowout.
Leave a Reply