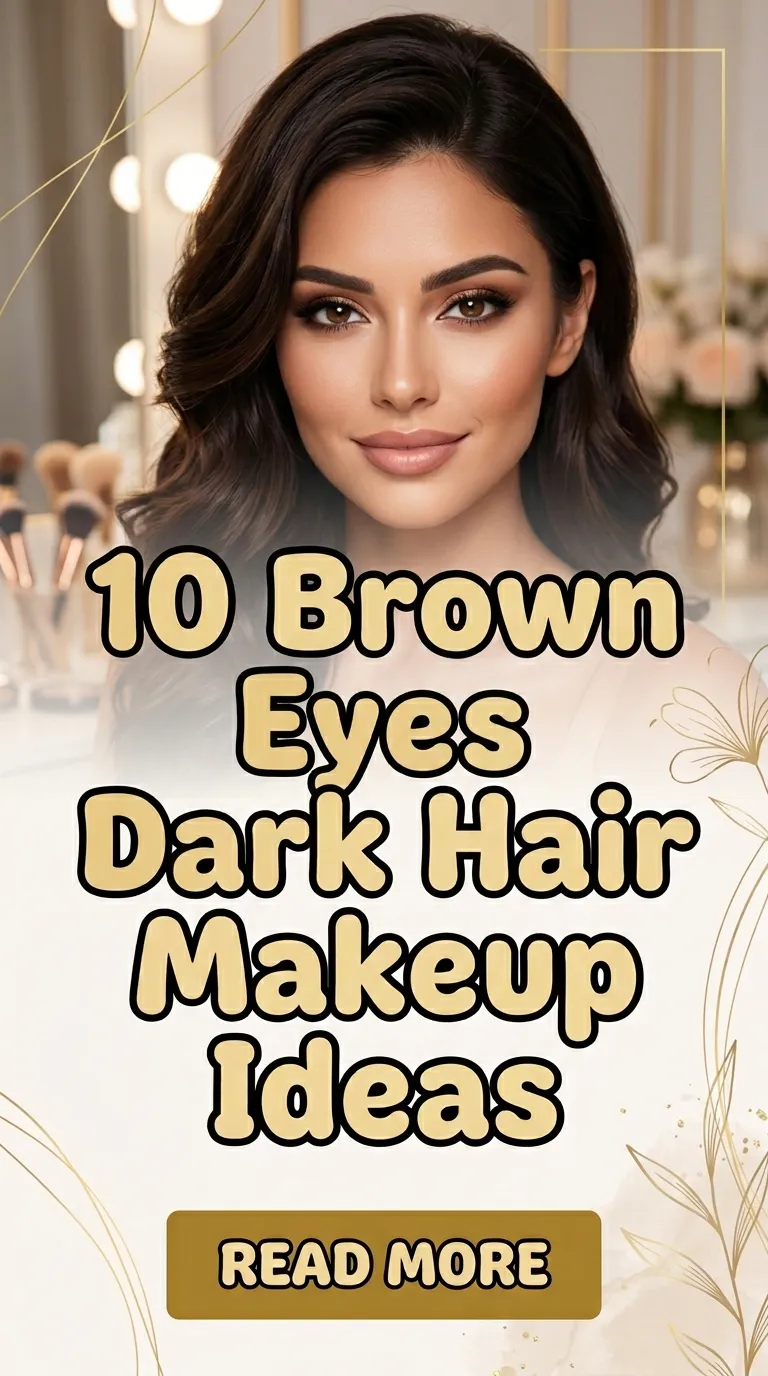

Brown eyes and dark hair create a naturally striking combination that offers strong contrast and depth, making it highly adaptable for a wide range of makeup styles. This Pinterest-inspired guide focuses on practical, beginner friendly approaches that enhance these features using balanced color choices, modern design principles, and structured application methods. Readers will learn how to create looks that range from soft everyday aesthetics to bold evening styles, all using accessible materials and clear step by step techniques. Each idea is designed as a complete creative project, ensuring that the process remains simple while delivering polished results. The goal is to provide inspiration that translates easily into real-life application without requiring advanced skills or expensive tools. These makeup ideas also emphasize harmony between eye color, hair tone, and overall facial balance, which is essential for achieving a cohesive look. Whether the focus is subtle definition or dramatic impact, this article provides clear guidance to help readers confidently explore different approaches while maintaining consistency and control in their routine.
Why This Idea Is Trending or Useful
Makeup ideas for brown eyes and dark hair are trending because they combine versatility with strong visual impact, making them ideal for modern aesthetic preferences seen across Pinterest inspiration boards. This combination works well with both minimalist style and more elaborate looks, allowing users to experiment without needing extensive product collections. The practicality lies in the fact that many of these looks rely on neutral tones, warm shades, and classic techniques that are easy to replicate at home. DIY appeal is strong because most styles can be created using basic materials and simple blending methods, making them accessible for beginners. These ideas also align with current home decor and personal styling trends where natural tones, soft gradients, and clean finishes are preferred. The growing interest in organization and planning within beauty routines further supports these looks, as they are structured and repeatable. Their adaptability for daily wear, special occasions, and seasonal changes makes them useful for anyone seeking consistent yet creative results without unnecessary complexity.
Materials and Preparation
Before starting any makeup tutorial, proper preparation ensures smoother application and more consistent results. Basic materials include a neutral eyeshadow palette with warm browns, golds, and soft pinks, a black or brown eyeliner, mascara, eyebrow tools, and a blending brush set. Optional additions such as shimmer pigments or deeper shades can help create more advanced variations. Skin preparation is equally important, including cleansing, moisturizing, and applying a primer to create a smooth base. This step supports even color distribution and longer wear time. Planning involves selecting a look based on the occasion, lighting conditions, and personal comfort level. Organizing tools in advance reduces interruptions during application and improves overall workflow. Beginners benefit from practicing blending techniques on the hand or a neutral surface before applying directly to the eyes. Good lighting and a stable mirror setup are also essential for precision. By preparing materials and following a clear structure, the entire process becomes more efficient and results appear more refined and controlled.
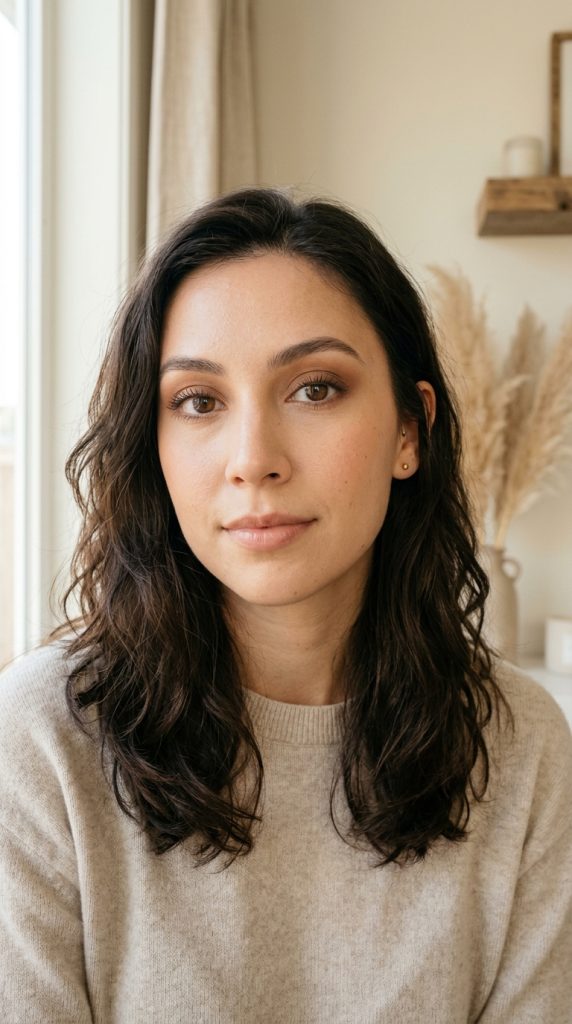
Idea 1: Soft Brown Everyday Look
How to Create
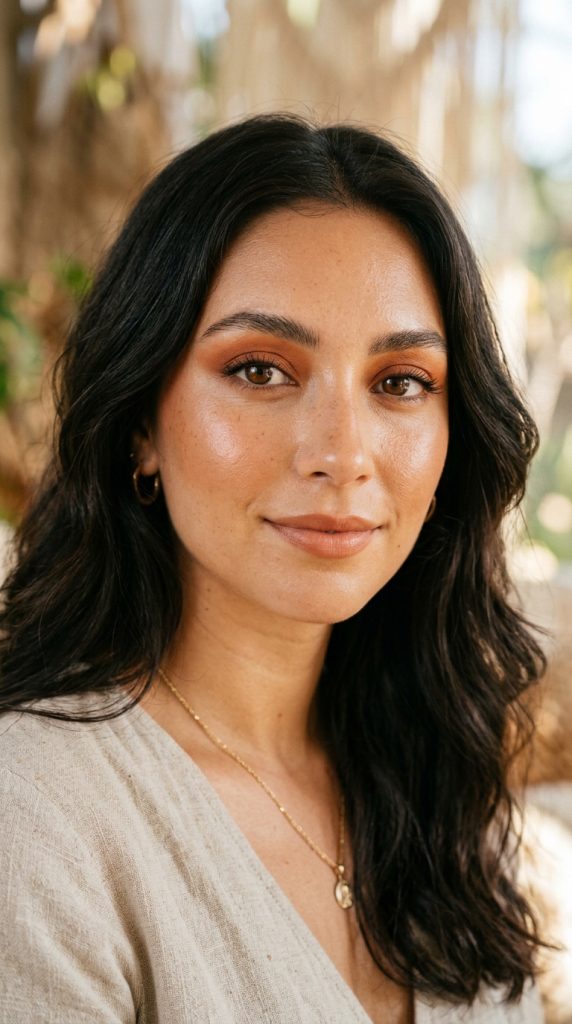
This look focuses on enhancing natural features using warm brown tones that complement both eye color and hair depth. It is ideal for daily wear and aligns with minimalist style preferences often seen in Pinterest ideas. The goal is to create soft definition without heavy contrast, allowing the eyes to stand out in a subtle and balanced way. Light matte browns are used to contour the eyelid, while slightly deeper shades define the crease. This combination creates dimension without appearing overly dramatic. A neutral base shade helps unify the entire look and ensures smooth blending between tones. The result is a clean, polished appearance suitable for work, casual outings, or simple home decor inspired aesthetics where understated beauty is emphasized.
To execute this easy project, start by applying a light neutral shade across the eyelid as a base. Next, use a medium brown shade to define the crease, blending it gently outward to create a soft gradient. Add a slightly darker brown to the outer corner for subtle depth, ensuring edges remain diffused. Use a small brush to apply the same medium tone along the lower lash line for balance. Finish with a light coat of mascara to enhance lashes without overpowering the look. This step by step approach keeps the process manageable for beginners while delivering consistent results. Proper blending is key, so take time to soften transitions between colors for a seamless finish.
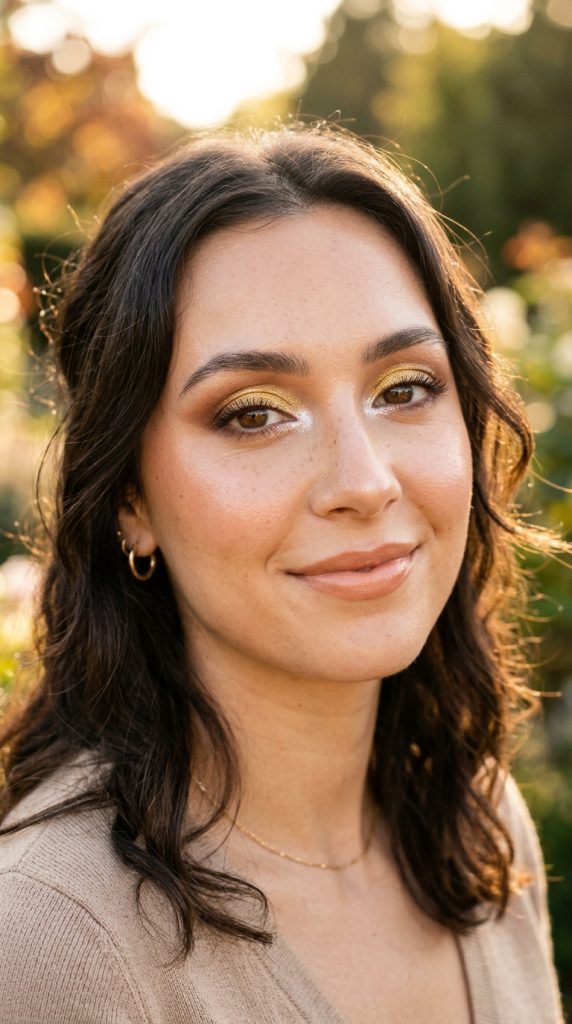
Idea 2: Golden Glow Enhancement
Step-by-Step Guide
This makeup idea uses warm golden tones to highlight the richness of brown eyes while complementing dark hair. Gold shades reflect light effectively, creating a radiant effect that enhances natural features without requiring complex techniques. This style is often included in trending ideas due to its ability to work in both daytime and evening settings. The combination of shimmer and warm undertones adds depth while maintaining a soft, approachable appearance. It fits well within aesthetic-focused Pinterest inspiration where glow and warmth are central elements.
Begin by applying a neutral matte base to the eyelid to prepare for shimmer application. Use a gold eyeshadow on the center of the lid, blending it outward toward the inner and outer corners. Add a warm brown shade to the crease to anchor the shimmer and provide structure. Blend carefully to avoid harsh lines. Apply a small amount of gold to the inner corner to brighten the eyes. Finish with eyeliner along the upper lash line and mascara to define lashes. This tutorial emphasizes controlled application and gradual layering, ensuring the final look remains balanced and beginner friendly.
Idea 3: Smoky Bronze Depth
How to Make
This look introduces deeper bronze tones to create a smoky effect that enhances contrast between brown eyes and dark hair. It is a modern design approach that combines classic smoky techniques with warmer shades, making it more wearable for everyday use. Bronze tones add richness without the heaviness of traditional black smoky eyes, making this a practical creative project for those exploring bolder styles.
Start by applying a medium brown base across the lid. Layer a bronze shimmer on top, focusing on the center and outer areas. Use a darker brown shade to deepen the outer corner and blend into the crease. Smudge a similar tone along the lower lash line to create a cohesive smoky effect. Add eyeliner close to the lash line and soften it slightly for a diffused finish. Complete the look with volumizing mascara. The step by step method ensures even blending and controlled intensity, making the process accessible while achieving a polished result.
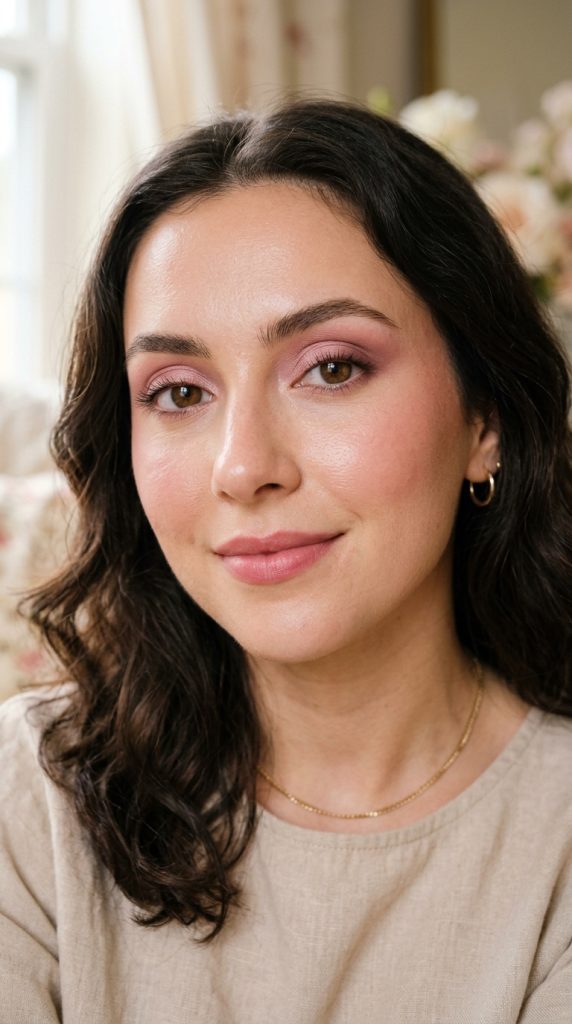
Idea 4: Rosy Neutral Blend
Execution Process
This idea incorporates soft pink and rose tones to create a balanced look that contrasts gently with dark hair while enhancing brown eyes. It aligns with aesthetic Pinterest ideas focused on softness and natural beauty. The combination of warm neutrals and subtle pink hues creates a fresh, approachable appearance suitable for various occasions.
Apply a light neutral base, then blend a soft rose shade into the crease. Use a slightly deeper pink or mauve tone on the outer corner for dimension. Keep the inner lid lighter to maintain brightness. Blend thoroughly to ensure smooth transitions. Add a thin line of eyeliner and finish with mascara. This beginner friendly approach emphasizes light layering and controlled blending, resulting in a cohesive and wearable look.
Idea 5: Classic Winged Definition
How to Create
This timeless style focuses on clean eyeliner application to define the eyes while keeping shadow minimal. It is widely used in modern makeup organization routines due to its simplicity and strong visual impact. The contrast between dark liner and brown eyes enhances clarity and sharpness.
Begin with a neutral eyeshadow base. Use eyeliner to create a precise wing extending slightly outward. Keep the line thin near the inner corner and gradually thicken toward the outer edge. Apply mascara to complete the look. This easy project requires steady hand control and practice but delivers consistent results once mastered.

Idea 6: Matte Neutral Sculpt
Setup Method
This look relies entirely on matte shades to create structure and depth without shimmer. It aligns with minimalist style trends and is ideal for professional or understated settings. The absence of shine emphasizes clean blending and natural contours.
Apply a matte base shade across the lid. Use a medium brown to define the crease and a darker tone for the outer corner. Blend carefully to maintain a smooth gradient. Add mascara for definition. This method focuses on precision and balance, making it a reliable option for daily use.

Idea 7: Warm Terracotta Accent
How to Make
Terracotta tones bring warmth and vibrancy to brown eyes while complementing dark hair. This style is popular in creative ideas collections due to its earthy and natural appeal. It works well in seasonal makeup looks, especially during warmer months.
Start with a neutral base, then apply a terracotta shade across the lid. Blend a deeper tone into the crease for depth. Keep edges soft and diffused. Add mascara and optional eyeliner for definition. The process is simple and adaptable, making it suitable for beginners.
Idea 8: Subtle Shimmer Highlight
Step-by-Step Guide
This look focuses on strategic shimmer placement to enhance brightness without overwhelming the eyes. It fits within aesthetic trends that prioritize light reflection and soft finishes.
Apply a matte base and crease shade. Add a light shimmer to the center of the lid and inner corner. Blend edges to integrate with surrounding tones. Finish with mascara. This approach emphasizes controlled shimmer use for a refined result.

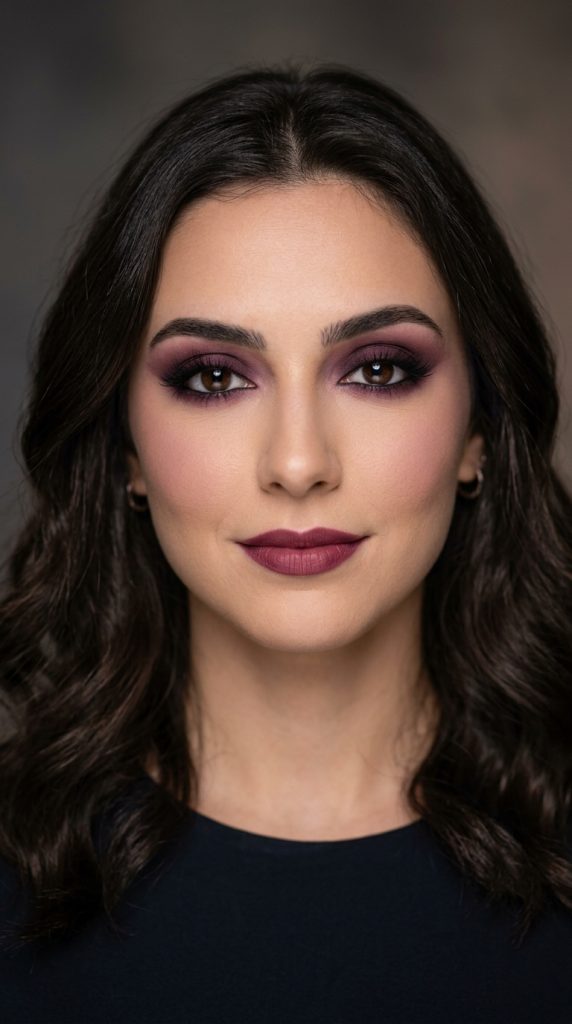
Idea 9: Deep Plum Contrast
How to Create
Plum shades provide a unique contrast that enhances brown eyes while complementing dark hair. This idea introduces variety while maintaining harmony with natural features.
Apply a neutral base, then layer a plum shade on the lid. Blend into the crease with a darker tone for depth. Add eyeliner and mascara. The process requires careful blending to maintain balance between color intensity and softness.
Idea 10: Natural Barely-There Look
Execution Process
This minimalist approach enhances natural features with minimal product use. It aligns with budget ideas and quick routines, making it ideal for everyday wear.
Apply a light neutral shade and softly define the crease. Skip heavy liner and use mascara for subtle enhancement. This step by step method prioritizes simplicity and efficiency while maintaining a polished appearance.

Common Beginner Mistakes and How to Avoid Them
One common mistake is applying too much product at once, which makes blending difficult and creates uneven results. Building color gradually allows better control and smoother transitions. Another issue is skipping preparation steps such as priming, which can lead to patchy application and reduced longevity. Using the wrong brush for blending or packing color can also affect the final outcome. Beginners often overlook the importance of lighting, which can distort color perception and lead to inconsistent application. To avoid these problems, focus on controlled layering, proper tool selection, and consistent preparation. Practicing simple techniques repeatedly helps improve accuracy and confidence over time.
Practical Tips for Better Results
Consistent blending is the key to achieving professional-looking results. Use light pressure and circular motions to soften edges between shades. Keeping tools clean prevents color mixing and ensures accurate application. Working in natural lighting improves color accuracy and overall balance. Organizing materials before starting reduces interruptions and improves efficiency. Choosing shades that complement natural features enhances the final look without requiring complex techniques.
Styling, Presentation, or Organization Ideas
Presenting makeup looks effectively involves maintaining clean lines and balanced color placement. Organizing products by category improves workflow and saves time. Using a consistent setup area with proper lighting enhances precision. Coordinating makeup with clothing or overall aesthetic themes creates a cohesive appearance.
Budget or Time Planning
Most of these ideas can be completed using a small set of essential materials, making them cost-effective. Planning the look in advance reduces application time and prevents unnecessary adjustments. Simple styles can be completed in under fifteen minutes, while more detailed looks may require additional time for blending and refinement.
Creative Expansion and Advanced Inspiration
Once basic techniques are mastered, experimenting with color combinations and layering methods can expand creative possibilities. Adding subtle variations such as different liner styles or additional shimmer placement allows customization. Exploring seasonal palettes and adapting looks for different occasions provides continuous inspiration while maintaining consistency in technique.


Leave a Reply