
The 90s blowout hairstyle has returned as one of the most recognizable and practical Pinterest ideas for modern beauty routines. Defined by volume, smoothness, and structured movement, this hairstyle offers a polished yet natural look that suits a wide range of face shapes and hair types. When paired with dark hair tones, the blowout enhances depth, shine, and contrast, making the overall style more visually striking. This article explores how to recreate ten distinct variations of the 90s blowout specifically for dark hair, using beginner friendly methods and accessible materials. Readers will learn practical techniques, step by step processes, and styling approaches that align with current trends in home decor aesthetics and personal presentation. The focus remains on clarity and execution, ensuring each idea can be completed as a realistic DIY project. Whether preparing for daily wear or special occasions, these styles provide structured inspiration while maintaining a modern design approach rooted in simplicity and functionality.
Why This Idea Is Trending or Useful
The resurgence of 90s-inspired hairstyles is closely linked to the growing demand for timeless, low-maintenance beauty routines that still deliver a refined appearance. The 90s blowout stands out among trending ideas because it balances structure with natural movement, making it suitable for both casual and formal settings. On Pinterest, users consistently search for creative ideas that combine aesthetic appeal with practical execution, and this hairstyle fits that requirement. Its DIY nature makes it accessible for beginners who want salon-level results without professional tools or advanced training. Additionally, the blowout works well with dark hair by enhancing shine and creating visible layers through controlled volume. This makes it particularly appealing for those seeking subtle transformation rather than dramatic changes. The method also aligns with minimalist style preferences, focusing on clean lines and smooth finishes. As a result, it has become a staple in beauty-related inspiration boards, offering both versatility and reliability for everyday styling.
Materials and Preparation
Before starting any 90s blowout hairstyle, proper preparation ensures consistent results and reduces styling time. Essential materials include a quality hair dryer with a concentrator nozzle, a round brush suitable for your hair length, sectioning clips, and a heat protectant product. Additional tools such as a wide-tooth comb and lightweight styling cream can help manage texture and improve control during the process. Preparation begins with freshly washed hair that is partially towel-dried to remove excess moisture. Applying a heat protectant evenly across the hair is critical to prevent damage during blow drying. Sectioning the hair into manageable parts improves precision and ensures even airflow distribution. Planning also involves selecting the appropriate brush size, as larger brushes create soft volume while smaller brushes define tighter movement. Workspace organization is equally important, with tools arranged for easy access. This structured setup allows beginners to follow the tutorial efficiently and achieve a polished, professional-looking result at home.
Idea 1: Classic Layered 90s Blowout
How to Create
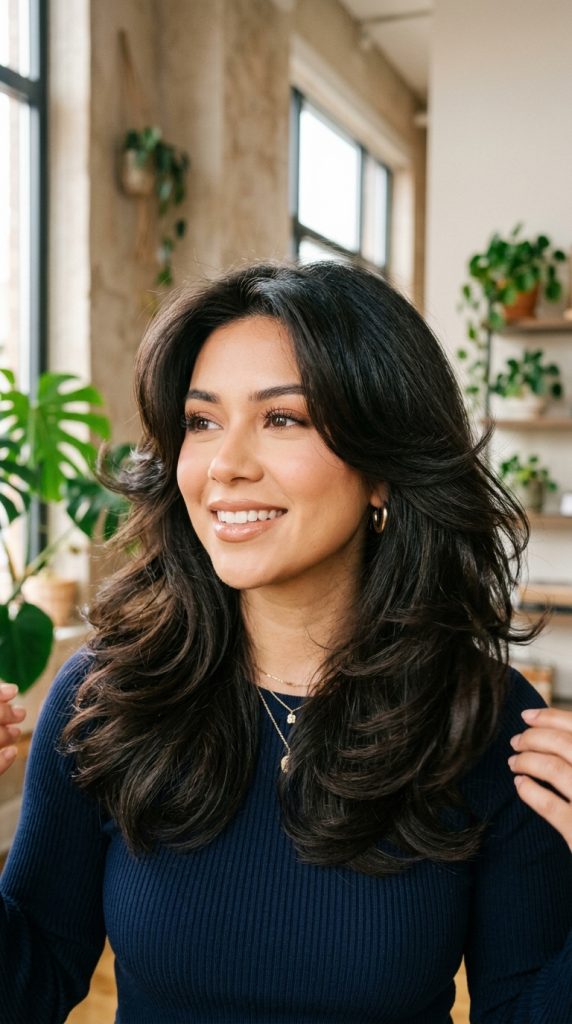
The classic layered blowout focuses on enhancing natural hair movement through structured layering and smooth volume. This style works particularly well with dark hair because the layers reflect light differently, creating depth and dimension without requiring additional color treatments. The defining feature is soft outward flicks at the ends, combined with a smooth crown that maintains height without appearing stiff. This approach aligns with minimalist style trends, as it avoids excessive styling while still delivering a refined finish. The aesthetic is clean, balanced, and suitable for both everyday wear and formal settings. This idea remains one of the most practical Pinterest ideas because it combines simplicity with a polished appearance. It is especially useful for individuals seeking a reliable, repeatable hairstyle that does not require frequent adjustments. The layered structure also helps reduce bulk in thicker hair, making it easier to manage and style consistently.
To achieve this look, begin by dividing the hair into horizontal sections, starting from the bottom. Use a round brush to pull each section outward while directing heat from the dryer along the shaft of the hair. This step by step method ensures smoothness and prevents frizz. Focus on curling the ends slightly outward to create the signature 90s shape. Continue this process upward, maintaining consistent tension with the brush. For the top section, lift the hair at the roots while blow drying to add volume. Once all sections are complete, allow the hair to cool before lightly combing through to soften the structure. This technique ensures the style remains flexible rather than rigid, making it suitable for daily wear.

Idea 2: Sleek Middle-Part Blowout
Step-by-Step Guide
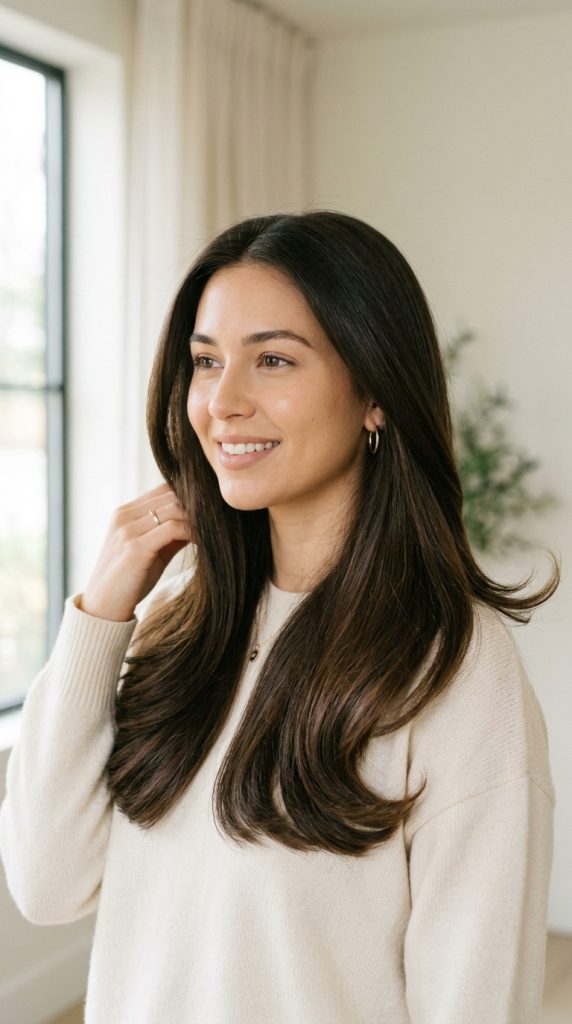
The sleek middle-part blowout emphasizes symmetry and smoothness, making it a strong choice for modern design aesthetics. This hairstyle highlights facial features while maintaining a clean and structured appearance. Dark hair enhances this effect by reflecting light evenly across the surface, creating a glossy finish. The middle part adds balance, making it suitable for both casual and professional environments. This style is particularly popular in Pinterest inspiration boards due to its simplicity and versatility. It aligns with minimalist trends while still offering a refined look that feels intentional and polished. The absence of excessive volume makes it easier to maintain throughout the day, reducing the need for constant adjustments. This makes it an ideal option for individuals seeking a low-maintenance yet visually appealing hairstyle.
To create this style, start by parting the hair evenly down the center using a comb. Section the hair into manageable parts and begin blow drying from the back. Use a medium-sized round brush to guide the hair downward while applying heat evenly. Focus on maintaining a straight, smooth texture rather than adding curls. For the front sections, pull the hair slightly forward while drying to frame the face naturally. Ensure each section is fully dry before moving on to the next to avoid uneven texture. Once complete, lightly brush through the hair to blend the sections and enhance the sleek finish. This process results in a clean, balanced blowout that complements a wide range of outfits and occasions.

Idea 3: Voluminous Side-Part Blowout
How to Make
The voluminous side-part blowout introduces asymmetry and added lift, making it a dynamic variation of the traditional 90s style. This approach is particularly effective for adding movement and visual interest to dark hair, as the shift in parting creates contrast and highlights natural shine. The side part allows for more volume at the crown, which can help balance facial proportions and create a more dramatic silhouette. This style is frequently featured in trending ideas due to its ability to transform the overall appearance without requiring significant changes to the haircut. It remains beginner friendly while offering a noticeable upgrade in volume and structure. The result is a bold yet controlled hairstyle that maintains a polished finish suitable for both day and evening settings.
To achieve this look, begin by creating a deep side part using a comb. Section the hair and start blow drying from the bottom layers. Use a round brush to lift the roots while directing airflow upward to build volume. For the side with more hair, focus on creating additional lift at the crown to enhance the asymmetrical effect. Continue working through each section, ensuring consistent tension and heat distribution. Once all sections are dry, gently sweep the hair into place along the side part. Use a light finishing technique, such as finger combing, to maintain movement without flattening the volume. This method ensures the hairstyle remains structured while still appearing natural and flexible.

Idea 4: Soft Curl Blowout Ends
How to Create
This variation focuses on subtle curls at the ends while maintaining a smooth upper structure. It is an effective way to add texture without overwhelming the overall design. Dark hair benefits from this approach because the curls catch light differently, creating depth and visual variation. The style is widely used in Pinterest inspiration boards as it bridges the gap between straight and curly finishes. It is suitable for beginners because it does not require precise curling techniques, relying instead on controlled brushing and heat application. The result is a balanced hairstyle that feels both relaxed and intentional.
To create this look, section the hair and begin blow drying from the roots using a round brush. As you reach the ends, rotate the brush inward slightly while applying heat to form a soft curl. Repeat this process for each section, ensuring the curls remain consistent in size and direction. Avoid over-rotating the brush, as this can create tighter curls that deviate from the intended style. Once all sections are complete, allow the hair to cool before gently separating the curls with your fingers. This step ensures the final result remains soft and natural rather than overly structured.
Idea 5: Face-Framing Blowout Layers
Execution Process
Face-framing layers emphasize the front sections of the hair, drawing attention to facial features while maintaining overall balance. This style works particularly well with dark hair because it enhances contrast around the face. It is a common choice in creative ideas collections due to its versatility and flattering structure. The design focuses on subtle layering rather than dramatic cuts, making it accessible for beginners who want to experiment with shape and movement.
To achieve this look, start by isolating the front sections of the hair. Use a round brush to direct these sections away from the face while applying heat. This creates a soft, open frame that highlights facial features. Continue blow drying the remaining sections with a focus on maintaining smoothness and light volume. Once complete, blend the front layers with the rest of the hair using a gentle brushing technique. This ensures a cohesive finish that feels natural and balanced.

Idea 6: Straight and Glossy Blowout
Setup Method
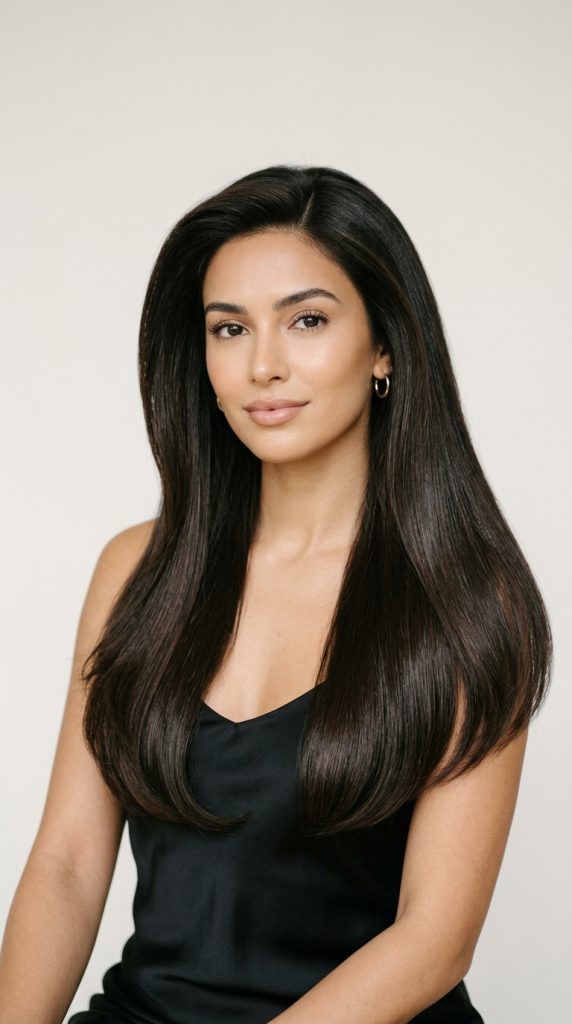
The straight and glossy blowout prioritizes smoothness and shine, making it ideal for minimalist style preferences. Dark hair naturally enhances this effect, as it reflects light evenly across the surface. This style is widely used in home decor-inspired beauty boards due to its clean and structured appearance.
To create this look, section the hair and use a flat round brush to guide the hair downward while applying heat. Focus on maintaining consistent tension to achieve a smooth finish. Avoid adding curls or waves, as the goal is a straight, polished appearance. Once complete, allow the hair to cool before lightly brushing through to enhance shine and uniformity.
Idea 7: Feathered 90s Blowout
How to Create
The feathered blowout introduces light, airy layers that create movement without adding weight. This style is strongly associated with 90s aesthetics and remains a popular choice in Pinterest ideas collections. It works well with dark hair by adding texture and reducing visual heaviness.
To achieve this look, use a round brush to flip sections outward while blow drying. Focus on creating separation between layers to enhance the feathered effect. Continue this process throughout the hair, ensuring consistency in direction and volume. Once complete, gently separate the layers with your fingers to maintain a soft, natural finish.
Idea 8: Low-Volume Natural Blowout
Step-by-Step Guide
This variation focuses on a more understated approach, reducing volume while maintaining smoothness. It is ideal for individuals seeking a subtle, everyday style. The natural finish aligns with modern design trends that prioritize simplicity and functionality.
To create this look, use a medium brush to guide the hair downward while applying heat. Avoid lifting the roots excessively, as the goal is a flatter silhouette. Once all sections are dry, lightly brush through the hair to blend the structure and maintain a natural appearance.
Idea 9: Bouncy Blowout with Movement
How to Make
The bouncy blowout emphasizes volume and elasticity, creating a lively and dynamic appearance. This style is frequently featured in trending ideas due to its energetic and polished look.
To achieve this effect, use a round brush to lift the roots and rotate the ends slightly. Work through each section methodically, ensuring even distribution of heat and tension. Once complete, allow the hair to cool before gently shaking it out to enhance movement.
Idea 10: Polished Tucked-In Blowout
How to Create
The tucked-in blowout features inward-curving ends that create a structured and refined silhouette. This style is particularly effective for formal settings and aligns with modern minimalist aesthetics.
To create this look, use a round brush to curl the ends inward while blow drying. Maintain consistent direction across all sections to ensure a cohesive finish. Once complete, lightly brush through the hair to soften the structure without losing definition.
Common Beginner Mistakes and How to Avoid Them
One common mistake is using excessive heat without proper protection, which can damage hair and reduce shine. Always apply a heat protectant before styling. Another issue is improper sectioning, which leads to uneven results and longer styling time. Dividing the hair into smaller sections ensures better control and consistency. Many beginners also use incorrect brush sizes, which can affect the final shape of the blowout. Selecting the right brush based on hair length improves results significantly. Rushing the process is another frequent error, as incomplete drying can cause frizz and loss of structure. Allowing each section to fully dry before moving on helps maintain the intended style.
Practical Tips for Better Results
Consistent tension while brushing improves smoothness and reduces frizz. Using a concentrator nozzle helps direct airflow more precisely, enhancing control during the styling process. Cooling each section before touching it helps set the shape and maintain volume. Keeping tools organized improves efficiency and reduces interruptions during styling. Practicing the step by step method regularly builds confidence and improves overall technique.
Styling, Presentation, or Organization Ideas
Arranging your styling tools in a dedicated space improves workflow and reduces preparation time. Using mirrors with proper lighting ensures better visibility and accuracy during the process. Presenting the finished hairstyle with simple accessories can enhance the overall look without overpowering the design. Maintaining a clean and organized setup aligns with modern aesthetic preferences.
Budget or Time Planning
Planning the styling process in advance helps reduce time spent on preparation. Investing in essential tools rather than multiple unnecessary items keeps costs manageable. Allocating sufficient time for each step ensures better results and reduces the need for corrections. Simple organization strategies can significantly improve efficiency.
Creative Expansion and Advanced Inspiration
Once comfortable with basic techniques, variations such as combining blowouts with braids or subtle waves can expand styling options. Experimenting with different partings and layering approaches allows for personalized results. Exploring new creative ideas within the same framework helps maintain consistency while introducing variety.
Leave a Reply