
Air-dry clay is an accessible and versatile material for DIY crafts, making it perfect for creating handmade bowls that are both functional and decorative. Unlike kiln-fired clay, air-dry clay hardens at room temperature, which means you don’t need specialized equipment to complete your projects. This makes it ideal for beginners and hobbyists who want to explore pottery and clay art.
Creating air-dry clay bowls allows you to experiment with shapes, textures, and colors. You can make bowls for practical purposes like holding keys, jewelry, or snacks, or purely decorative pieces for display. With a few basic tools and materials, you can transform a simple lump of clay into a beautiful, personalized bowl.
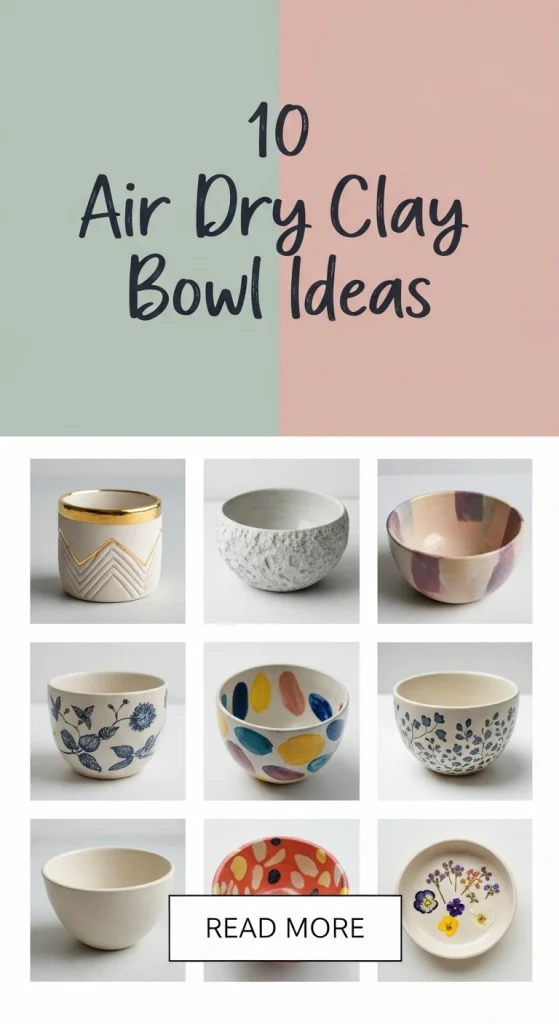
In this post, we will explore 10 creative air-dry clay bowl ideas. Each idea includes preparation steps, suggested materials, and styling tips. Whether you are new to clay crafting or looking for fresh inspiration, these ideas will help you make unique bowls that enhance your space and showcase your creativity.
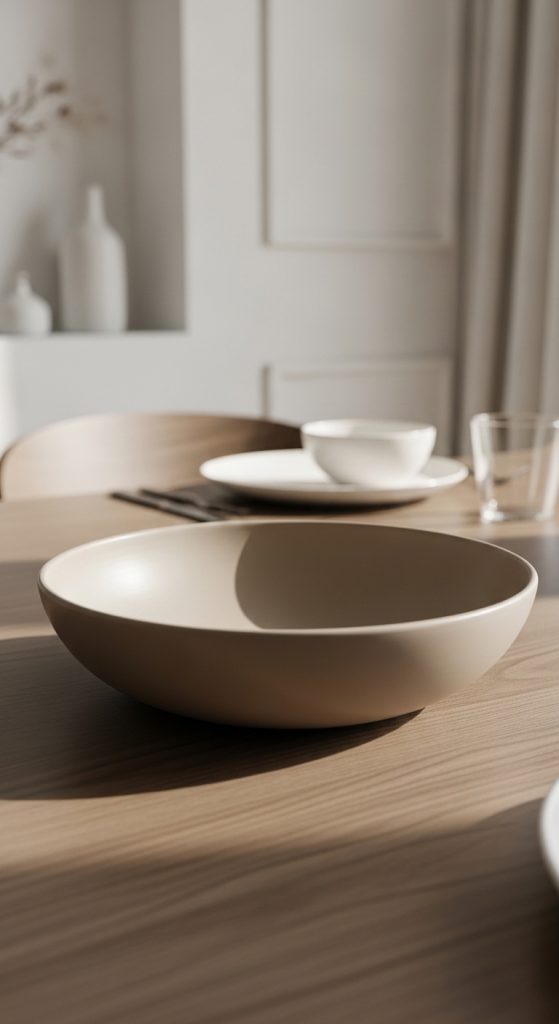
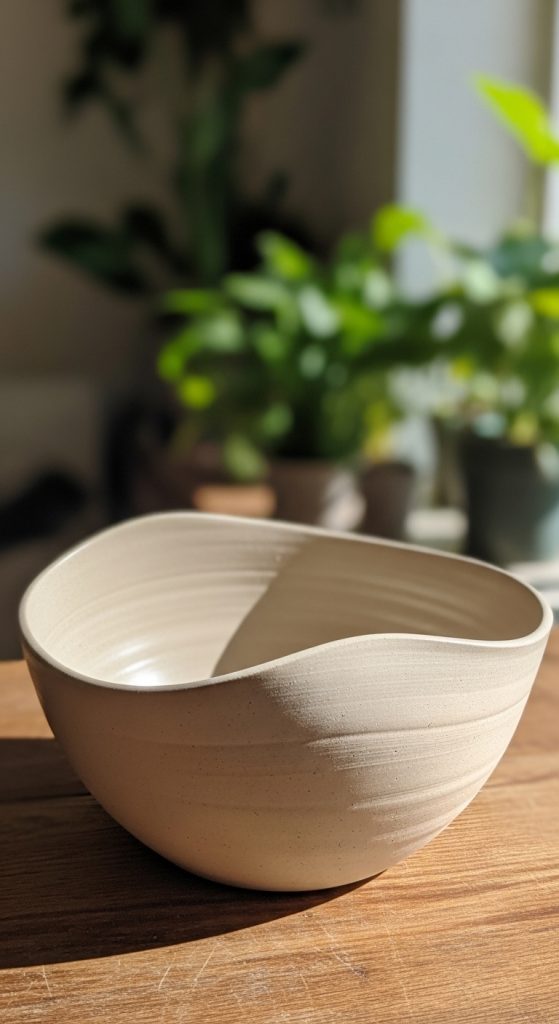
1. Minimalist Round Bowl
A minimalist round bowl is a classic and versatile design. Start by kneading your air-dry clay until it is soft and pliable. Roll the clay into a smooth ball, then flatten it gently with your palms or a rolling pin to create an even thickness. Use your fingers to lift the edges and form a shallow bowl shape.
For finishing, smooth the surface with a damp sponge to remove fingerprints and imperfections. Once dried, you can paint it in neutral tones like white, beige, or gray to maintain a minimalist aesthetic. This type of bowl works well as a catchall for jewelry, coins, or small items.
Materials needed include air-dry clay, a rolling pin, a damp sponge, and acrylic paint if you wish to add color. The simplicity of this design makes it perfect for beginners, while the clean lines make it stylish and modern.
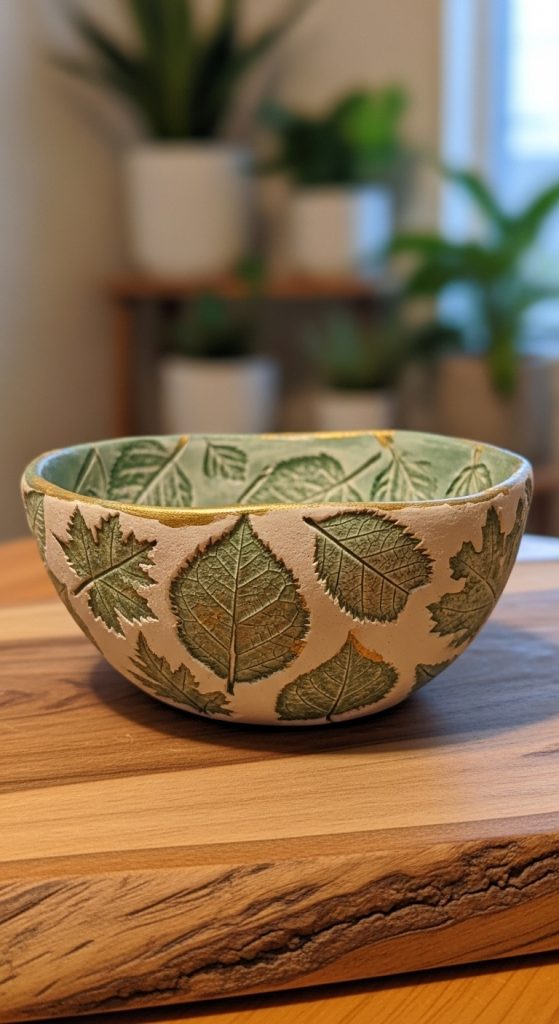
2. Textured Leaf Bowl
A textured leaf bowl brings natural elements into your clay art. After preparing your clay, flatten it into a circular or oval shape. Press a real leaf gently into the clay to create an imprint, then carefully lift the edges to form the bowl shape.
Allow the clay to dry completely. You can highlight the leaf pattern by painting the bowl lightly, using green, gold, or metallic colors to accentuate the texture. This type of bowl is perfect for decorative use, adding a touch of nature to your home décor.
Materials required include air-dry clay, real leaves, a rolling pin, acrylic paint, and a damp sponge for smoothing edges. This project encourages experimentation with patterns and textures, giving you a unique and organic bowl every time.
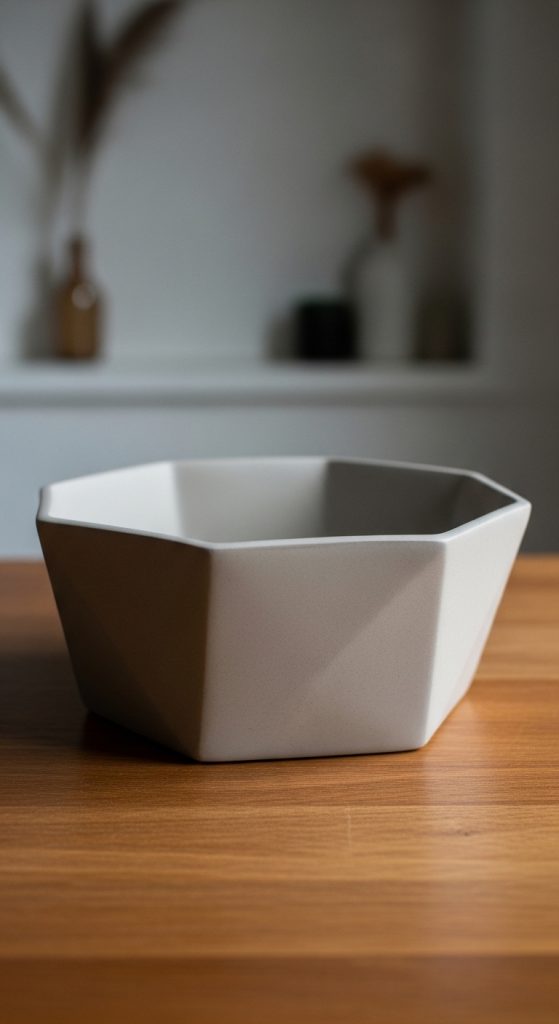
3. Geometric Polygon Bowl
A geometric polygon bowl uses straight lines and angles for a modern look. Begin by rolling out your clay into a slab. Cut the clay into equal triangles or rectangles and join the edges carefully using a little water to adhere pieces together. Form a polygonal base and raise the sides to complete the shape.
Smooth the edges with a damp sponge and allow it to dry fully. Painting the bowl in bold colors or keeping it neutral works well with geometric designs. This bowl can serve as a modern accent piece for desks or shelves.
Materials include air-dry clay, a knife or clay cutter, water for adhesion, and acrylic paints. The structured design makes it slightly more advanced but adds a striking visual element to your collection.
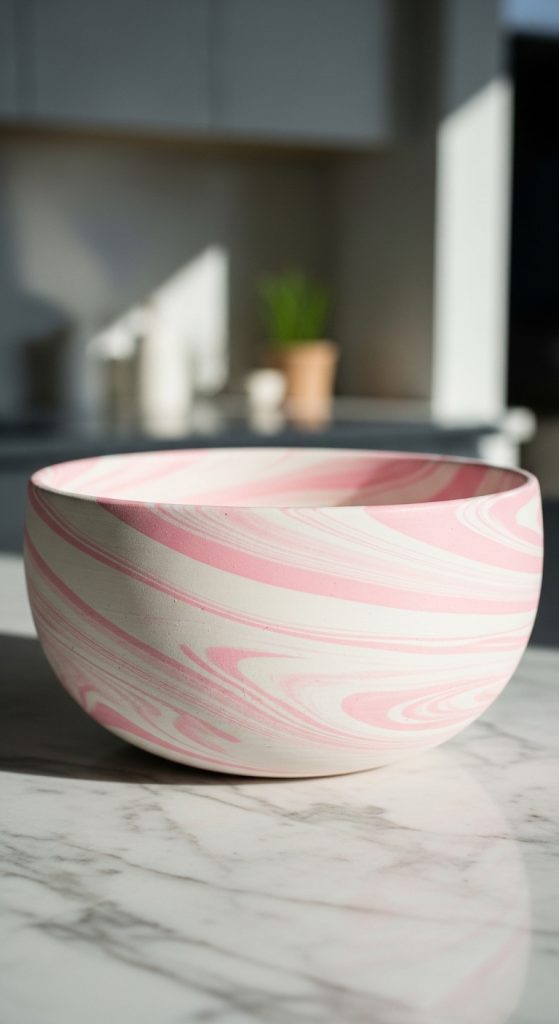
4. Marbled Clay Bowl
Marbled clay bowls combine two or more clay colors for a swirled effect. Choose complementary clay colors and knead them together lightly, twisting and folding just enough to create a marbled pattern without overmixing. Flatten the clay into a round slab and shape it into a bowl by lifting the edges.
Allow it to dry fully. You can enhance the design with a clear sealant for a glossy finish. Marbled bowls work well for both decorative and functional purposes, creating a visually appealing piece every time.
Materials include at least two colors of air-dry clay, a rolling pin, a damp sponge, and optional varnish or sealant. This technique allows endless creativity, as no two bowls will look exactly alike.
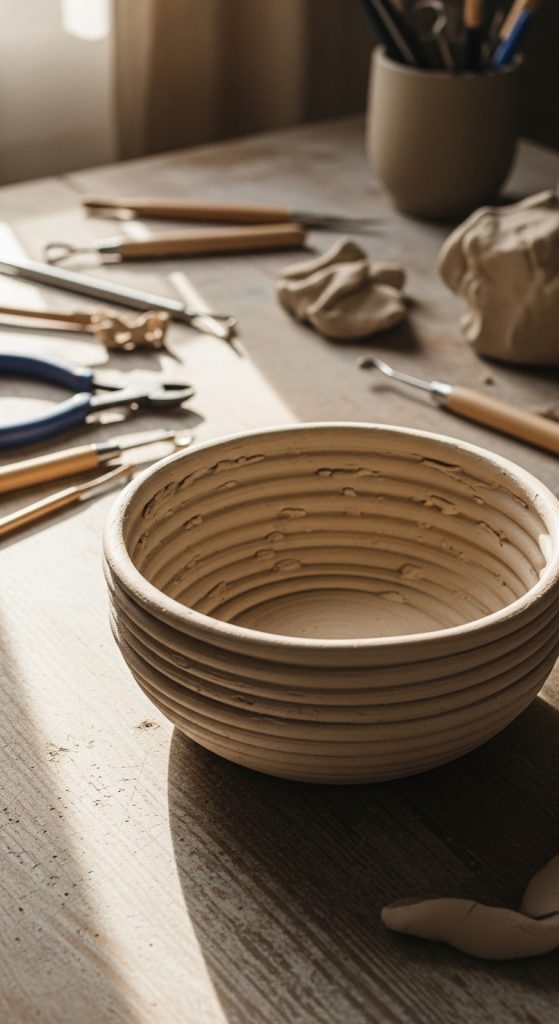
5. Coil-Style Bowl
Coil-style bowls use clay ropes to build the shape gradually. Roll long, even coils of clay, then stack them on top of each other, blending the edges with your fingers or a small tool. Shape the coils into a circular base and rise the sides to form a bowl.
Once the bowl is built, smooth the interior for usability while keeping some texture on the outside for a handcrafted look. Coil bowls have a rustic charm and are perfect for holding keys, trinkets, or small household items.
Materials include air-dry clay, a rolling surface, a small smoothing tool or damp sponge, and optional paint or sealant. This method is great for beginners and gives bowls a unique, textured appearance.
6. Pinched Clay Bowl
Pinched clay bowls are formed by hand without rolling or cutting. Start with a ball of clay and press your thumb in the center to create a hollow. Use your fingers to pinch the walls of the bowl evenly while rotating the piece. Continue until the desired size and shape are achieved.
Pinched bowls often have a natural, organic feel and are ideal for holding small decorative objects. They can also be painted or left in their natural clay color for a minimalist look.
Materials needed include air-dry clay and a damp sponge for smoothing. This technique develops hand-eye coordination and encourages intuitive creativity, as every bowl will have a unique form.
7. Imprinted Pattern Bowl
Imprinted pattern bowls feature textures or designs pressed into the clay surface. Flatten your clay into a slab and press stamps, textured tools, lace, or other objects into the surface. Then form the slab into a bowl shape by lifting the edges.
Dry the bowl completely before painting or sealing. Patterns can be subtle or bold depending on the impression technique. This bowl adds an artistic element to any home décor or can serve as a gift.
Materials include air-dry clay, stamps or texture tools, a rolling pin, and optional paint or varnish. The possibilities for patterns are endless, giving a personal touch to each piece.

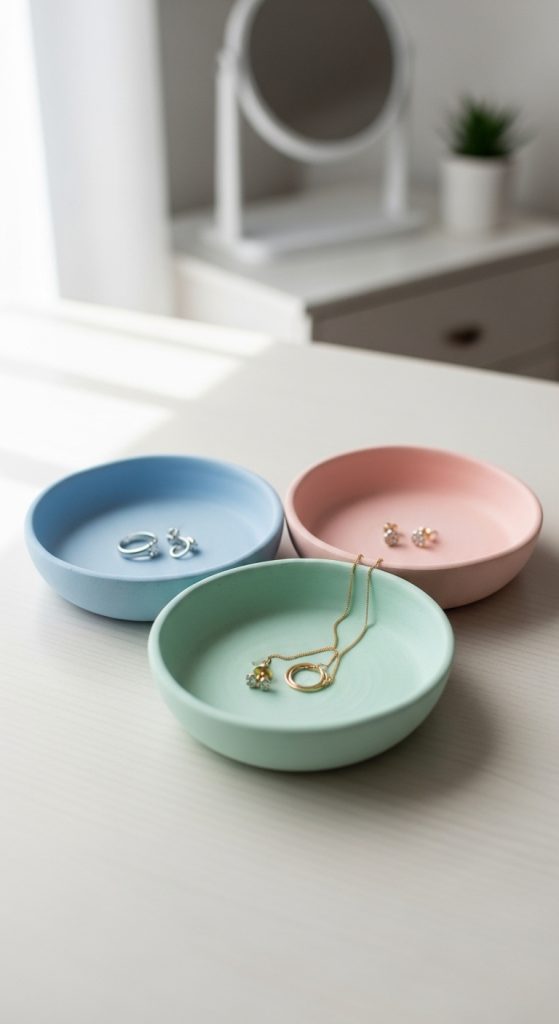
8. Mini Trinket Bowls
Mini trinket bowls are small and practical for storing jewelry or small items. Roll a small amount of clay into a ball, flatten slightly, and pinch or smooth edges to create a tiny bowl. Keep it shallow for easier access to contents.
Once dry, these bowls can be painted in pastel or metallic colors. They work well in sets, allowing you to mix colors and textures. Materials needed include air-dry clay, a small smoothing tool, and paint. Mini bowls are great starter projects for beginners and are functional as well as decorative.
9. Organic Freeform Bowl
An organic freeform bowl embraces asymmetry and natural curves. Flatten a clay slab, then use your hands to shape it without focusing on perfect symmetry. Lift and fold the edges to create uneven, flowing sides.
Dry fully and optionally paint or seal. These bowls are artistic statement pieces, perfect for holding decorative items or simply serving as a unique centerpiece. Materials include air-dry clay, a damp sponge for smoothing, and optional paints. The unpredictability of freeform designs adds charm and individuality.
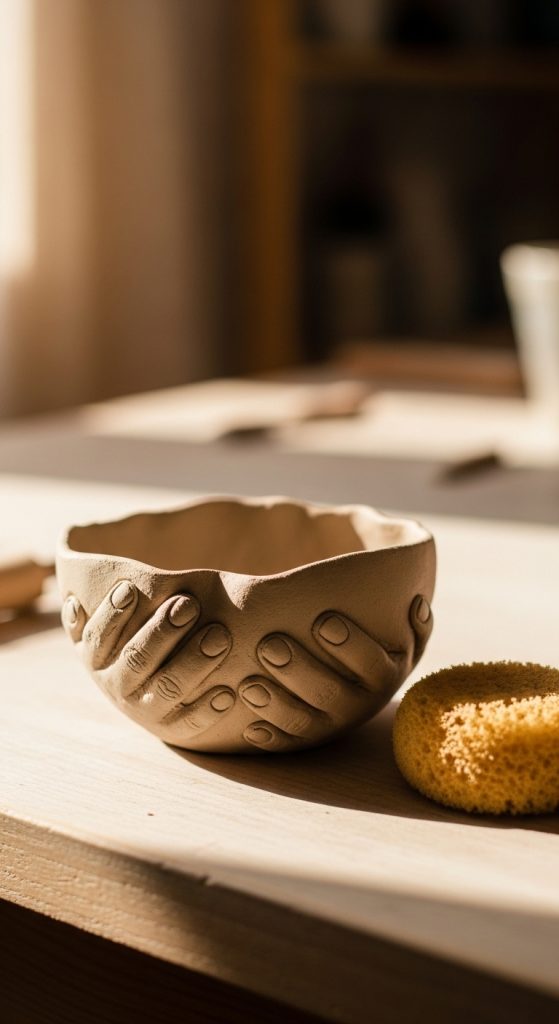
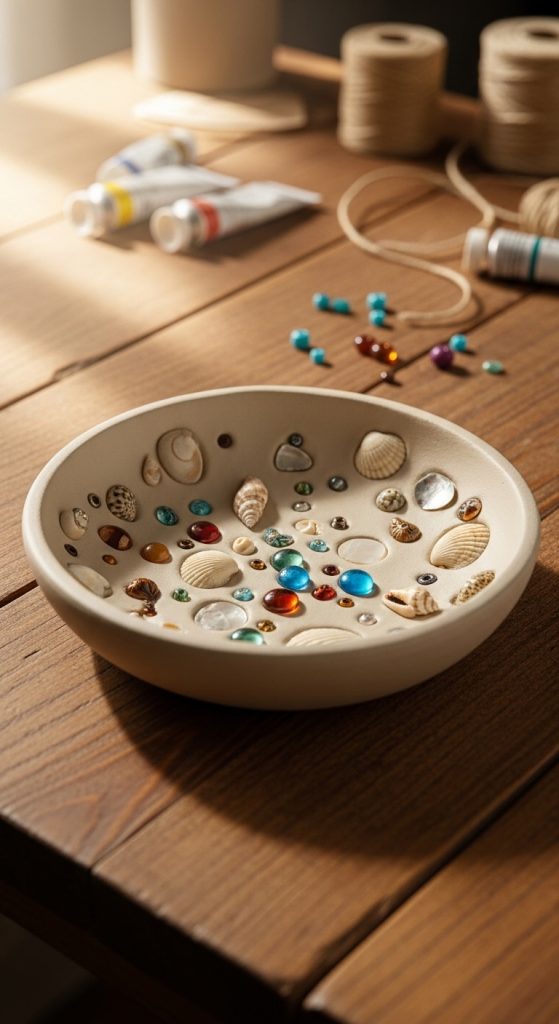
10. Bowls with Embedded Objects
Embedding small objects into clay adds texture and visual interest. Flatten a clay slab into a bowl shape and gently press beads, shells, or stones into the surface. Ensure objects are lightly pressed so they remain secure during drying.
Once dried, you can add paint or varnish to enhance colors. Embedded bowls are decorative and make unique gifts. Materials include air-dry clay, small decorative objects, a rolling pin, and optional paint or sealant. This technique encourages creativity by combining clay with other craft materials.


Leave a Reply