
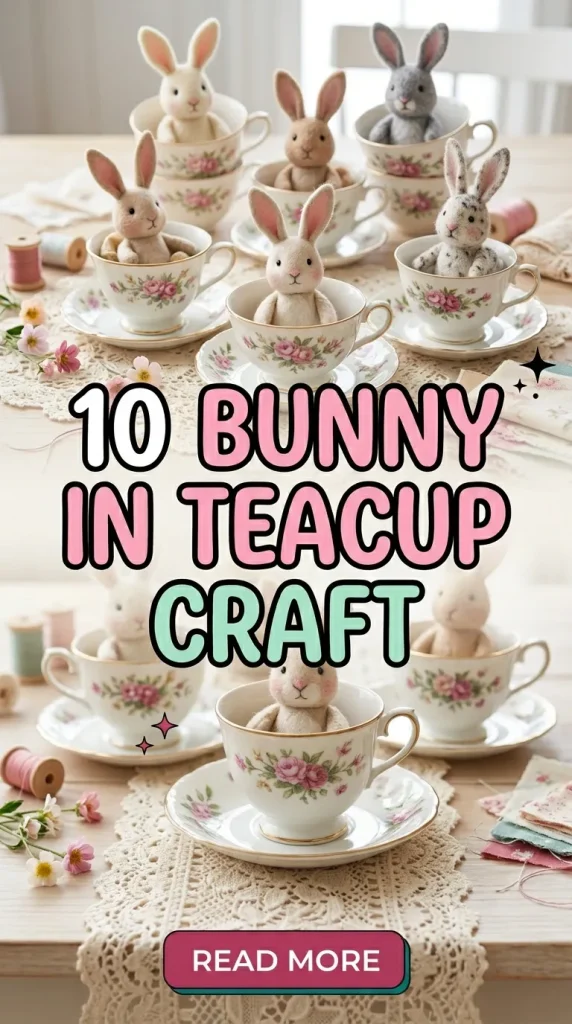
Creating cute and whimsical crafts is a fun way to bring joy into your home or give thoughtful gifts. Among the many craft ideas, making a “Bunny in Teacup” craft has become increasingly popular. This charming project combines two adorable elements—bunnies and teacups—into a decorative piece that can brighten any room. Whether you are an experienced crafter or a beginner, this craft is simple, enjoyable, and versatile.
The “Bunny in Teacup” craft can be made from a variety of materials such as clay, felt, paper, or even recycled items. It is perfect for spring decorations, Easter celebrations, or as a handmade gift. Additionally, making these bunnies encourages creativity and allows you to personalize each piece with colors, textures, and designs.
In this guide, we will explore ten different ways to create a “Bunny in Teacup” craft. Each point will provide step-by-step instructions, materials needed, tips for preparation, and ideas to enhance your craft. By the end of this post, you will have a complete understanding of how to make your own adorable bunny in a teacup.
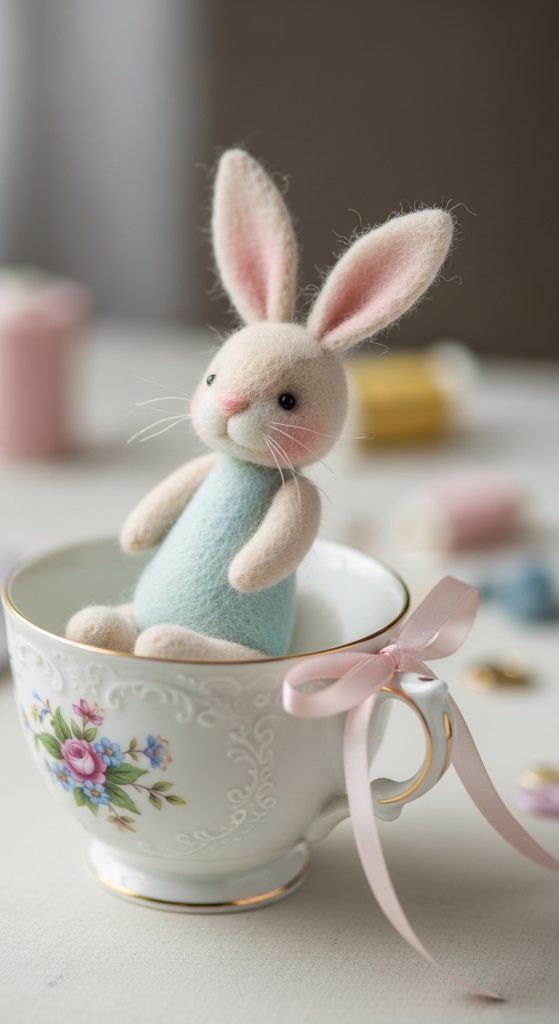
1. Felt Bunny in a Teacup
For a soft and cuddly version of this craft, using felt is a great choice. To start, gather colored felt sheets, scissors, fabric glue, small beads for eyes, and a miniature teacup. Cut out small bunny shapes from the felt sheets, including a body, ears, and a tail.
Next, assemble the pieces by gluing the ears and tail to the bunny’s body. For extra dimension, slightly fold the ears to make them stand upright. Place a small amount of cotton or polyester stuffing inside the bunny to give it a plush look.
Once your bunny is ready, carefully place it inside the teacup. You can add extra decoration like a ribbon around the teacup or a tiny felt carrot next to the bunny. Felt is easy to work with, forgiving for beginners, and results in a soft, appealing bunny that is safe for kids to handle.
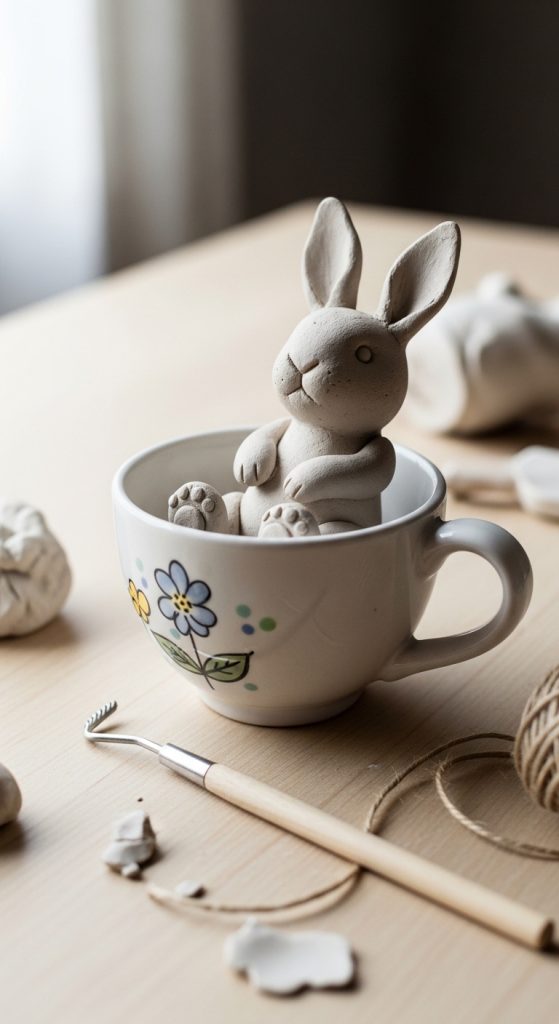
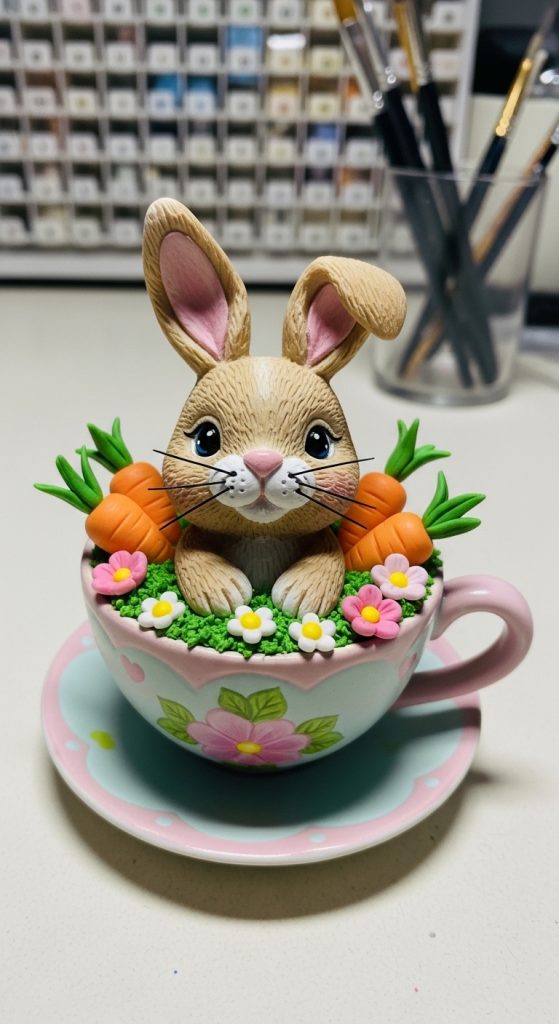
2. Clay Bunny in a Teacup
Clay is perfect for creating a durable, realistic bunny craft. You will need air-dry clay or polymer clay, acrylic paints, sculpting tools, and a teacup. Begin by molding the bunny’s body, ears, and head separately. Small details like paws or facial features can be added using a sculpting tool or toothpick.
After shaping the bunny, attach the parts together and smooth the seams with a damp tool or finger. Place your clay bunny inside the teacup to see if it fits well. Allow the clay to dry according to the instructions—usually 24 hours for air-dry clay or baking for polymer clay.
Once hardened, use acrylic paints to add color and details to your bunny. You can paint the teacup as well for a coordinated look. Clay bunnies are sturdy, long-lasting, and can be displayed on shelves or desks as a cute decoration.
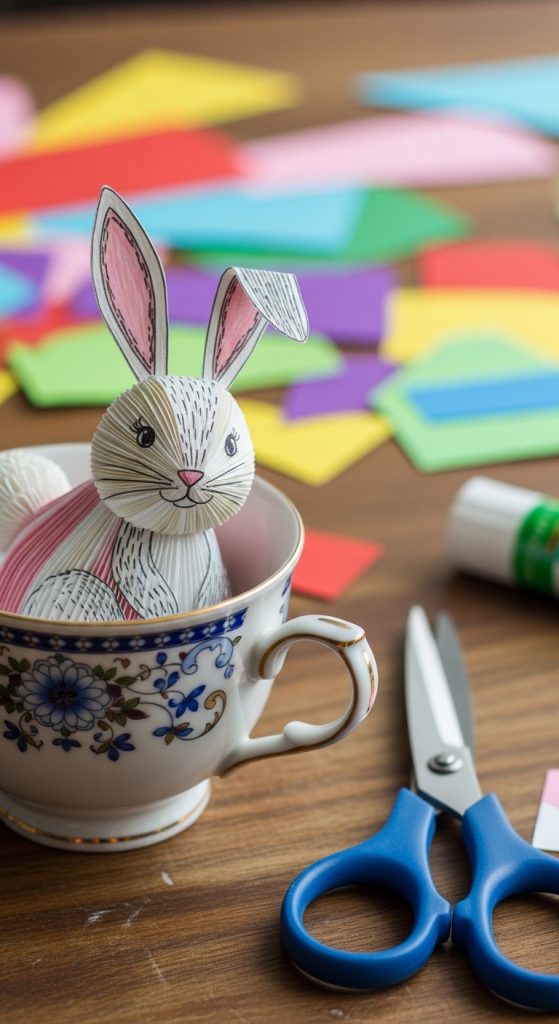
3. Paper Bunny in a Teacup
Using paper is an affordable and creative way to craft a bunny in a teacup. You will need colored cardstock, scissors, glue, and a teacup. Start by cutting out a bunny shape from cardstock. You can also make 3D paper bunnies by folding and layering pieces.
Decorate the bunny with markers, colored pencils, or small stickers. For added realism, create tiny ears that can stand upright and a small round tail. Once the bunny is decorated, carefully place it in the teacup. You can glue it in place or leave it loose for repositioning.
Paper crafts are lightweight, simple to make, and ideal for kids. You can create a series of bunnies in different teacups to make a themed display. Paper also allows for endless color combinations, making your craft unique each time.
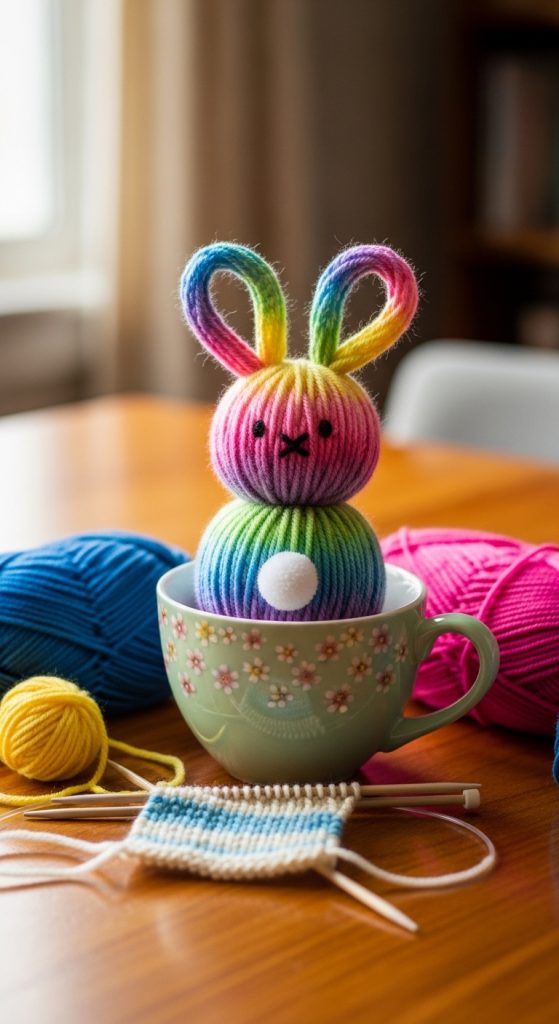
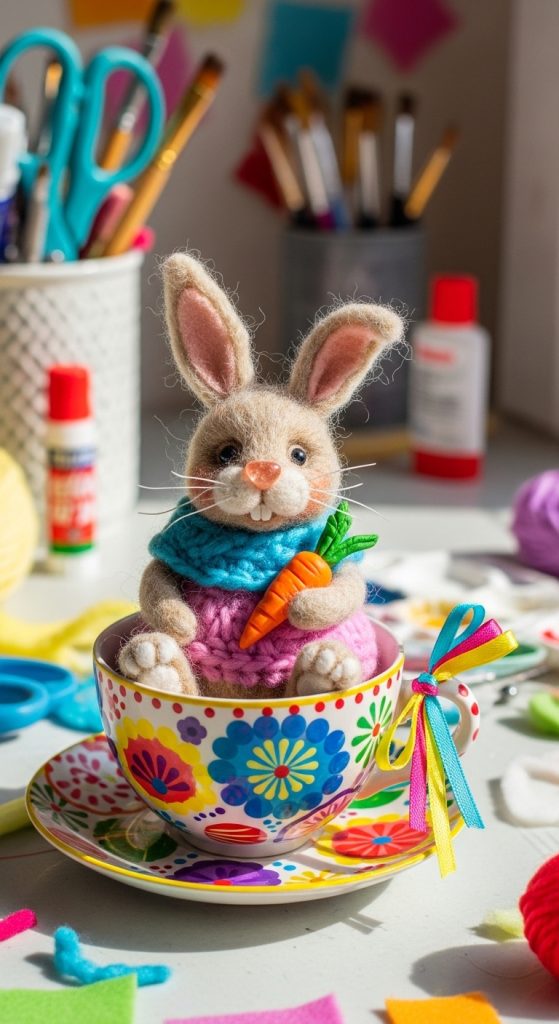
4. Yarn Bunny in a Teacup
Yarn is a versatile material for creating soft and textured bunnies. You will need yarn in desired colors, scissors, glue, a small teacup, and a small amount of stuffing. Begin by making a yarn pom-pom for the bunny’s body using a pom-pom maker or by wrapping yarn around your fingers.
For the ears, cut smaller pieces of yarn and shape them into loops or cones. Attach the ears to the pom-pom using glue or thread. Add a tiny cotton ball or pom-pom for the tail. Place the yarn bunny into the teacup and adjust its position.
Yarn bunnies are soft, cozy, and perfect for a handmade gift. You can make multiple bunnies in different colors and sizes to create a charming collection. This craft also helps develop fine motor skills and allows creativity in choosing yarn textures.
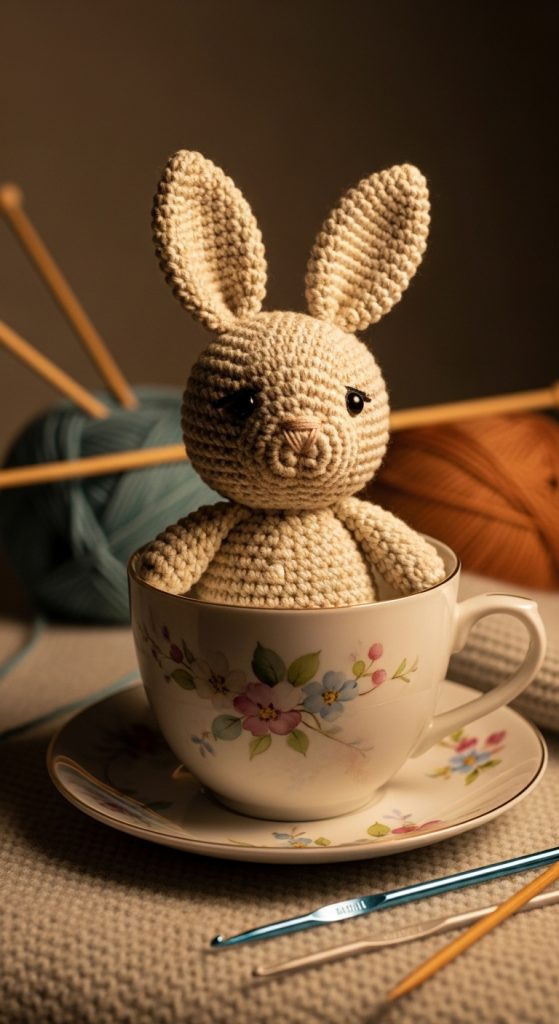
5. Crochet Bunny in a Teacup
Crocheting is a slightly advanced but rewarding method to make a bunny in a teacup. Materials required include crochet thread or yarn, a crochet hook, stuffing, a teacup, and small beads for eyes. Start by crocheting the bunny’s body in a simple round pattern, adding increases and decreases to shape it.
Crochet the ears separately and attach them to the body using yarn or a needle. Add stuffing carefully to maintain shape. You can also crochet a small carrot or other accessories for the bunny. Place the completed crochet bunny in a teacup and adjust it so it sits upright.
Crochet bunnies are durable, textured, and highly customizable. They make excellent gifts for crafters who appreciate handmade, intricate designs. The teacup adds an elegant touch, creating a perfect decorative item for home or office.
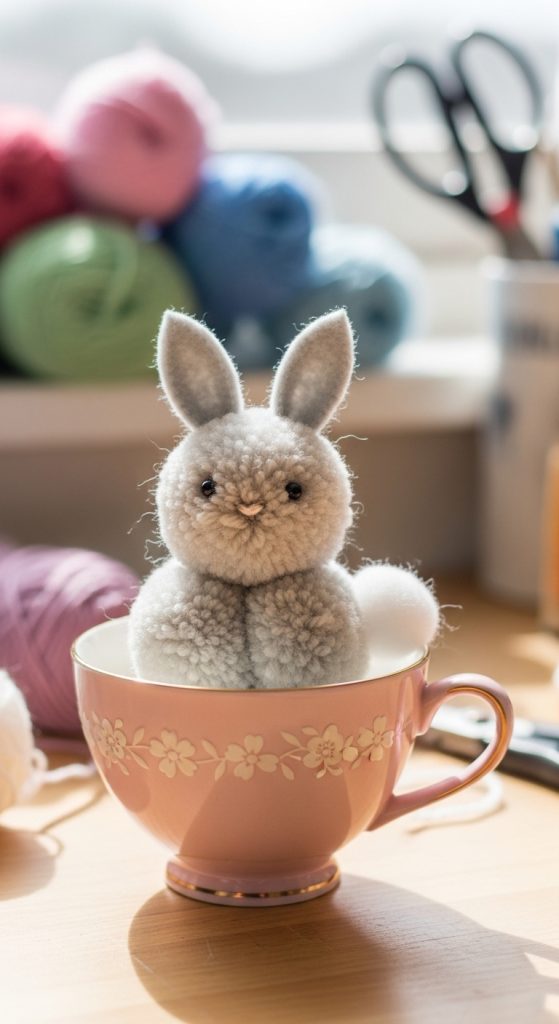
6. Pom-Pom Bunny in a Teacup
Pom-poms offer a quick and fun way to create a bunny. You will need fluffy yarn, scissors, glue, and a teacup. Wrap the yarn around your fingers or a fork to make a round pom-pom for the bunny’s body. Make a smaller pom-pom for the head.
Attach the head to the body using glue and shape the ears from felt or yarn. Add small details like eyes and a tail to complete the bunny. Place the finished pom-pom bunny in the teacup and adjust for a snug fit.
This method is very beginner-friendly, quick, and allows for creative variations. Pom-poms give the bunny a soft, fluffy look that is visually appealing. You can also make multiple pom-pom bunnies to create a playful display.
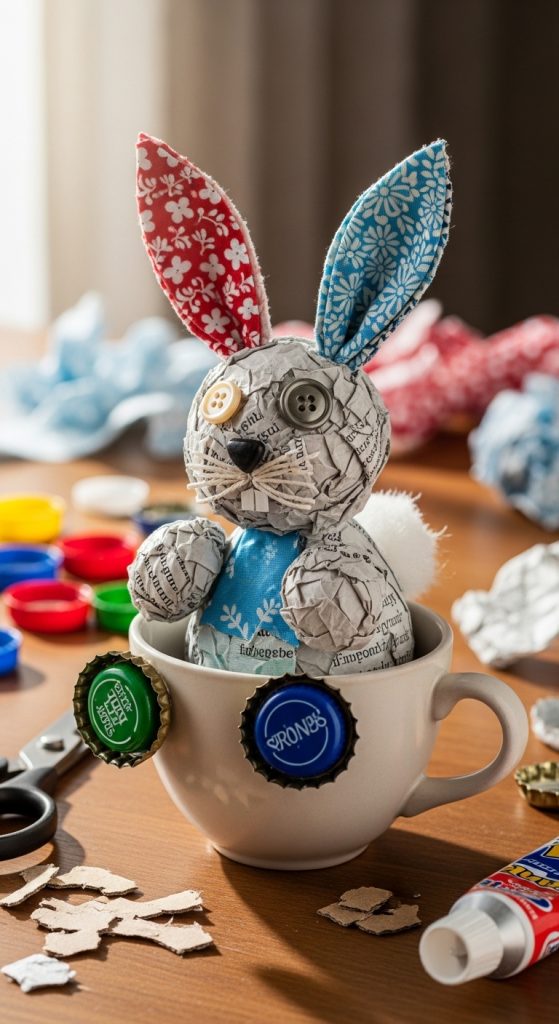
7. Recycled Material Bunny in a Teacup
For an eco-friendly option, you can use recycled materials such as bottle caps, scraps of fabric, paper rolls, and old buttons. Begin by forming the bunny body with bottle caps or small fabric bundles. Use fabric or paper scraps for ears and tails, attaching them with glue or tape.
Decorate the bunny using paint, markers, or small buttons for eyes. Once the bunny is complete, place it inside a teacup, possibly using a small foam piece to stabilize it. This method teaches creativity and resourcefulness.
Recycled bunnies are unique, environmentally friendly, and educational. They are ideal for craft sessions with kids or for creating whimsical gifts. Each recycled bunny will be one-of-a-kind, giving extra charm to your teacup display.
8. Clay Air-Dry Bunny with Accessories
Enhancing a clay bunny with miniature accessories adds more charm. Use air-dry clay to create a small bunny as described before. Next, make tiny carrots, flowers, or bows from clay or paper. Attach these accessories around the bunny or inside the teacup.
After drying, paint the bunny and accessories using acrylic paint. Use a fine brush to add details like eyes, nose, and whiskers. Place the bunny and accessories in the teacup, creating a themed miniature scene.
Adding accessories transforms a simple bunny into a detailed craft piece. It allows creativity to shine and makes your craft stand out. These can be displayed as collectibles, gifts, or seasonal decorations for events like Easter or spring celebrations.
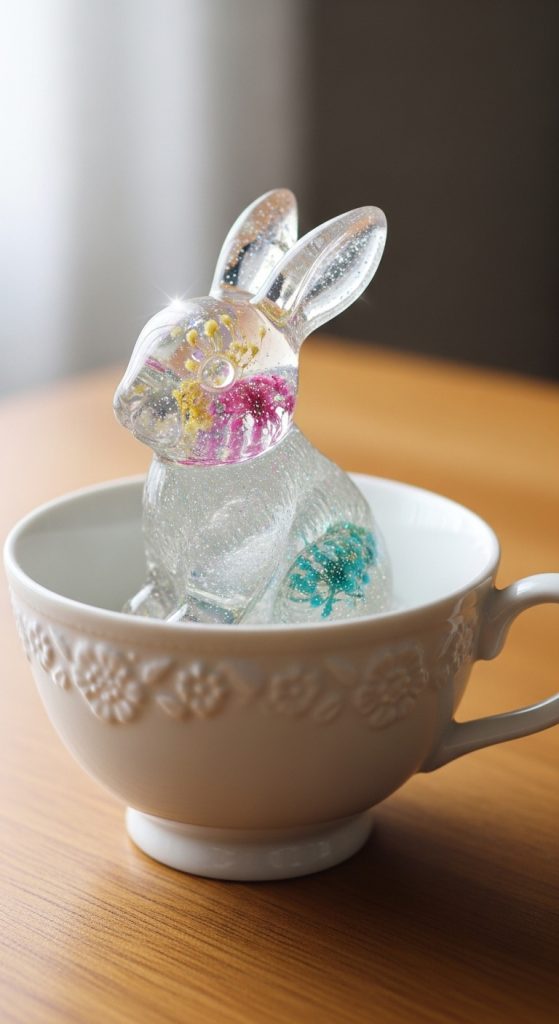
9. Resin Bunny in a Teacup
Resin bunnies create a glossy, durable craft. You will need clear or colored resin, a silicone bunny mold, a teacup, and resin pigments. Mix the resin according to instructions and pour it into the mold. You can add glitter or small decorations inside for a magical effect.
Allow the resin to cure completely, usually 24 to 48 hours. Once hardened, remove the bunny from the mold and polish any rough edges. Place the resin bunny carefully in the teacup.
Resin bunnies are long-lasting, glossy, and ideal for collectors. They allow for creative effects such as embedded flowers or sparkles. This craft is more advanced but results in a professional-looking piece that can be a beautiful home decoration.
10. Mixed Media Bunny in a Teacup
A mixed media approach allows combining multiple materials for a unique craft. For example, you can use a felt body with clay ears, yarn tail, and a resin nose. Collect all materials including glue, teacup, paints, and small decorative items.
Start by creating the bunny’s body using the primary material. Add details using different textures and materials. Paint or decorate the teacup to match. Place the completed bunny in the cup, ensuring it is balanced.
Mixed media bunnies are highly customizable and visually interesting. This method encourages experimentation with textures and colors. It results in a craft that is one-of-a-kind, combining creativity, skill, and personal style in a single whimsical display.


Leave a Reply