Easter is a joyful time for families, especially for children who love bright colors, sweet treats, and creative activities. It is a season that celebrates new life, spring, and togetherness. One of the best ways to make Easter special for kids is through simple and fun hand crafts. Crafting helps children develop fine motor skills, creativity, patience, and confidence. It also gives parents and teachers a chance to spend meaningful time with them. Easter crafts do not have to be expensive or complicated. Many beautiful projects can be made using basic supplies found at home, such as paper, glue, scissors, paint, and recycled materials.
In this blog post, you will find 10 Easter hand crafts for kids. Each craft includes preparation steps, materials needed, and helpful tips to make the activity safe and enjoyable. The instructions are written in simple language so they are easy to follow. These crafts are suitable for home, school, church groups, or community events. With a little preparation and imagination, you can turn ordinary materials into wonderful Easter decorations and keepsakes that children will be proud of.
1. Paper Plate Easter Bunny
A paper plate Easter bunny is a simple and adorable craft that young children will enjoy making. It can be used as a wall decoration, classroom display, or even as part of an Easter party theme.
Materials needed:
Paper plates, white paint, paintbrush, pink construction paper, black marker, glue, scissors, cotton balls, and googly eyes.
Preparation:
Cover the table with old newspapers or a plastic sheet to protect it from paint. Pour white paint into small containers. Pre-cut bunny ear shapes from pink paper for younger children if they are too small to use scissors safely.
Instructions:
First, let the children paint the paper plate white. Allow it to dry completely. While the plate is drying, cut out two long ear shapes from white paper and smaller inner ear shapes from pink paper. Glue the pink shapes inside the white ears. Once the plate is dry, glue the ears to the top back of the plate. Add googly eyes or draw eyes with a marker. Glue a cotton ball in the center for the nose or tail. Use the black marker to draw whiskers and a smiling mouth.
This craft helps children practice painting and cutting skills. For safety, supervise the use of scissors and make sure non-toxic paint is used. You can also add a string at the back to hang the bunny on a wall. This craft is best for children aged three and above with adult guidance.

2. Easter Egg Sponge Painting
Easter egg sponge painting is a colorful and creative craft that allows children to explore patterns and textures. It is perfect for celebrating the bright colors of spring.
Materials needed:
White paper, washable paint in different colors, kitchen sponges, scissors, paper plates, and markers.
Preparation:
Cut the sponges into oval shapes that look like Easter eggs. Prepare different paint colors on paper plates. Cover the working area with newspaper or a plastic tablecloth.
Instructions:
Give each child a sheet of white paper. Dip the sponge egg shapes into paint and gently press them onto the paper. Children can use one color or mix different colors to create unique designs. Encourage them to layer colors after the first layer dries. Once the paint is dry, they can use markers to draw zigzags, dots, stripes, or flowers on the eggs.
This craft is suitable for preschool and elementary-aged children. It helps improve hand-eye coordination and creativity. Remind children not to press too hard to avoid too much paint spreading. Washable paint is best because it is easy to clean from hands and clothes.
For extra fun, you can cut out the painted egg shapes and display them on a classroom bulletin board or string them together to make a festive Easter banner.

3. Handprint Chick Card
A handprint chick card is a lovely keepsake that parents and grandparents will treasure. It combines art with a personal touch, making it a meaningful Easter gift.
Materials needed:
Yellow paint, white cardstock or thick paper, orange and black construction paper, glue, scissors, and a marker.
Preparation:
Fold the cardstock in half to create a card. Pour yellow paint onto a plate. Have wet wipes or a bowl of water ready for quick hand cleaning.
Instructions:
Help the child dip their hand into yellow paint. Press the hand firmly onto the front of the card with fingers spread slightly. Carefully lift the hand straight up to avoid smudging. Allow the paint to dry completely. Once dry, turn the handprint so the thumb becomes the wing and the fingers form feathers. Cut out a small orange triangle for the beak and small orange shapes for feet. Glue them in place. Draw eyes with a marker or glue small paper circles.
Inside the card, children can write a simple Easter message such as Happy Easter or draw small eggs and flowers.
This craft supports sensory development and creativity. It is important to use non-toxic, washable paint. Always supervise young children during the painting process. This project works well with toddlers and preschoolers, especially with one-on-one adult assistance.

4. Popsicle Stick Easter Cross
The popsicle stick Easter cross is a meaningful craft that teaches children about the religious side of Easter in a simple and respectful way.
Materials needed:
Popsicle sticks, glue, paint or markers, small decorations like stickers or foam flowers, and ribbon.
Preparation:
Lay out the popsicle sticks and decide how many crosses you want to make. Protect the table surface if painting will be done.
Instructions:
Take two popsicle sticks and glue one horizontally across the other to form a cross shape. Let the glue dry completely. Once dry, children can paint the cross in soft spring colors like purple, pink, or blue. After the paint dries, they can decorate the cross with small foam flowers, stickers, or glitter glue. Tie a small ribbon loop at the top so it can be hung on a wall or doorknob.
This craft is suitable for elementary-aged children who can handle glue carefully. It encourages patience because children must wait for glue and paint to dry before decorating. Talk to children about the meaning of the cross during Easter in a way that matches their age and understanding.
To make this craft more durable, use strong craft glue instead of school glue. This project is ideal for Sunday school classes, church groups, or family craft time at home.

5. Toilet Paper Roll Easter Bunny
Recycling materials into crafts is a great way to teach children about caring for the environment. A toilet paper roll Easter bunny is easy to make and very cute.
Materials needed:
Empty toilet paper rolls, white or pastel paint, construction paper, glue, scissors, cotton balls, markers, and googly eyes.
Preparation:
Make sure the toilet paper rolls are clean and dry. Cover the table to protect it from paint spills.
Instructions:
Let the children paint the toilet paper roll in white or a soft pastel color. Allow it to dry. Cut out two long ear shapes from construction paper and glue them inside the top of the roll so they stick up. Add googly eyes or draw eyes with a marker. Glue a small cotton ball to the front for the nose and another at the back for the tail. Draw whiskers and a mouth with a marker.
You can also cut a small oval from paper and glue it to the front as a belly. Children can personalize their bunnies with different colors and patterns.
This craft is best for children aged four and older with supervision. It helps improve cutting and gluing skills. It is also a great group activity because each child can create a unique bunny to display together on a shelf or table.

6. Easter Egg Collage Art
Easter egg collage art is a great way to use leftover craft materials. It encourages imagination and creativity.
Materials needed:
Large egg shapes cut from cardstock, tissue paper, wrapping paper scraps, old magazines, glue, scissors, and glitter glue.
Preparation:
Cut large egg shapes in advance from thick paper. Sort small pieces of colored paper into bowls so children can easily choose what they like.
Instructions:
Give each child an egg-shaped cutout. Ask them to glue different pieces of paper onto the egg to create patterns and designs. They can overlap colors, mix textures, and add small shapes. Once the egg is covered, allow it to dry. For extra decoration, children can add glitter glue lines, stickers, or draw patterns with markers.
This craft is suitable for all ages, as younger children can simply tear paper instead of cutting it. It helps develop fine motor skills and decision-making. Encourage children to talk about the colors and patterns they choose.
After the eggs are finished, display them on a wall or window. You can even organize a small art show where children explain their designs. This makes them feel proud of their work and boosts their confidence.

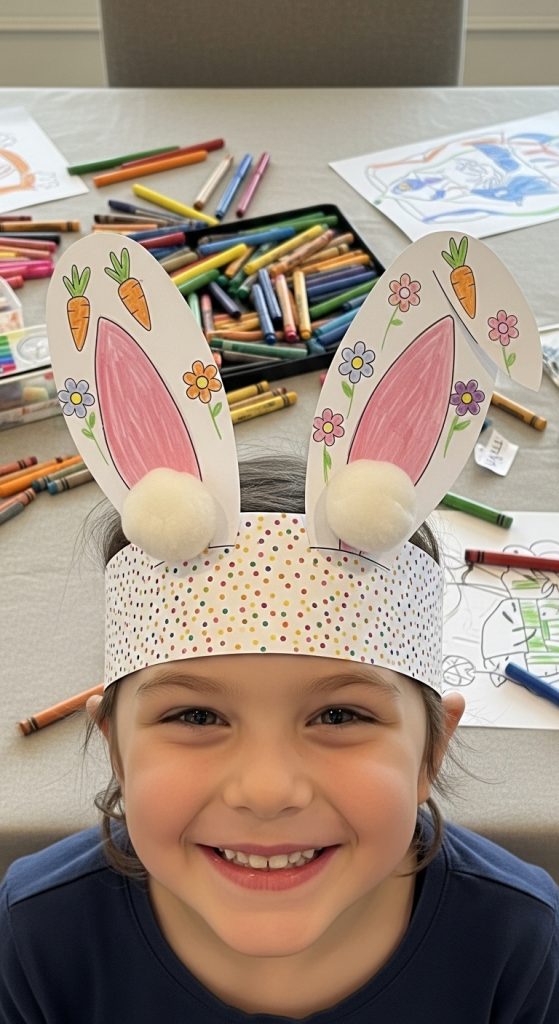
7. Bunny Ear Headband
A bunny ear headband is a fun and interactive craft that children can wear during Easter celebrations or egg hunts.
Materials needed:
White and pink construction paper, stapler or tape, glue, scissors, cotton balls, and crayons or markers.
Preparation:
Measure each child’s head using a strip of paper and staple or tape it into a circle to fit comfortably. Pre-cut ear shapes for younger children if needed.
Instructions:
Cut two large bunny ear shapes from white paper and two smaller inner ear shapes from pink paper. Glue the pink pieces inside the white ears. Attach the ears to the headband using glue, tape, or staples. Make sure they are secure and stand upright. Children can decorate the headband with small drawings, stickers, or cotton balls.
This craft is best for preschool and elementary-aged children. It encourages imaginative play, as kids can pretend to be bunnies hopping around. Always supervise the use of staplers and scissors.
To make the headband more durable, use thicker paper or light cardstock. This craft works well for classroom parties and group events because children can wear their creations right away.
8. Easter Basket from Paper Cups
Making a small Easter basket from a paper cup is a simple craft that can hold candy, small toys, or plastic eggs.
Materials needed:
Paper cups, construction paper, glue, scissors, markers, stickers, and pipe cleaners.
Preparation:
Turn the paper cup upside down so the open end faces down. Cut strips of paper to decorate the outside.
Instructions:
Let children decorate the outside of the cup with colored paper, drawings, and stickers. Once decorated, attach a pipe cleaner to both sides of the cup to create a handle. You can punch small holes on each side and twist the pipe cleaner ends through the holes for extra strength.
Children can place small treats inside the basket. This craft helps develop creativity and fine motor skills. It is suitable for children aged five and older with supervision during hole punching.
You can also organize a small Easter egg hunt where children collect items in their handmade baskets. This adds excitement and makes the craft more meaningful.

9. Salt Dough Easter Ornaments
Salt dough ornaments are long-lasting crafts that can be kept for many years. They are perfect as Easter decorations or gifts.
Materials needed:
Two cups flour, one cup salt, one cup water, mixing bowl, rolling pin, cookie cutters in egg or bunny shapes, straw, paint, and ribbon.
Preparation:
Mix flour, salt, and water in a bowl to form a dough. Knead until smooth. Preheat the oven to a low temperature.
Instructions:
Roll out the dough on a floured surface. Use cookie cutters to cut out shapes. Use a straw to make a small hole at the top for hanging. Place shapes on a baking sheet and bake at a low temperature until hard. Let them cool completely before painting.
Once cool, children can paint the ornaments in bright colors and add patterns. When the paint dries, thread a ribbon through the hole.
This craft requires adult supervision, especially when using the oven. It teaches patience because the process takes time from mixing to baking to decorating. The finished ornaments can be hung on an Easter tree or around the house.

10. Fingerprint Easter Egg Art
Fingerprint Easter egg art is a simple and enjoyable craft that is perfect for younger children.
Materials needed:
White paper, washable paint in different colors, markers, and wipes.
Preparation:
Draw large egg outlines on paper in advance. Pour small amounts of paint onto plates.
Instructions:
Children dip their fingers into paint and press fingerprints inside the egg outline. They can create flowers, dots, or abstract patterns. After the paint dries, they can use markers to add stems, leaves, or decorative lines.
This craft supports sensory learning and creativity. It is best for toddlers and preschoolers with close supervision. Make sure to use washable paint and have cleaning supplies ready.
Display the finished artwork on a wall or refrigerator. Each egg will look different, which shows how unique and creative each child is.


Leave a Reply