Pastel decor has become one of the most loved interior design trends because of its soft tones, gentle atmosphere, and ability to bring a calming presence into any room. Whether you are decorating a bedroom, living area, workstation, or even a hallway, pastel shades offer a delicate and balanced style that pairs well with many home aesthetics. DIY pastel decor is also affordable and allows you to add a personal touch to your home without needing high cost materials or professional assistance. By preparing simple craft items and applying basic techniques, you can transform ordinary items into beautiful pastel themed pieces. The following guide explores ten detailed DIY pastel decor ideas, along with preparation steps, materials needed, and practical tips to achieve long lasting results. Each idea highlights how pastel colors can be added to your space in a meaningful and creative way. This complete guide will help you create stylish decor items that reflect your taste while keeping your home warm, inviting, and thoughtfully designed.
1. Pastel Painted Mason Jars
Pastel painted mason jars are one of the most versatile decor items you can add to your home. They work well as flower vases, makeup brush holders, desk organizers, or small centerpieces. To start, gather glass mason jars, acrylic pastel paints, soft bristle brushes, and a clear matte sealer. Clean the jars thoroughly to remove dust or oils before applying the first coat. Pastel paints tend to be light, so two to three coats may be required to achieve a smooth finish. Allow each layer to dry fully before adding the next to avoid streaks. If you prefer a vintage look, gently sand parts of the jar after painting to create a distressed appearance. Once the paint is completely dry, apply a clear matte sealer to prevent scratches and ensure the paint stays intact. You can also decorate the jars with twine, small labels, or simple dotted patterns in complementary pastel shades. These jars can be displayed on shelves, bedside tables, or dining spaces to create a soft and organized feel throughout your home.

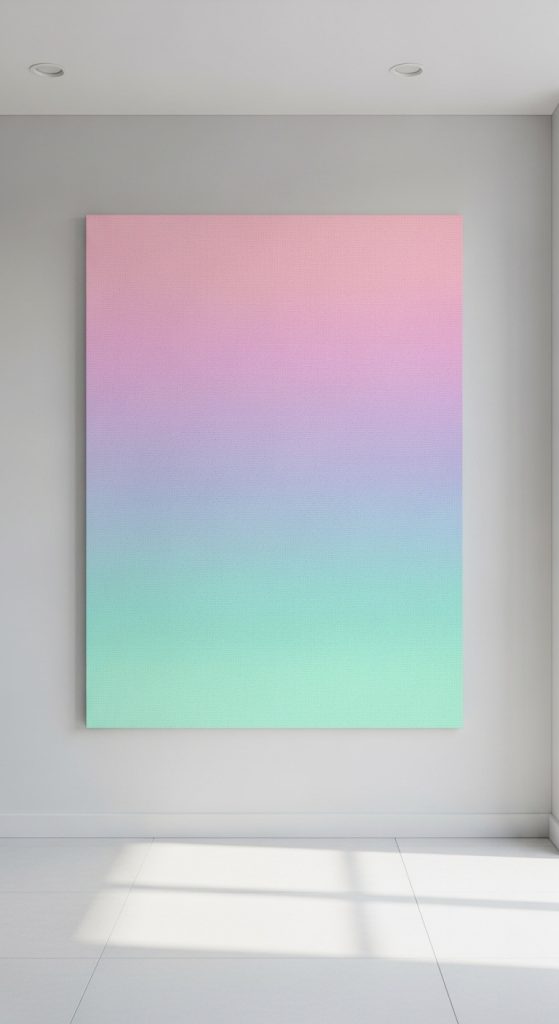
2. Pastel Ombre Canvas Art
Creating pastel ombre canvas art is a simple and relaxing project that adds elegance to any wall. You will need a blank canvas, a set of pastel acrylic paints, blending sponges or wide brushes, and a protective finishing spray. Begin by choosing two or three pastel colors that blend well together, such as soft pink, mint, and lavender. Apply the lightest color at the top of the canvas, gradually mixing it with the next shade in the middle area. Work in long horizontal strokes or soft circular sponge motions to avoid harsh lines. Patience is important, as blending takes time to achieve a seamless gradient effect. Allow the paint to dry before adding additional layers for depth and smoothness. Once complete, spray the surface with a clear sealer to protect the artwork from dust and discoloration. Ombre art pairs perfectly with minimalist interiors, creating a subtle visual feature that enhances the room without overpowering it. Whether you place it above a sofa, in an entryway, or in a creative workspace, pastel ombre art offers both beauty and serenity.
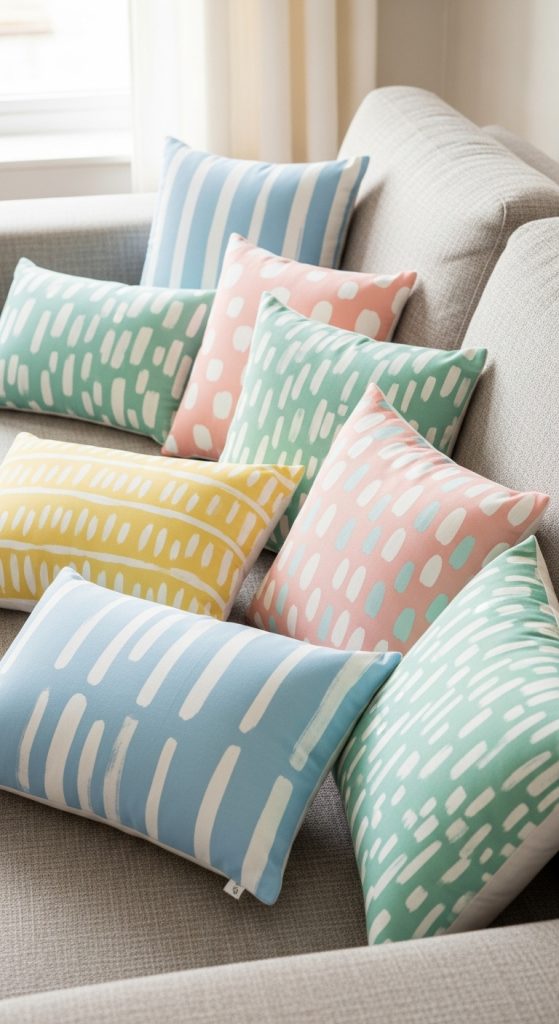
3. Pastel Decorative Throw Pillows
Pastel throw pillows instantly soften the look of sofas, chairs, or beds. This DIY allows you to customize patterns, fabric textures, and color combinations. Begin with plain white or light fabric pillow covers, fabric paints in pastel colors, paint brushes, painter tape, sponges, and stencils if you want patterned designs. Wash and iron the pillow covers before painting to ensure smooth application. Use painter tape to create stripes, blocks, or geometric shapes, or apply paint through stencils for floral or abstract designs. Pastel colors work best when applied in thin even layers to prevent paint from stiffening the fabric. Allow the paint to dry fully before removing tape or moving the cover. Once the design is complete, heat set the paint with an iron following the paint manufacturer instructions to ensure long lasting results. Insert the cushion filling and arrange the pillows on beds, chairs, or reading corners. This project enables you to refresh your home textiles without buying expensive decorative pillows, giving you soft pastel accents that blend well with modern or traditional decor styles.
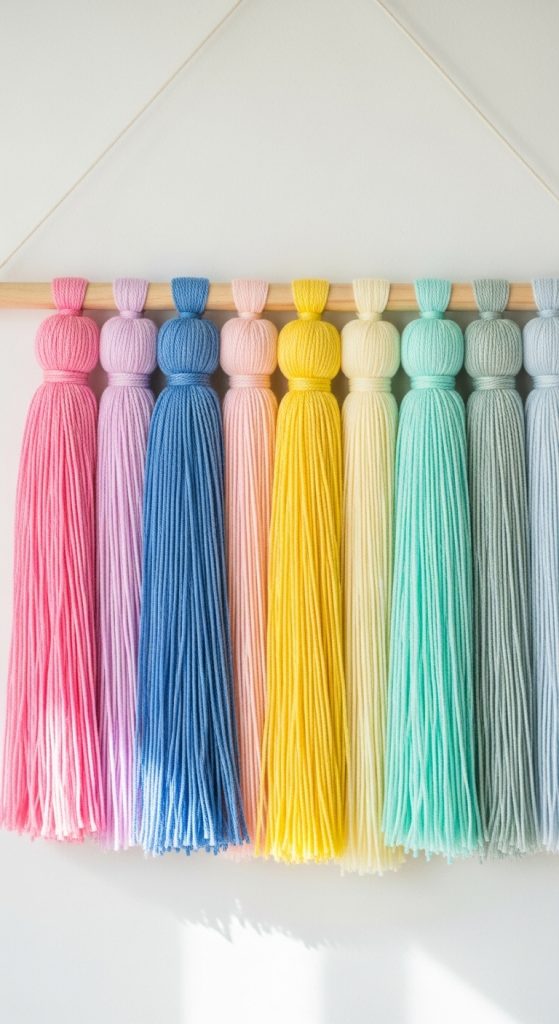
4. Pastel Wall Hanging Tassels
Pastel wall hanging tassels create a soft artistic statement in a living room, bedroom, or craft area. For this project, gather pastel colored yarn, a wooden dowel or branch, scissors, and optional beads. Begin by cutting equal lengths of yarn, then folding the strands in half to form tassels. Secure the top with a tight knot or wrap extra yarn around the bundle. Repeat the process with multiple pastel shades like pale pink, sky blue, soft yellow, and mint green. Arrange the tassels by color order to create a gradient or random layout depending on your preference. Tie the tassels onto the dowel, ensuring they hang evenly. Trim the bottom of each tassel to achieve a neat and symmetrical finish. You can also add wooden beads for more texture or braid some strands to give the wall hanging additional character. Use a strong string to hang the piece on the wall. This decor idea adds a gentle bohemian touch that brightens the environment without overwhelming the space.
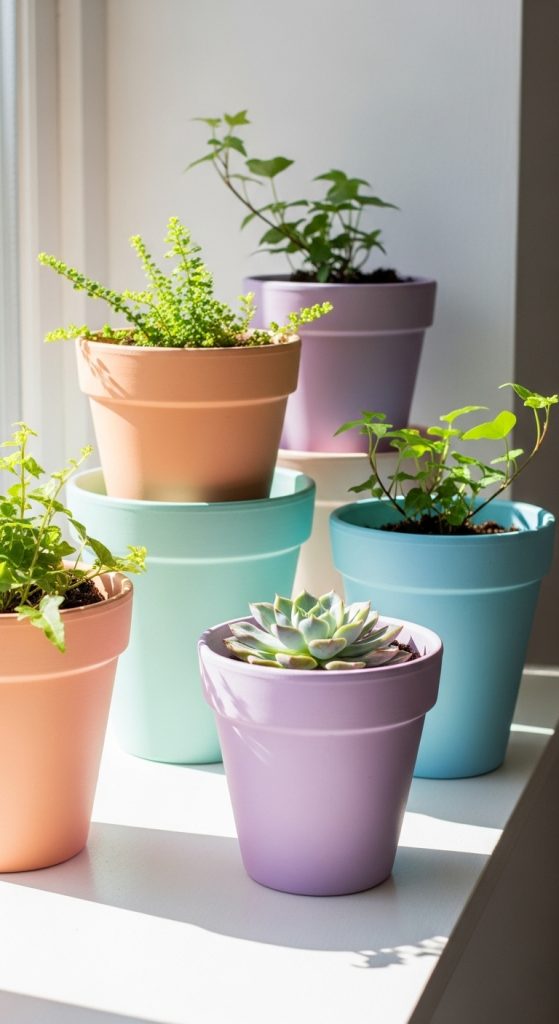
5. Pastel Painted Clay Pots
Pastel painted clay pots are perfect for windowsills, kitchens, and indoor plant corners. Start by selecting basic terracotta pots, sandpaper, pastel acrylic paints, and a waterproof sealer. Clay pots often have a rough surface, so gently sanding them helps the paint adhere smoothly. Wipe off dust before applying paint. Use one solid pastel color for a clean minimalist look, or combine multiple shades to add stripes, color blocks, or simple patterns. Acrylic paint dries quickly, making this project simple and fast. Once fully dry, apply a waterproof sealer to protect the paint from moisture, especially if the pots will house real plants. You can add labels or simple brush strokes for extra detail. These pastel pots create a lively yet calming plant display, especially when paired with greenery. Their soft tones help balance bold leaf colors, enhancing the natural freshness of the space. This project works well for home offices, kitchens, or any area where you want to introduce plants in a stylish and cost effective way.
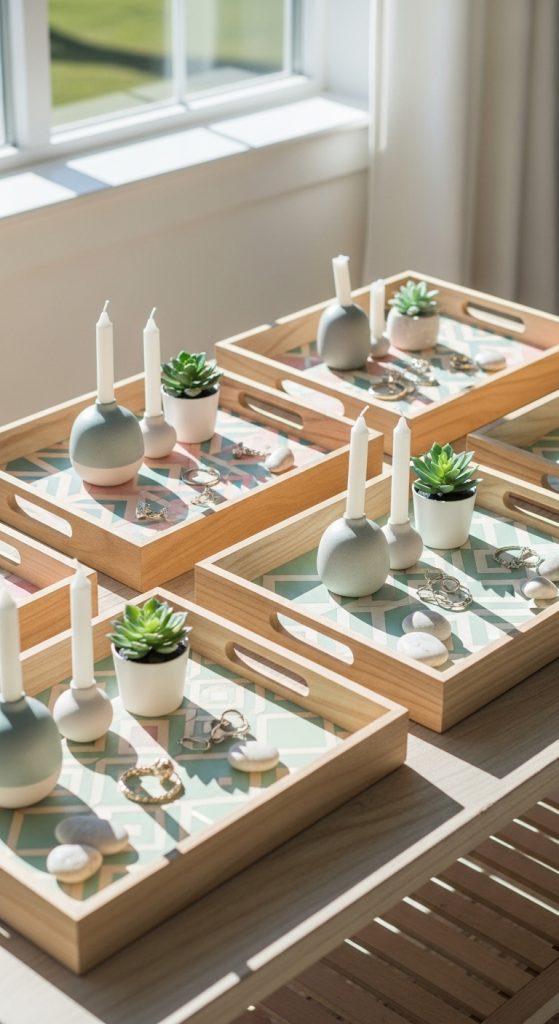
6. Pastel Decorative Trays
Pastel trays are useful for organizing small items such as jewelry, stationery, keys, or candles. To make your own, start with a plain wooden or plastic tray, pastel paints, painter tape, brushes, and a finishing sealant. Choose a base color such as soft beige or pale pink and allow it to dry thoroughly. Use painter tape to create geometric shapes or clean line sections, then fill each area with a different pastel shade. This method keeps the design neat and modern. Make sure to apply thin coats to avoid uneven textures. For extra detail, lightly sponge the edges for a subtle gradient or leave the design crisp for a structured look. After drying completely, apply a clear sealant to protect the tray from scratches and moisture. These decorative trays work well on coffee tables, vanities, or kitchen countertops. Their soft colors complement both bright and neutral interiors while offering functional organization.
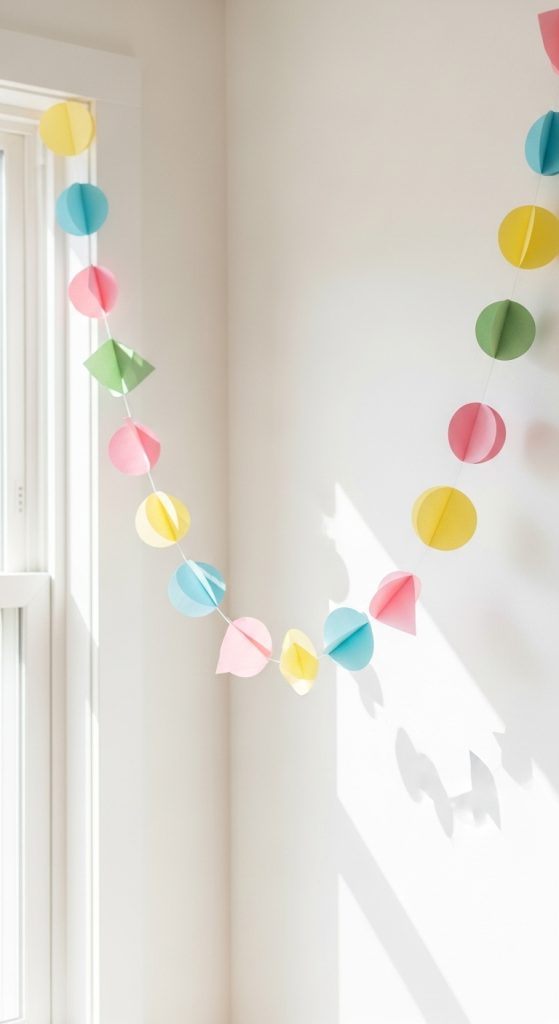
7. Pastel Garland for Walls or Parties
Pastel garlands add charm to celebrations and home decor. To create your own, gather pastel colored cardstock, string, scissors, hole punch, and optional glitter glue. Decide on a shape such as circles, triangles, hearts, or simple rectangles. Cut multiple pieces of each shape from cardstock. To make the garland more dynamic, vary the sizes or alternate pastel shades. Punch small holes at the top of each piece, then carefully thread them onto the string. Organize the shapes evenly and secure them with small knots if needed. For added creativity, apply light glitter accents in matching pastel tones, ensuring the design remains subtle. Hang the garland across walls, shelves, or windows. Garlands are ideal for baby showers, birthdays, or simply adding a playful touch to your home. This DIY is simple, affordable, and customizable, allowing you to adjust the size and length depending on your decorating needs.
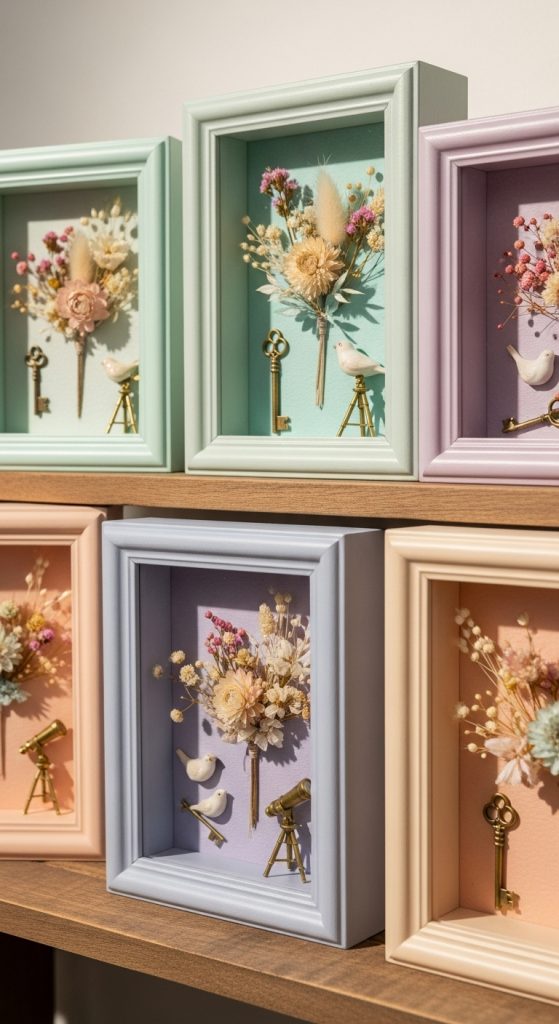
8. Pastel Shadow Boxes
Pastel shadow boxes allow you to display memories, dried flowers, small trinkets, or mini crafts in a clean and stylish way. Begin with a wooden or cardboard shadow box frame, sandpaper, pastel paint, glue, and decorative elements that match the theme of your display. Sand the frame lightly to smooth the surface, then paint it using pastel shades like lavender, peach, or mint. Allow the paint to dry completely before adding a second coat if needed. Inside the shadow box, arrange items thoughtfully. For example, you can attach dried flowers, pastel fabric scraps, mini figurines, or printed messages. Use glue to secure each item in place. A pastel colored background paper can also enhance the internal design. Once the layout is complete, close the frame securely. These shadow boxes can be hung on walls or placed on shelves as decorative room accents. They are especially meaningful because they allow you to combine creativity with personal memories, creating a sentimental and visually appealing decor piece.
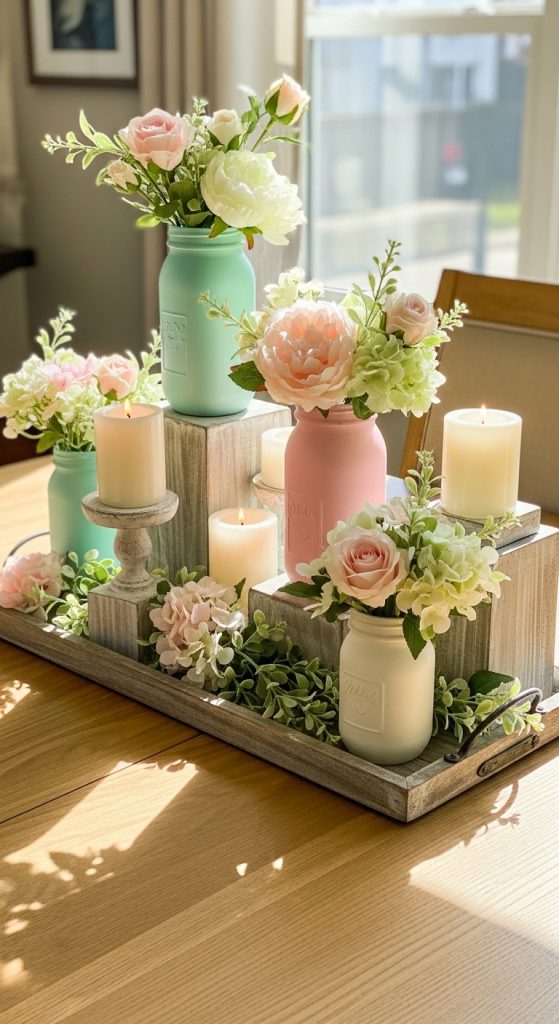
9. Pastel Table Centerpieces
Pastel table centerpieces create a welcoming mood for dining tables, coffee tables, or special gatherings. Begin by selecting the base elements such as wooden blocks, glass bottles, small crates, or decorative bowls. Paint each item with pastel acrylic paints, keeping the tones soft and consistent. Add artificial flowers, candles, pastel beads, or ribbons to enhance texture and visual depth. You can mix pastel pink roses with soft green leaves, or place candles in pastel jars to form a cohesive theme. Ensure the components are balanced and not overcrowded. Centerpieces should enhance the table without blocking visibility or creating clutter. To bring the centerpiece together, place all elements on a small tray or fabric mat in a complementary pastel shade. This makes it easy to move the arrangement when cleaning or rearranging the space. Pastel centerpieces suit both everyday use and special occasions, offering a stylish and calming visual feature for any room.
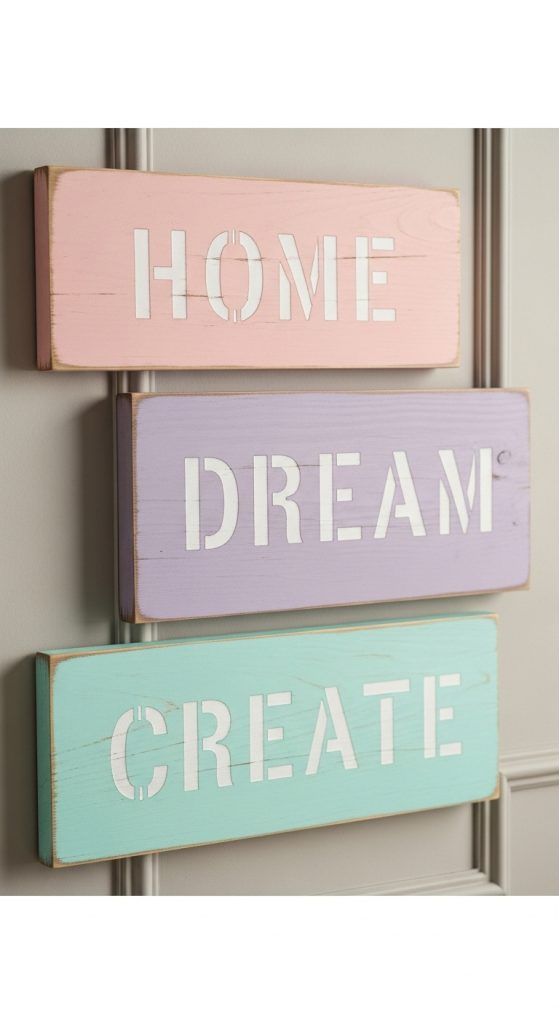
10. Pastel Painted Wooden Signs
Pastel painted wooden signs add character to walls, doors, or shelves. You will need wooden boards, sandpaper, pastel paints, stencils, brushes, and sealing spray. Begin by sanding the wood to remove rough elements and create a smooth painting surface. Apply one or two coats of pastel paint, choosing a shade that matches your interior theme. Once dry, use stencils to add inspirational words or simple patterns. Press the stencil firmly to avoid paint bleeding, and apply the paint in light dabs rather than heavy strokes. Allow the letters or shapes to dry before removing the stencil. For a rustic look, lightly sand the edges or letters to give a worn effect. After finishing the design, seal the board with a protective spray to ensure durability. These signs can be hung near entryways, above desks, or inside bedrooms. Their soft pastel tones bring charm and calmness while adding a personal message or artistic touch to your space.


Leave a Reply