Short choppy haircuts have become a defining feature of modern style, especially in the realm of edgy messy pixie cuts. These hairstyles combine texture, movement, and structure to create a bold yet wearable look that suits a wide range of face shapes and personal styles. On Pinterest, this trend continues to gain traction as people search for low-maintenance yet expressive hair inspiration that aligns with both minimalist style and creative individuality. This article explores ten distinct edgy messy pixie ideas, each designed to offer practical styling guidance and clear execution methods. Readers will learn how to approach each haircut concept, what materials and tools are required, and how to adapt the look for different preferences. Whether the goal is a subtle texture update or a dramatic transformation, these ideas provide structured direction. The content focuses on realistic, beginner friendly approaches while maintaining a strong emphasis on aesthetic value and modern design principles, making it useful for both personal styling and creative inspiration boards.
Why This Idea Is Trending or Useful
Edgy messy pixie cuts are trending because they align with the growing demand for low-effort yet visually striking styles. Many people are shifting toward practical beauty routines, and short choppy hair offers a solution that reduces daily styling time while maintaining a polished appearance. On Pinterest, these looks are popular due to their versatility and strong visual impact, making them ideal for mood boards and DIY inspiration. The textured, imperfect finish of a messy pixie creates a natural aesthetic that fits current minimalist and modern design trends. Additionally, these hairstyles are accessible for beginners because they rely more on layering and texture than precise styling techniques. This makes them easier to maintain at home with basic tools and simple tutorials. The adaptability of pixie cuts also contributes to their popularity, as they can be customized with bangs, undercuts, or asymmetry. Overall, this trend reflects a balance between structure and freedom, offering both practicality and creative expression in everyday styling.
Materials and Preparation
Before creating any short choppy pixie style, proper preparation ensures consistent results. Basic materials include professional hair scissors, thinning shears, a fine-tooth comb, sectioning clips, and a spray bottle for dampening hair. Styling products such as texturizing spray, lightweight wax, and volumizing mousse are also essential for achieving the messy, layered effect. Preparation begins with clean, slightly damp hair, as this allows for better control during cutting and shaping. Sectioning the hair into manageable parts helps maintain accuracy, especially for beginners attempting a DIY approach. Planning is equally important; selecting a reference image from Pinterest ideas or creating a visual guide helps clarify the desired outcome. Consider face shape, hair density, and natural texture when choosing a pixie variation. It is also helpful to work in a well-lit area with a mirror setup that allows visibility from multiple angles. Taking time to prepare tools and layout ensures a smoother process and reduces the likelihood of uneven cuts or styling inconsistencies.
Idea 1: Textured Feathered Pixie
How to Create
This pixie style focuses on soft, feathered layers that create movement without appearing overly structured. The concept relies on light, choppy ends that give the hair a natural lift, making it suitable for those seeking a relaxed yet polished look. The feathered effect works well for fine to medium hair types, as it adds dimension without removing too much volume. This style aligns with modern design trends by maintaining a balance between controlled shape and effortless texture. It is a strong choice for Pinterest inspiration boards because it photographs well from multiple angles and adapts easily to different styling preferences. The layered structure frames the face while maintaining a slightly messy finish, which enhances the overall aesthetic. This haircut is particularly useful for individuals transitioning from longer hair to shorter styles, as it retains softness while introducing a bold silhouette.
To achieve this look, begin by sectioning damp hair and cutting the base length evenly around the head. Use thinning shears to create feathered ends, focusing on the crown and sides for added texture. Work in small sections, lifting the hair at a slight angle before cutting to maintain a natural flow. After the cut, apply a lightweight mousse to damp hair and blow-dry using fingers instead of a brush to preserve the messy texture. Finish with a texturizing spray to define the layers without weighing them down. Regular trimming every four to six weeks helps maintain the shape and prevents the ends from becoming too heavy. This step by step process ensures a consistent result while keeping the style easy to manage and adaptable for everyday wear.
Idea 2: Asymmetrical Choppy Pixie
How to Create
The asymmetrical choppy pixie introduces contrast by keeping one side slightly longer than the other. This design creates visual interest and highlights facial features, making it a popular choice in creative ideas for modern hairstyles. The uneven length adds an edgy quality while maintaining the practicality of a short cut. This style works particularly well for those who want a bold yet structured appearance, as the asymmetry naturally draws attention without requiring complex styling. It is frequently featured in Pinterest ideas due to its strong visual lines and adaptability to different textures. The longer section can be styled forward, swept to the side, or left naturally tousled, offering multiple looks within one haircut.
To create this style, begin by determining the side that will remain longer. Cut the shorter side close to the head using scissors or clippers, maintaining a clean but slightly textured finish. On the longer side, use point-cutting techniques to create choppy layers that blend into the shorter section. Maintain a gradual transition rather than a sharp divide to keep the look cohesive. After cutting, apply a small amount of styling wax to emphasize the asymmetry and define individual strands. Blow-dry using a directional airflow to guide the longer section into place. This method ensures the haircut remains balanced while still showcasing its edgy structure. Regular maintenance involves trimming the shorter side more frequently to preserve the contrast.
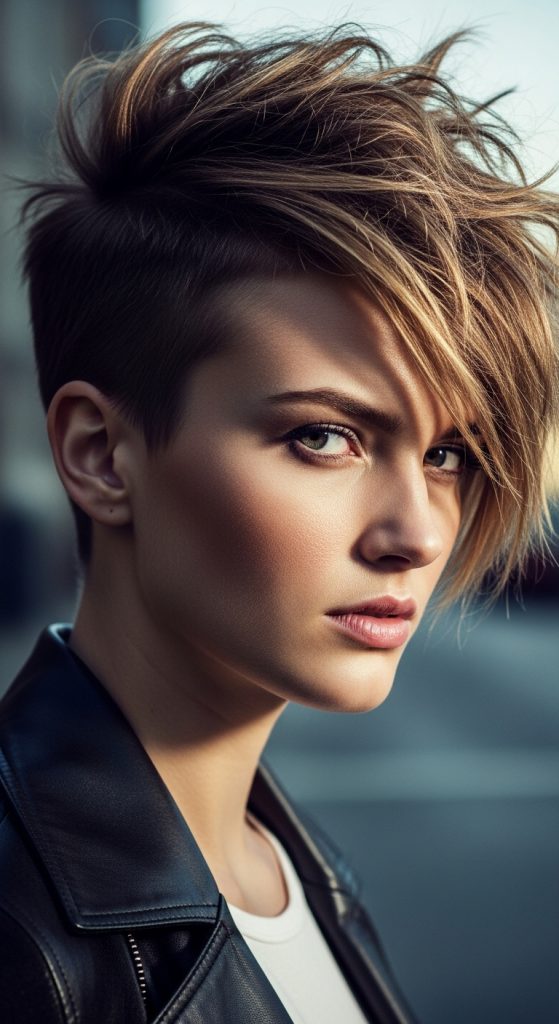
Idea 3: Undercut Messy Pixie
How to Create
The undercut messy pixie combines a closely trimmed base with longer textured layers on top. This contrast creates a bold, modern design that emphasizes both structure and movement. The undercut reduces bulk around the sides and back, making it ideal for thicker hair types, while the top layers provide flexibility for styling. This look is widely used in home decor-inspired beauty boards because of its clean lines and strong silhouette. It offers a practical solution for managing volume while maintaining a creative edge. The messy top adds softness, preventing the overall style from appearing too rigid.
To achieve this look, start by clipping the lower sections of the hair close to the scalp using clippers set to a short guard length. Leave the top section significantly longer and cut it using choppy layering techniques. Focus on creating uneven ends to enhance the messy effect. After cutting, apply a volumizing product to the top and blow-dry while lifting the hair with your fingers. Use a small amount of wax to separate strands and define texture. The undercut requires regular upkeep every few weeks to maintain its clean appearance, while the top can be trimmed less frequently. This combination ensures the style remains sharp and manageable over time.
Idea 4: Layered Crown Volume Pixie
How to Create
This pixie style emphasizes height and volume at the crown, creating a fuller appearance without adding length. The layered crown design is particularly useful for individuals with fine hair, as it creates the illusion of density. The choppy layers allow for natural movement, making the style appear dynamic rather than flat. This approach aligns with minimalist style principles by focusing on structure rather than excessive styling. It is a practical option for those seeking a polished yet effortless look that works well in both casual and professional settings.
To create this style, section the crown area and cut it in shorter layers compared to the sides and back. Use point-cutting to add texture and prevent blunt edges. Keep the sides slightly tapered to direct attention toward the top. After cutting, apply a volumizing mousse and blow-dry while lifting the crown with your fingers or a round brush. Finish with a light texturizing spray to maintain movement. This method ensures the volume remains natural and easy to recreate daily. Regular trims help maintain the layered structure and prevent the crown from becoming too heavy.
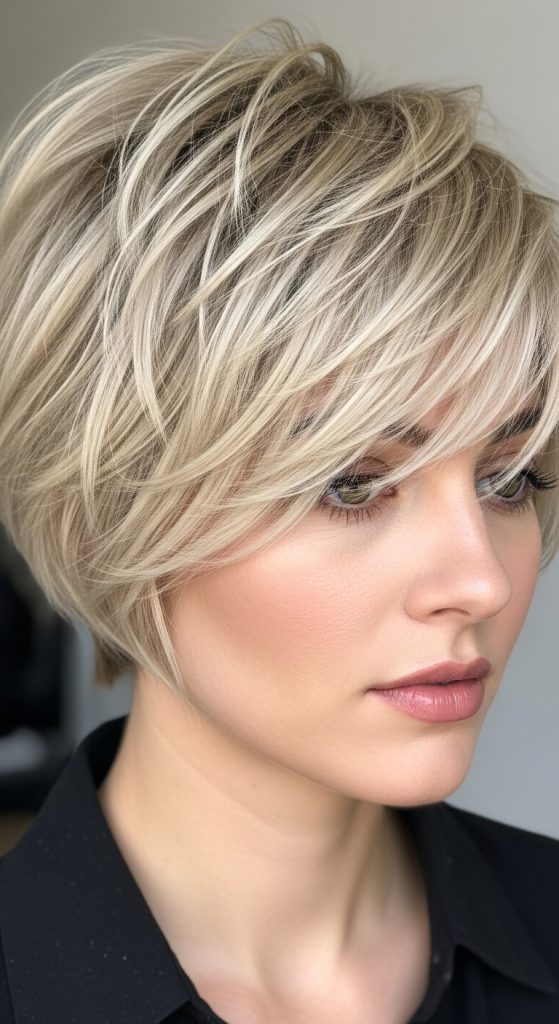
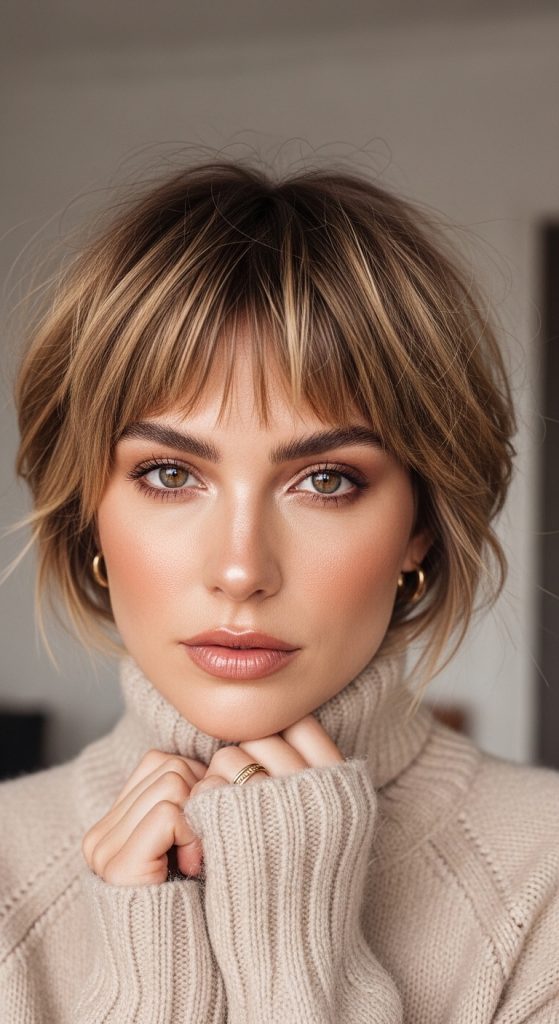
Idea 5: Soft Fringe Messy Pixie
How to Create
The soft fringe messy pixie incorporates a light, wispy fringe that frames the forehead while blending seamlessly into the rest of the haircut. This style softens the overall look, making it suitable for those who prefer a less dramatic approach to edgy hair. The fringe adds versatility, allowing for different styling options such as side-swept or slightly parted. This design is commonly featured in aesthetic Pinterest boards due to its balanced and approachable appearance.
To achieve this look, begin by cutting the main pixie shape with choppy layers. Then, section the front portion and trim it into a soft fringe using point-cutting techniques. Keep the fringe slightly longer to allow flexibility in styling. After cutting, apply a lightweight styling cream and blow-dry the fringe using a gentle downward motion. Use fingers to maintain a natural finish rather than a structured shape. This approach ensures the fringe blends seamlessly with the rest of the hair while remaining easy to manage.
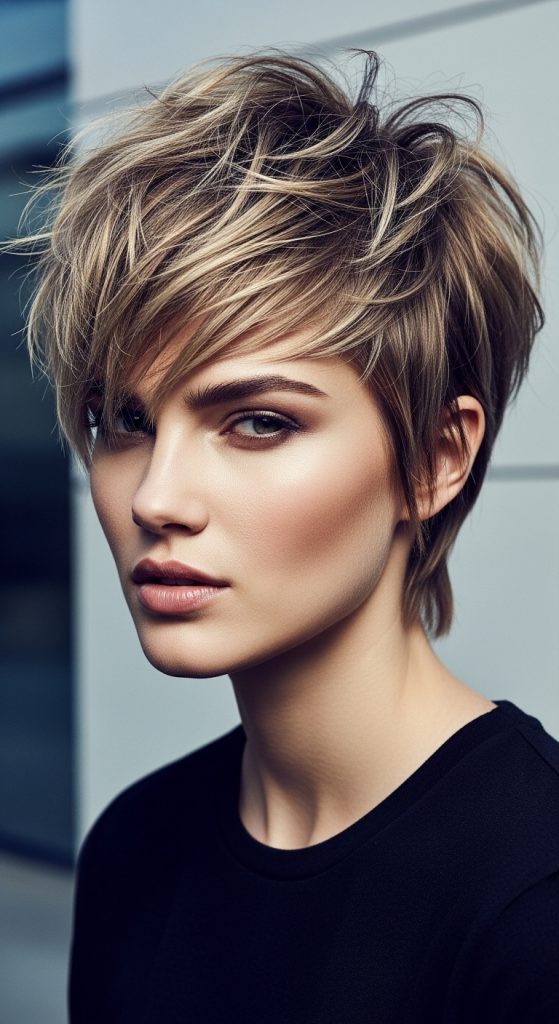
Idea 6: Tousled Razor Cut Pixie
How to Create
The razor cut pixie focuses on sharp, defined edges created using a razor instead of scissors. This technique produces a highly textured finish that enhances the messy, tousled appearance. The result is a lightweight style with significant movement, making it ideal for those seeking a bold yet wearable look. This haircut aligns with trending ideas that emphasize individuality and natural texture.
To create this style, use a razor tool to cut the hair in short, uneven layers. Work in small sections, pulling the hair slightly away from the head before slicing to create texture. Avoid over-cutting, as this can remove too much volume. After the cut, apply a texturizing spray and scrunch the hair with your hands while blow-drying. This technique enhances the natural movement and ensures the style remains dynamic.
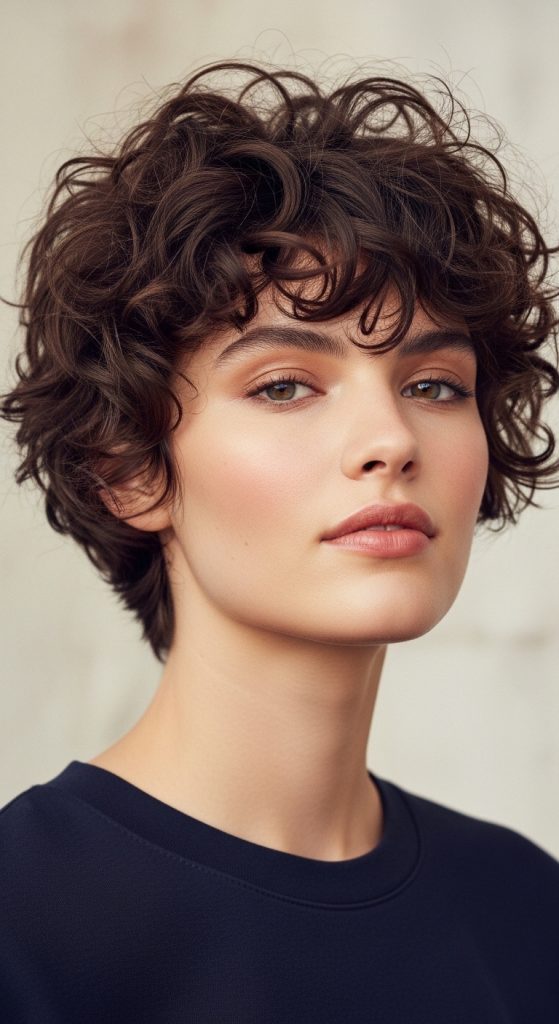
Idea 7: Curly Messy Pixie
How to Create
This pixie style is designed specifically for naturally curly hair, emphasizing texture rather than straightening it. The choppy layers help distribute volume evenly, preventing the hair from appearing bulky. This approach highlights natural curls while maintaining a structured shape.
To achieve this look, cut the hair while it is dry or slightly damp to better understand the curl pattern. Use layering techniques to remove excess weight and shape the curls. Apply a curl-enhancing product and allow the hair to air dry or use a diffuser. This method ensures the curls remain defined and manageable.
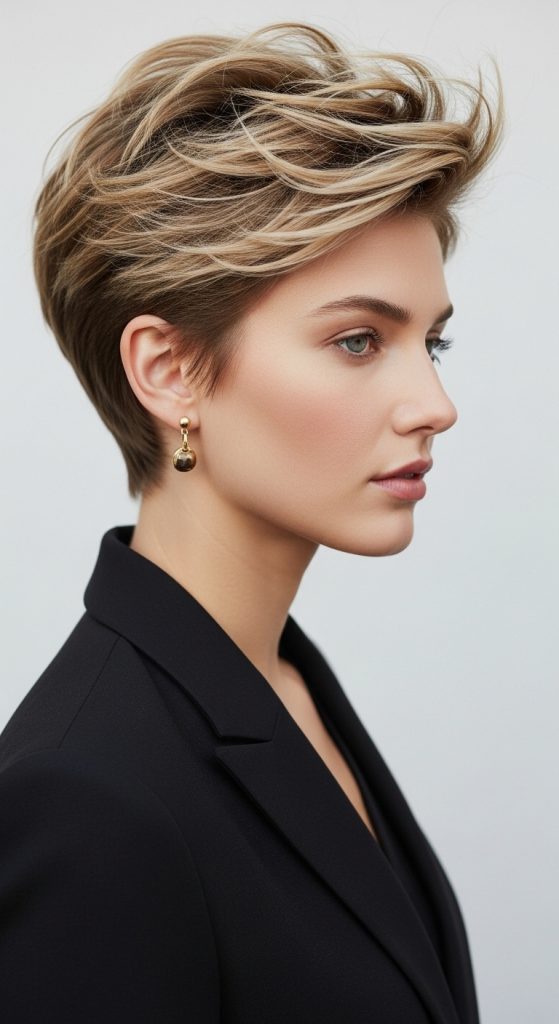
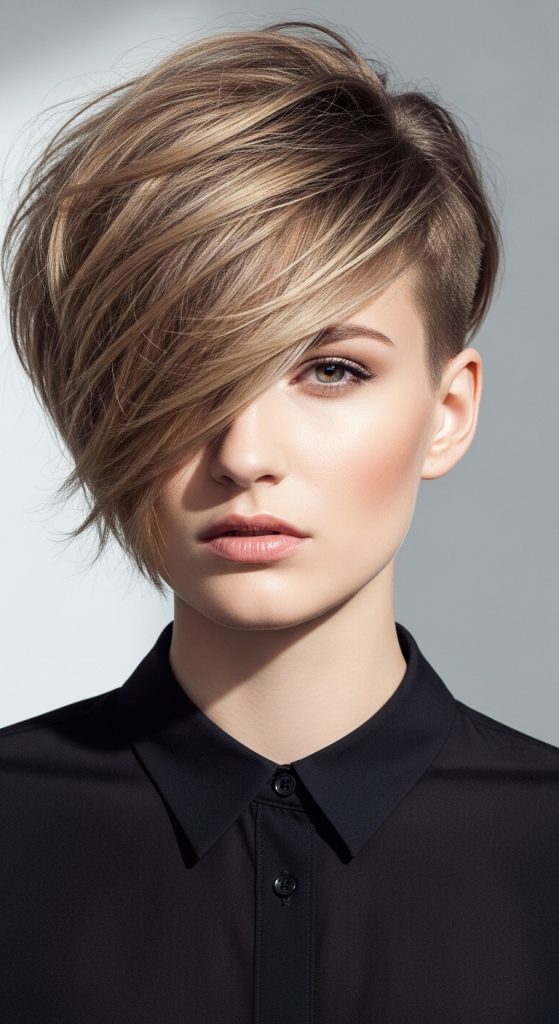
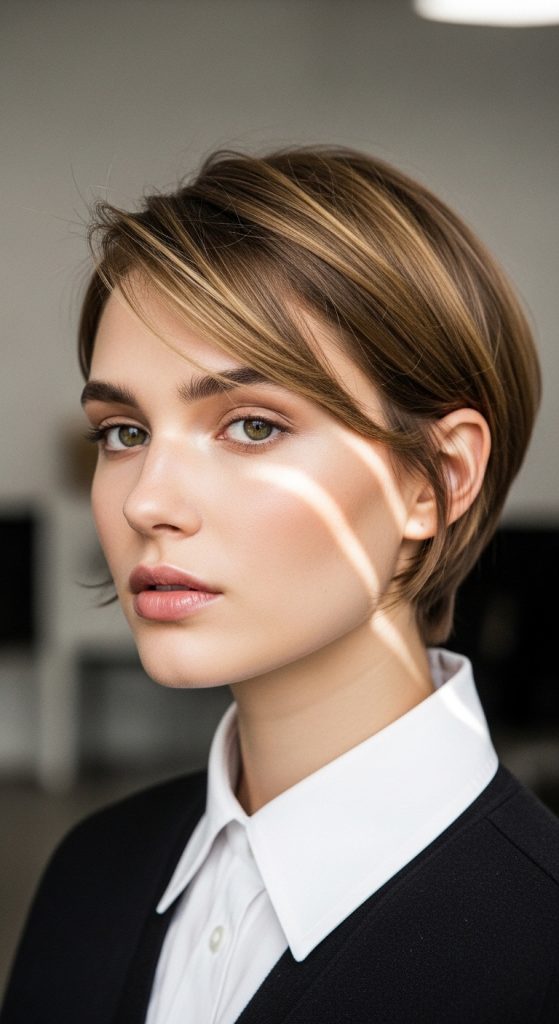
Idea 8: Side-Swept Choppy Pixie
How to Create
The side-swept pixie features longer layers on top that are directed to one side, creating a sleek yet textured appearance. This style offers versatility and works well for both casual and formal settings.
To create this look, cut the top layers longer and angle them toward one side. Use thinning shears to add texture. Blow-dry the hair in the desired direction and use a styling product to hold the shape. This ensures a consistent and polished finish.
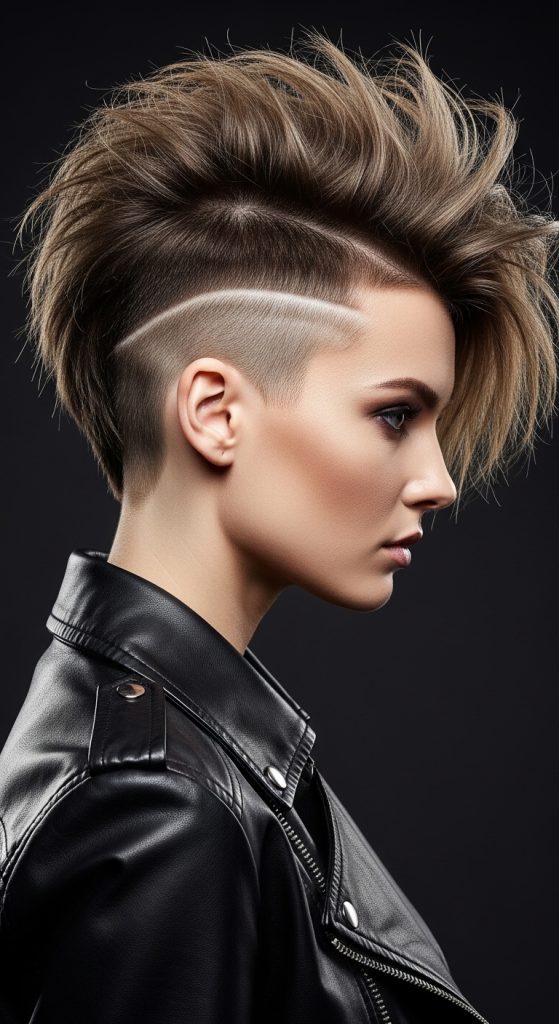
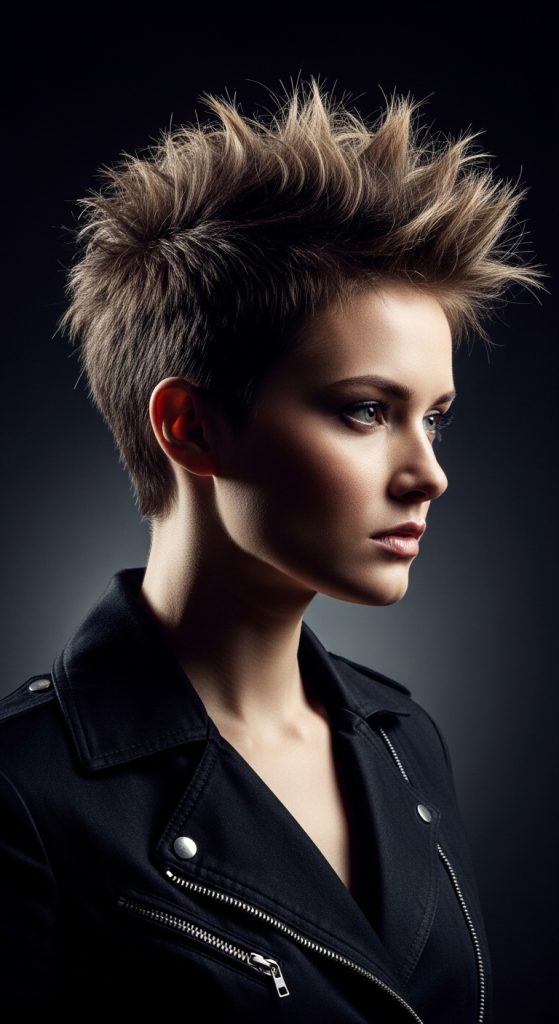
Idea 9: Spiky Edgy Pixie
How to Create
The spiky pixie focuses on defined, upward-pointing strands that create a bold and energetic look. This style emphasizes structure and works well for those seeking a more dramatic appearance.
To achieve this look, cut the hair into short, choppy layers and apply a strong-hold styling product. Use your fingers to lift and shape the hair into spikes while blow-drying. This method ensures the spikes remain defined throughout the day.
Idea 10: Minimalist Clean Choppy Pixie
How to Create
This pixie style combines clean lines with subtle choppy layers, creating a refined yet modern appearance. It is ideal for those who prefer a simple and structured look with minimal styling.
To create this style, cut the hair into a classic pixie shape and add light texture using point-cutting. Keep the layers subtle to maintain a clean finish. Apply a small amount of styling cream and allow the hair to fall naturally.
Common Beginner Mistakes and How to Avoid Them
One common mistake when creating a choppy pixie is cutting too much hair at once, which can lead to uneven layers and loss of structure. Working in small sections allows for better control and more accurate results. Another issue is overusing thinning shears, which can remove too much volume and make the hair appear flat. It is important to use these tools sparingly and focus on targeted areas. Beginners often neglect proper sectioning, leading to inconsistent lengths across the head. Taking time to divide the hair evenly ensures a balanced outcome. Additionally, skipping preparation steps such as dampening the hair or planning the design can result in a less polished finish. Using appropriate styling products is also essential, as the wrong product can weigh down the hair or fail to hold the desired shape.
Practical Tips for Better Results
For better results, always start with clean hair to ensure accurate cutting and styling. Use sharp, professional tools to achieve clean edges and prevent damage. Practicing basic cutting techniques such as point-cutting and layering improves overall consistency. It is also helpful to reference multiple Pinterest ideas to understand different variations of pixie styles. Maintaining regular trims keeps the haircut looking fresh and prevents overgrowth from disrupting the shape. Experimenting with different styling products helps identify what works best for your hair type. Consistency in technique and attention to detail contribute significantly to the final outcome.
Styling, Presentation, or Organization Ideas
Styling plays a key role in enhancing the overall appearance of a pixie cut. Using a combination of texturizing sprays and lightweight wax allows for flexibility in creating different looks. Presentation can be improved by focusing on the natural direction of the hair and avoiding overly rigid styling. Organizing tools and products in advance ensures a smoother process and reduces interruptions. Keeping a visual reference nearby helps maintain consistency throughout the styling process.
Budget or Time Planning
Short pixie styles are cost-effective because they require fewer products and less time for daily maintenance. Investing in basic tools such as scissors and styling products provides long-term value. Planning regular trims every four to six weeks helps maintain the shape without requiring major adjustments. Setting aside time for initial preparation and cutting ensures better results and reduces the need for corrections.
Creative Expansion and Advanced Inspiration
Once comfortable with basic pixie styles, experimenting with color techniques such as highlights or subtle contrasts can enhance the overall design. Adding elements like shaved patterns or layered variations introduces more complexity. Exploring different textures and styling methods allows for continuous creativity. Using Pinterest as a source of inspiration helps identify new trends and adapt them into personalized styles.
Leave a Reply